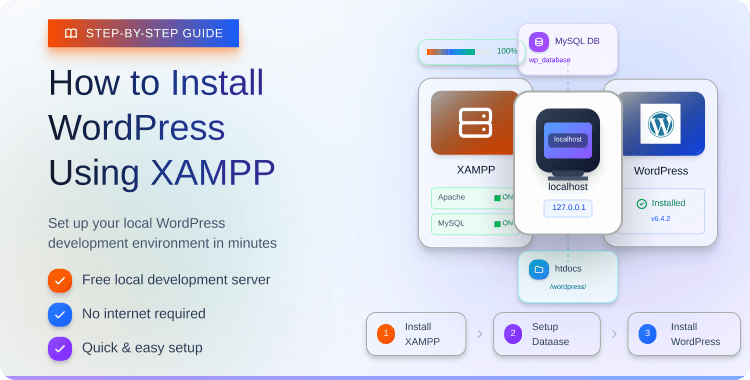
How to Install WordPress Using XAMPP: A Step-by-Step Guide
Asif Reza
- Reader Disclosure Reader Disclosure: Some of the posts on our site may contain affiliate links. Clicking may earn us a commission at no extra cost to you. Thank you for your support! Read our Disclosure
If you want to create a WordPress site and test it locally before launching, XAMPP is a great option. XAMPP provides an easy way to set up a local development environment that allows you to install WordPress without needing a web host or domain name. This article will show you how to install WordPress using XAMPP on your Windows or Mac computer.
- Key Takeaways:
- A Brief Overview of WordPress and XAMPP
- Importance of local development environments for WordPress
- Benefits of using XAMPP for WordPress installation
- How to Install WordPress Using XAMPP: Steps
- Preparing for Installation
- Starting the modules and testing the server
- Adding the WordPress files
- Creating a database for WordPress
- Install WordPress locally via the on-screen installer
- Troubleshooting Common Issues
- Frequently Asked Questions
- Final Words
Key Takeaways:
- Learn how to install WordPress locally with XAMPP.
- Understand the benefits of creating a local WordPress site using XAMPP.
- Explore how XAMPP bundles Apache, MySQL, PHP, and phpMyAdmin to streamline local WordPress setup and control.
- Discover how to run WordPress on a local server to test plugins, themes, and updates before launching publicly.
- Troubleshoot common issues in WordPress localhost installation with XAMPP.
A Brief Overview of WordPress and XAMPP
WordPress, a robust content management system, enables users to build impressive websites and engaging blogs quickly. However, you will need a web server before making your website. This is where XAMPP comes in.
XAMPP is a local server application that you can install on your computer, which allows you to create a testing environment for your WordPress website.
With XAMPP, you can install WordPress locally and test your website before you go live on the web. This is ideal for web developers who want to avoid the hassle of transferring files back and forth from their web server.
Note on terminology: In this guide, we’ll refer to your development environment set up with XAMPP as a “local server.” When accessing your site in the browser, we’ll use the address “localhost” which simply points to your local server on your own machine.
Local installation ensures that you can safely make and test changes without affecting a live website. It gives you full control to refine the design, troubleshoot issues, and ensure everything works perfectly before launch.
Importance of local development environments for WordPress
One of the key aspects of web development is having a local development environment that allows you to work on your website without affecting the live version. This is crucial, particularly for WordPress, where modifying live sites can lead to disastrous consequences.
Local development environments are crucial for WordPress for several reasons:
Testing and experimentation:
Local environments offer developers a secure, controlled area to test and iterate before applying changes to live websites, minimizing potential issues and downtime risks.
Speed and efficiency
Local development removes the necessity of directly altering live websites, leading to faster and internet-independent development. It allows quick iterations, enhancing productivity.
Collaboration and teamwork
Local development fosters teamwork, allowing multiple developers to collaborate efficiently. When you create a local WordPress site using XAMPP, every developer can work on their version and later merge changes using version control tools. Individualized environments improve productivity and streamline collaboration.
Version control and code management:
Local environments work seamlessly with Git, enabling version control, code management, and simplifying deployments for enhanced code integrity and collaboration.
Security and data privacy:
A local environment offers enhanced security, allowing developers to handle sensitive data and test security measures without risking the live site or users’ data.
Replicating the production environment:
Local setups can closely mimic the production environment, including server configurations, plugins, themes, and databases. This ensures that developers can accurately replicate issues or bugs experienced on the live site, making it easier to troubleshoot and debug problems.
Training and learning:
Local environments are ideal for beginners and learners in WordPress development. They offer a secure space to practice, experiment, and build skills without affecting real websites, facilitating hands-on experience in a controlled setting.
Local WordPress development environments provide flexibility, efficiency, and security. They enhance development, foster collaboration, and reduce risks, resulting in high-quality websites and improved productivity.
While there are several tools available for local WordPress development, such as WAMP, MAMP, and Local, XAMPP stands out due to its cross-platform compatibility, simplicity, and powerful all-in-one package.
It includes everything needed to run WordPress locally (Apache, MySQL, PHP, and phpMyAdmin) and is widely supported by the developer community, making it an excellent choice for beginners and professionals alike.
Benefits of using XAMPP for WordPress installation
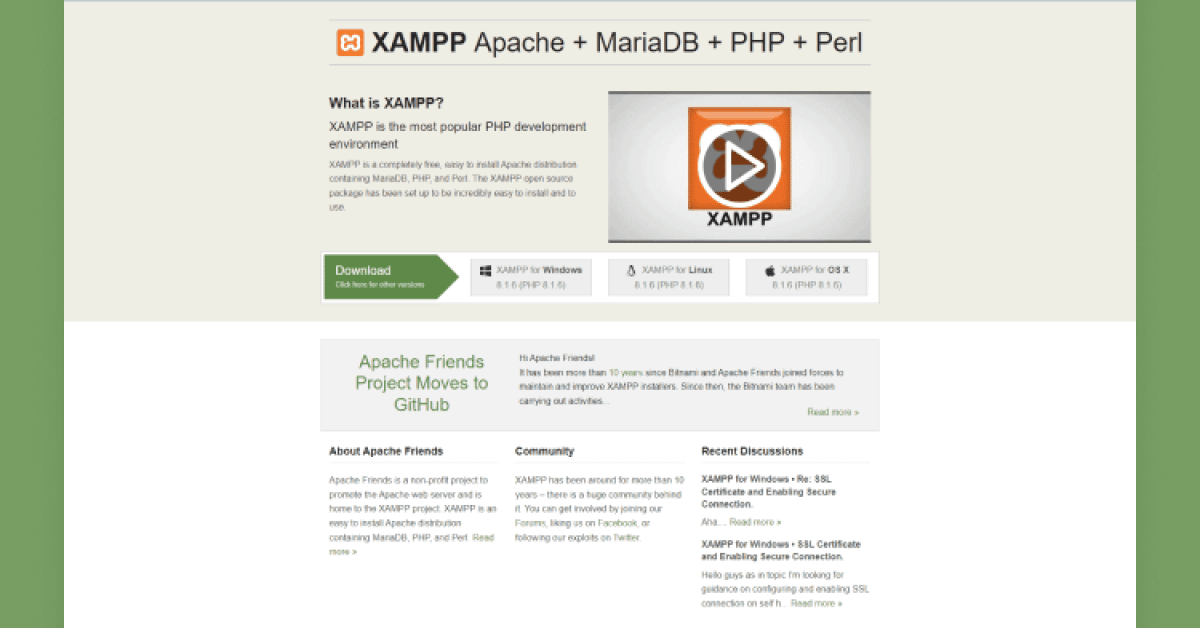
XAMPP (Cross-platform, Apache, MySQL, PHP, Perl) is a widely used and powerful software package that provides a local development environment for WordPress hosting. Here are some benefits of using XAMPP for WordPress installation:
Easy installation:
XAMPP streamlines local WordPress setup with Apache, MySQL, PHP, and more in one installer, saving configuration time. You can avoid the manual setup of individual components, ensuring a quicker and hassle-free development environment.
Cross-platform compatibility:
XAMPP is available for Windows, macOS, and Linux, making it a versatile choice for developers working on different operating systems. Transferring your local WordPress setup across machines or collaborating with team members on various platforms is a straightforward process.
All-in-one solution:
XAMPP integrates Apache, MySQL, PHP, and tools like phpMyAdmin for a comprehensive, ready-to-use local WordPress environment. No separate installations or configurations are needed.
Customizability:
XAMPP offers an easy-to-use control panel for quick management of Apache and MySQL services. It provides flexibility to adjust settings like PHP versions and memory limits to suit your specific development needs.
Offline development:
With XAMPP, you can work on WordPress projects offline without an internet connection. This is particularly useful when you’re in an environment with limited or no internet access. You can develop, test, and make changes to your WordPress site without relying on external servers or internet connectivity.
Speed and performance:
XAMPP provides a local development environment that runs on your machine, which is often faster compared to hosting WordPress on remote servers. This speed benefit enables faster development iterations, quicker page loading, and an overall smoother development experience.
Isolation and security:
XAMPP’s local development creates a secure, isolated environment for experimenting with plugins and themes. It minimizes risks and allows issue resolution before affecting the live website.
Learning and experimentation:
XAMPP is favored by developers for safe WordPress experimentation and learning. It enables trying new elements without the risk of disrupting live websites, fostering skill development in a controlled setting.
XAMPP streamlines WordPress local development with convenience, cross-platform support, customization, offline capabilities, performance benefits, and secure isolation. It encourages both learning and experimentation, making it an invaluable asset for developers of all proficiency levels.
Recommended Blogs for You:
👉 How to License WordPress Plugins and Themes: A Step-by-Step Guide
👉 How to Install Google Analytics on WordPress: A Step-By-Step Guide
👉 MonsterInsights WordPress Plugin Review – Everything You Need to Know
👉 How to Add a Facebook Pixel to WordPress: Step-by-Step Guide
👉 How to Set Up a Print on Demand Store with WooCommerce
How to Install WordPress Using XAMPP: Steps
When it comes to constructing a WordPress website, a local development environment is of utmost importance. It provides the opportunity to test modifications and updates without impacting the live site, ensuring a seamless user experience.
One popular way to set up a development environment is by using XAMPP, which includes a web server, database server, and PHP interpreter.
This tutorial will guide you through the process of how to install WordPress using XAMPP by creating a local WordPress development site.
Preparing for Installation
To install WordPress locally using XAMPP, make sure your system meets the following minimum requirements:
- Operating System: Windows 10 or later, macOS 10.13 or later, or a recent Linux distribution
- RAM: At least 4 GB (8 GB or more recommended)
- Disk Space: Minimum 2 GB of free space (5–10 GB recommended)
- Permissions: Administrator rights required to install and run XAMPP
Once your system meets these requirements, follow these steps:
To initiate the XAMPP installer, simply execute the downloaded file. Ignore any antivirus warnings and proceed. You might also encounter prompts related to User Account Control (UAC); continue through them.
On the installer screen, click “Next” to continue.
Choose the components to install. For a basic installation with WordPress, you only need to select “MySQL” and “PHPMyAdmin.” You can choose to install additional components based on your requirements.
Deselect all other components and proceed by clicking “Next.”
Select the installation folder for XAMPP, preferably the default one.
Choose your preferred language.
During the installation, you may be prompted to install Bitnami for XAMPP. It’s not necessary for installing XAMPP and WordPress, so you can uncheck the box.
Click “Next” to begin the installation process, which might take a few minutes.
Once the installation is completed, launch the XAMPP control panel to start working with XAMPP and set up your local WordPress environment.
Starting the modules and testing the server
To successfully install XAMPP and WordPress, you must run two modules:
- Apache and
- MySQL.
These modules can be started from the XAMPP control panel. After launching them, the status of the items should turn green.
To check if your local server is working, use your preferred web browser and go to http://localhost/.
Now, you have successfully set up a local server on your Windows PC using XAMPP.
However, the next step is to install XAMPP and WordPress. Follow these steps to create a WordPress site using XAMPP.
Adding the WordPress files
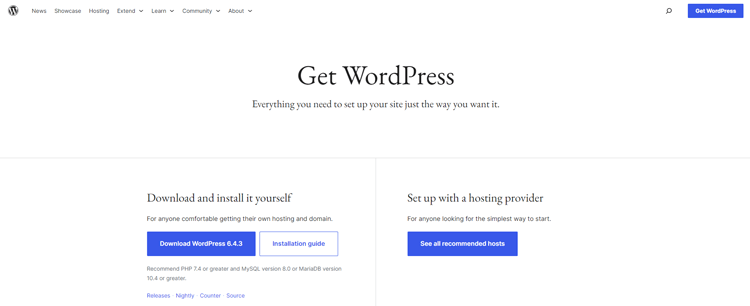
If you’re already familiar with manually installing WordPress, the rest of the process will be easy. Begin by downloading the latest WordPress version from wordpress.org.
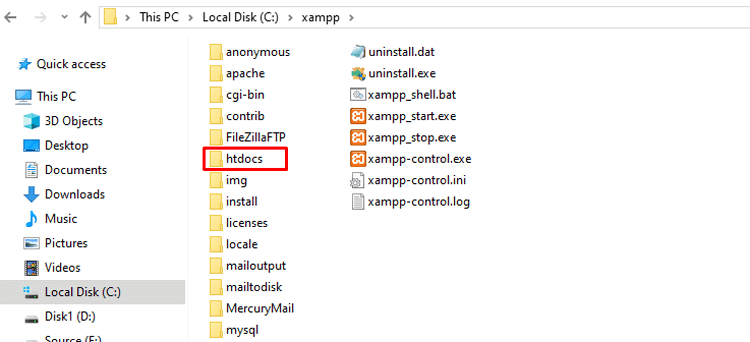
Next, open the XAMPP folder on your Windows computer.

Inside it, locate the htdocs subfolder; this is where all your local websites are stored.
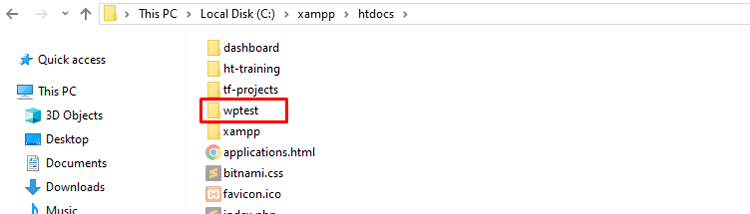
To create a test site, go to the htdocs folder and create a new folder with a name of your choice. This folder name will be used as a sub-name to access your site.
For example, if you choose to name the folder “wptest”.
This folder name will be used in the local URL to access your site, for example:
C:\xampp\htdocs\wptest
Access it in your browser by visiting:
http://localhost/wptest
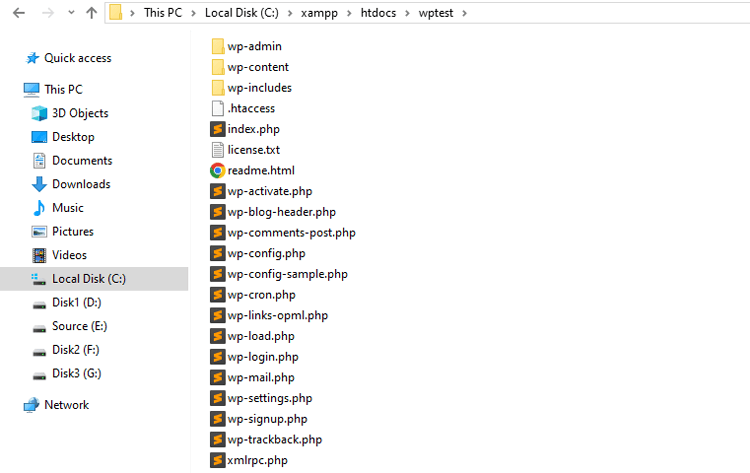
Now, extract the contents of the downloaded WordPress .zip file directly into this new wptest folder.
Note: When extracting, make sure the files go directly inside wptest, not inside a nested wordpress folder. You may rename the extracted wordpress folder to wptest before moving it, or simply extract the files manually into wptest.
Once extracted correctly, the wptest folder should contain files like wp-config-sample.php, index.php, and the wp-content folder.
Creating a database for WordPress
To set up a database for your WordPress installation on XAMPP, access PHPMyAdmin through the control panel of your XAMPP software.
Click on the “Databases” option at the top, give your database a name, and click the “Create” button. Make sure to take note of the name, as it will be required for the next step. Unlike the process of installing WordPress on a live web server, there is no need to create a database user when installing XAMPP and WordPress.
Install WordPress locally via the on-screen installer
To access the WordPress installer on your test site, go to http://localhost/FOLDERNAME.
The installation process will be the same as usual, except for the step where you enter the database details. When you reach the database details section, fill in the following information:
- Database Name: The name of the database you previously created in PHPMyAdmin.
- Username: “root”
- Password: leave this field blank.
Download WordPress and complete the install process as usual. Now, you will be able to see your freshly installed WordPress local working perfectly on your local host.
Manually Creating the wp-config.php File (if prompted)
In some cases, WordPress may not be able to automatically generate the wp-config.php file due to permission settings. If you’re prompted to create this file manually, follow these steps:
Navigate to your wptest folder (e.g., C:\xampp\htdocs\wptest).
Find the file named wp-config-sample.php and make a copy of it.
Rename the copied file to wp-config.php.
Open wp-config.php in a text editor like Notepad or VS Code.
Locate the following lines and update them with your database details:
php
define( ‘DB_NAME’, ‘your_database_name’ );
define( ‘DB_USER’, ‘root’ );
define( ‘DB_PASSWORD’, ” );
define( ‘DB_HOST’, ‘localhost’ );
Save the file and refresh your browser at http://localhost/wptest to continue the installation.
Now, complete the WordPress setup as usual by entering your site title, admin username, password, and email.
Once finished, you’ll be able to log in and see your freshly installed WordPress site running perfectly on your local server
Troubleshooting Common Issues
If you have followed our install WordPress XAMPP tutorial, you should have everything set up and working properly. Nevertheless, there may be some rare occurrences where you encounter XAMPP errors that need to be resolved.
Here are some tips to help you fix common XAMPP errors.
XAMPP and port conflicts
Sometimes, XAMPP may encounter port conflicts with other applications running on your system. To resolve this, you can change the ports used by XAMPP. Open the XAMPP control panel, click on “Config” next to Apache, and select “httpd.conf.”
Look for the “Listen” directive and change the port number to an available one (e.g., 8080). Save the file, restart Apache, and access your local WordPress installation using the modified port (e.g., http://localhost:8080).
WordPress installation errors
If you encounter errors during the WordPress installation process, double-check that you’ve correctly configured the database settings in the wp-config.php file. Ensure the database name, username, password, and host match your XAMPP configuration.
Additionally, make sure you have granted the appropriate privileges to the database user. If errors persist, you can try deleting the wp-config.php file and rerunning the WordPress installation to generate a fresh configuration file.
Database connection problems
If you are experiencing issues connecting WordPress to the database, verify that your XAMPP MySQL service is running. In the XAMPP control panel, check the status of MySQL. If it’s not running, click “Start” to initiate it.
Additionally, confirm that the database credentials in the wp-config.php file are accurate. You can also try creating a new MySQL user with proper privileges and updating the wp-config.php file accordingly.
Debugging and error-handling techniques
To debug WordPress issues, enable debugging mode. Open the wp-config.php file and locate the “WP_DEBUG” constant. Set it to true: define(‘WP_DEBUG’, true); This enables detailed error reporting, which can help identify the cause of issues. Additionally, WordPress generates an error log file named “debug.log” in the “wp-content” directory.
Review this log file to find specific error messages and warnings. It’s also helpful to search for error messages online or consult the WordPress support forums for assistance in troubleshooting specific errors.
Now that you’ve successfully installed WordPress locally using XAMPP, you’re ready to begin building and customizing your website.
Here are some helpful resources to get started:
👉 How to Start a WordPress Blog in a Few Simple Steps
👉 How to Change Theme on WordPress: A Step-by-Step Guide
👉 28 Must Have WordPress Plugins for eCommerce
👉 How to Set Contact Form 7 Redirect After Submit
👉 How to Install SSL Certificate on WordPress
HT Easy GA4
#1 📈 Google Analytics Plugin for WordPress
🚀 Supercharge your WordPress website with analytical insights. (Including WooCommerce Report)
Frequently Asked Questions
Can I use WordPress without XAMPP?
Yes, you can use WordPress without XAMPP by opting for alternative local servers like WAMP for Windows or MAMP for Mac. These platforms also support WordPress installation and testing on a local environment before going live.
Why does WordPress need XAMPP?
WordPress requires XAMPP or similar local server software because it uses PHP for scripting and MySQL for database management. XAMPP provides an environment that supports these technologies, enabling WordPress to run locally for development purposes.
Does WordPress require a web server?
Yes, WordPress requires a web server to function. It is a PHP-based application that needs a server environment like Apache or Nginx. It also requires MySQL or MariaDB for its database to process and serve its content on the internet.
Is XAMPP good for WordPress?
XAMPP is highly suitable for WordPress development. It’s a popular, easy-to-install software package that emulates a server environment on your computer. It allows you to develop and test WordPress sites locally before deploying them online.
Can I use XAMPP without Internet?
Yes, you can use XAMPP without an internet connection. Since XAMPP creates a local server environment on your computer, you can develop and test websites, including WordPress sites, offline.
Can I use XAMPP for commercial use?
Yes, XAMPP can be used for commercial purposes. It is an open-source software package, freely available for both personal and commercial use. This makes it a cost-effective option for developing and testing websites, including eCommerce platforms.
Final Words
Now that you’ve seen the step-by-step process for how to install WordPress using XAMPP, you have all the tools and knowledge to get started!
You should now be able to complete the installation on your own and explore all of WordPress’s features in a local environment.
Keep in mind that improperly installing or configuring WordPress on your local host can cause issues later. But if you follow our guide carefully, the installation process should go smoothly.
Ready to build? Log in to your new local site and start customizing your content, design, and functionality, all without affecting a live website.