How to Install WordPress on Web Servers?
Aslam Hasib
- Reader Disclosure Reader Disclosure: Some of the posts on our site may contain affiliate links. Clicking may earn us a commission at no extra cost to you. Thank you for your support! Read our Disclosure
Wondering how to install WordPress on web servers the right way? If you’re launching your first website, selecting the right web server for WordPress is essential.
Even for new projects, understanding the correct installation method ensures better performance and reliability.
In this guide, you’ll learn how to install WordPress on web servers using two common methods. We’ll walk you through each step to help you set up WordPress smoothly, using either the manual method or a one-click installer.
Key Takeaways
- Learn manual and auto-installer processes to choose the best approach for your WordPress web server needs.
- Understand what your WordPress web server needs.
- Implement proper file permissions, strong credentials, and post-installation security for your WordPress web server.
- Mastering MySQL database creation and wp-config.php setup is essential for WordPress web server functionality.
- Solve common installation issues like database errors and permission problems when you install WordPress on a server.
- Learn immediate actions for optimal WordPress web server performance.
WordPress Server Requirements
Before installing WordPress on web servers, verify your hosting meets these requirements:
- PHP version 7.4 or higher (PHP 8.0+ recommended)
- MySQL 5.7+ or MariaDB 10.3+ database support
- HTTPS SSL certificate for security
- Minimum 1GB disk space (5GB+ recommended)
- 256MB RAM minimum (512MB+ for better performance)
- Apache or Nginx web server software
Most modern hosting providers automatically meet these WordPress hosting requirements.
How to Install WordPress Manually on a Web Server?
Prerequisites for Manual WordPress Installation
Before starting the manual installation process, ensure you have:
- Web hosting account with PHP and MySQL support
- FTP client software (like FileZilla) installed
- Database management access through cPanel or phpMyAdmin
- Basic understanding of file management and database operations
To manually install WordPress on a web server, follow the steps listed below.
Steps to Install WordPress Manually on a Web Server
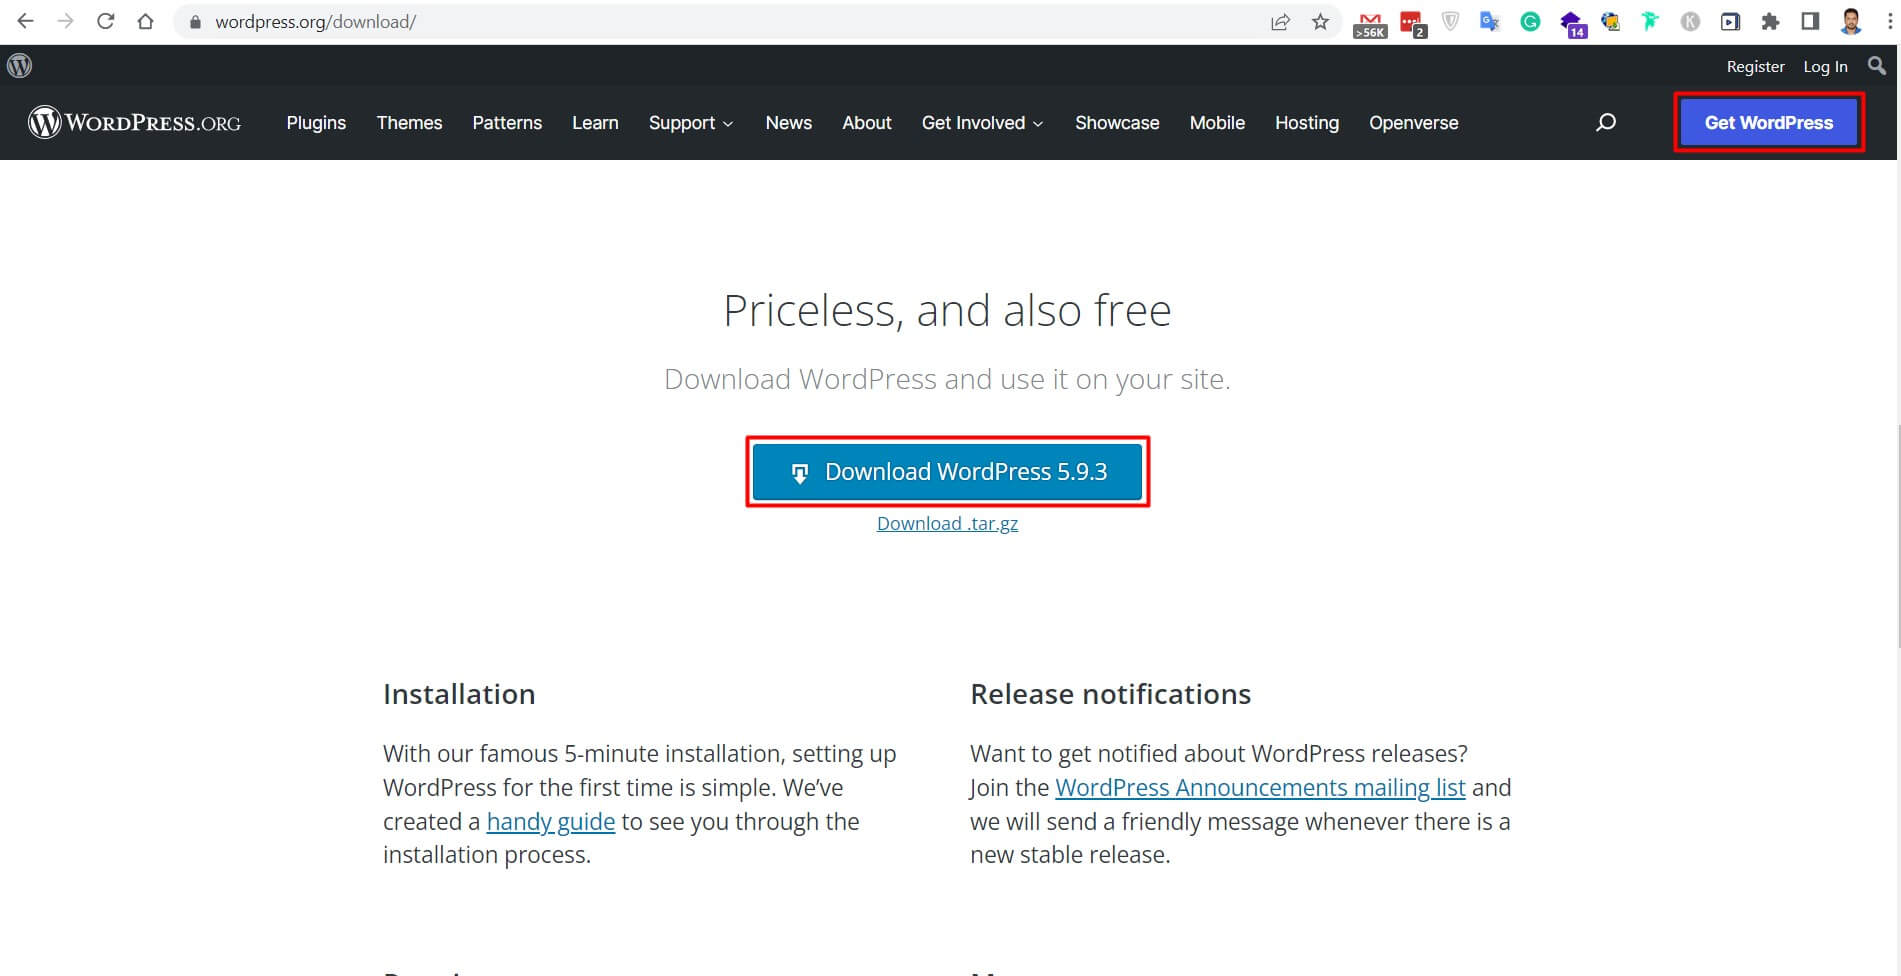
Step 1: Download the Latest WordPress Version
First, visit the official WordPress website at www.wordpress.org and download the latest stable version of WordPress. This ensures you’re getting the most secure and feature-rich version for your WordPress web server installation.
Step 2: Upload WordPress Files to Your Web Server
Once downloaded, you’ll need to extract the WordPress package and upload it to your web server for WordPress hosting. Here’s how:
- Unzip the downloaded WordPress package on your local computer
- Connect to your web server using an FTP client like FileZilla
- Navigate to your domain’s public_html directory (or your website’s root folder)
- Upload all WordPress files from the extracted folder to this directory
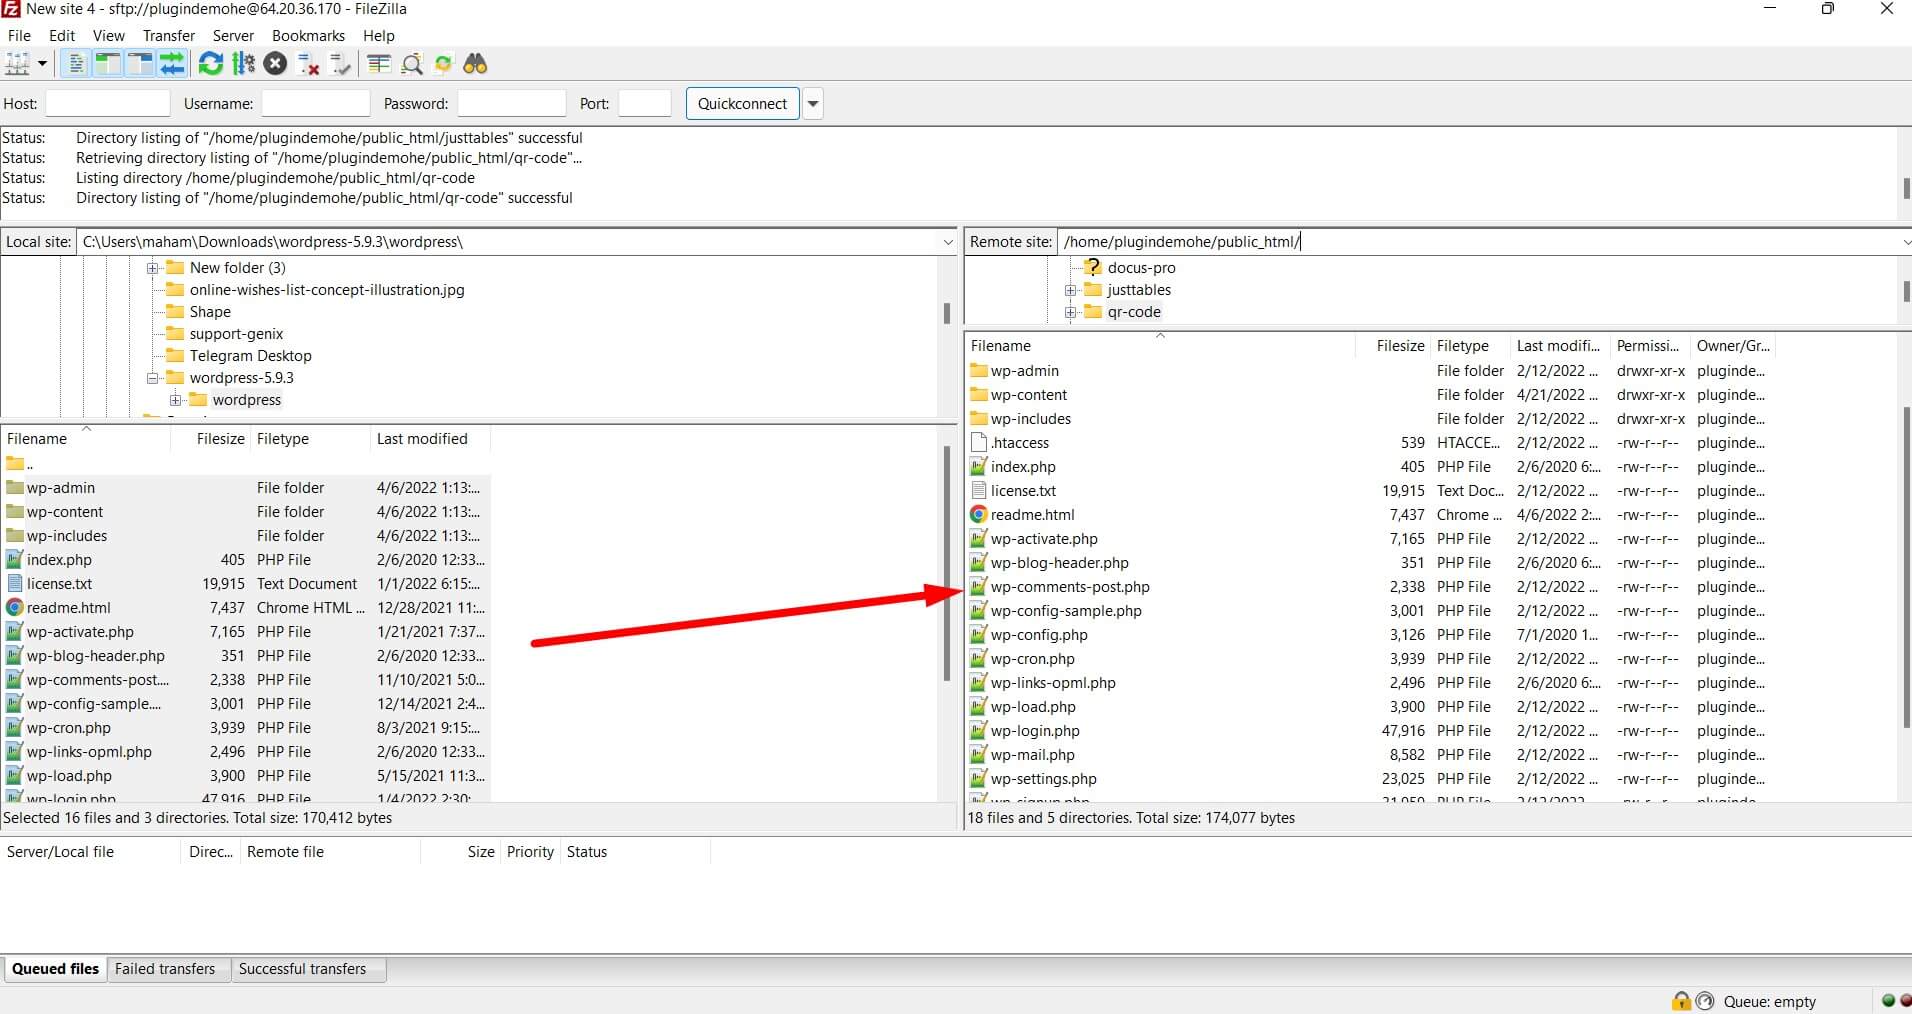
Pro tip: When you install WordPress on a server via FTP, ensure all file permissions are set correctly (folders: 755, files: 644) for optimal security.
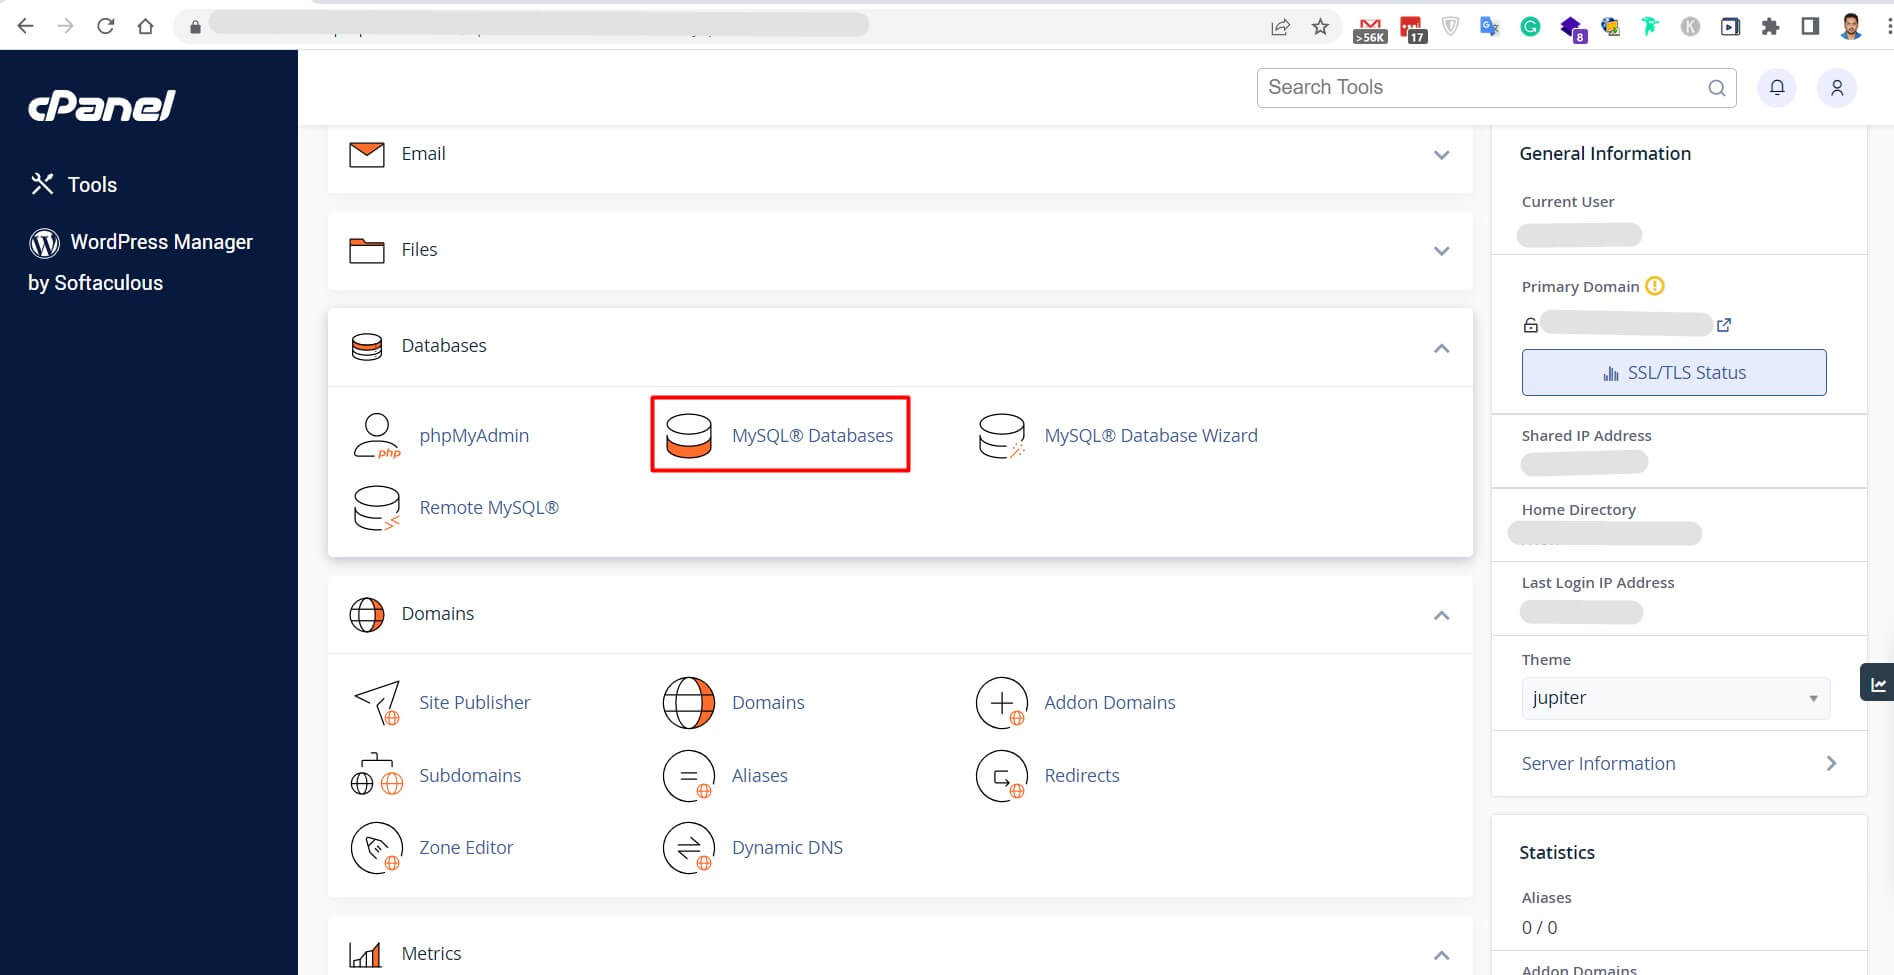
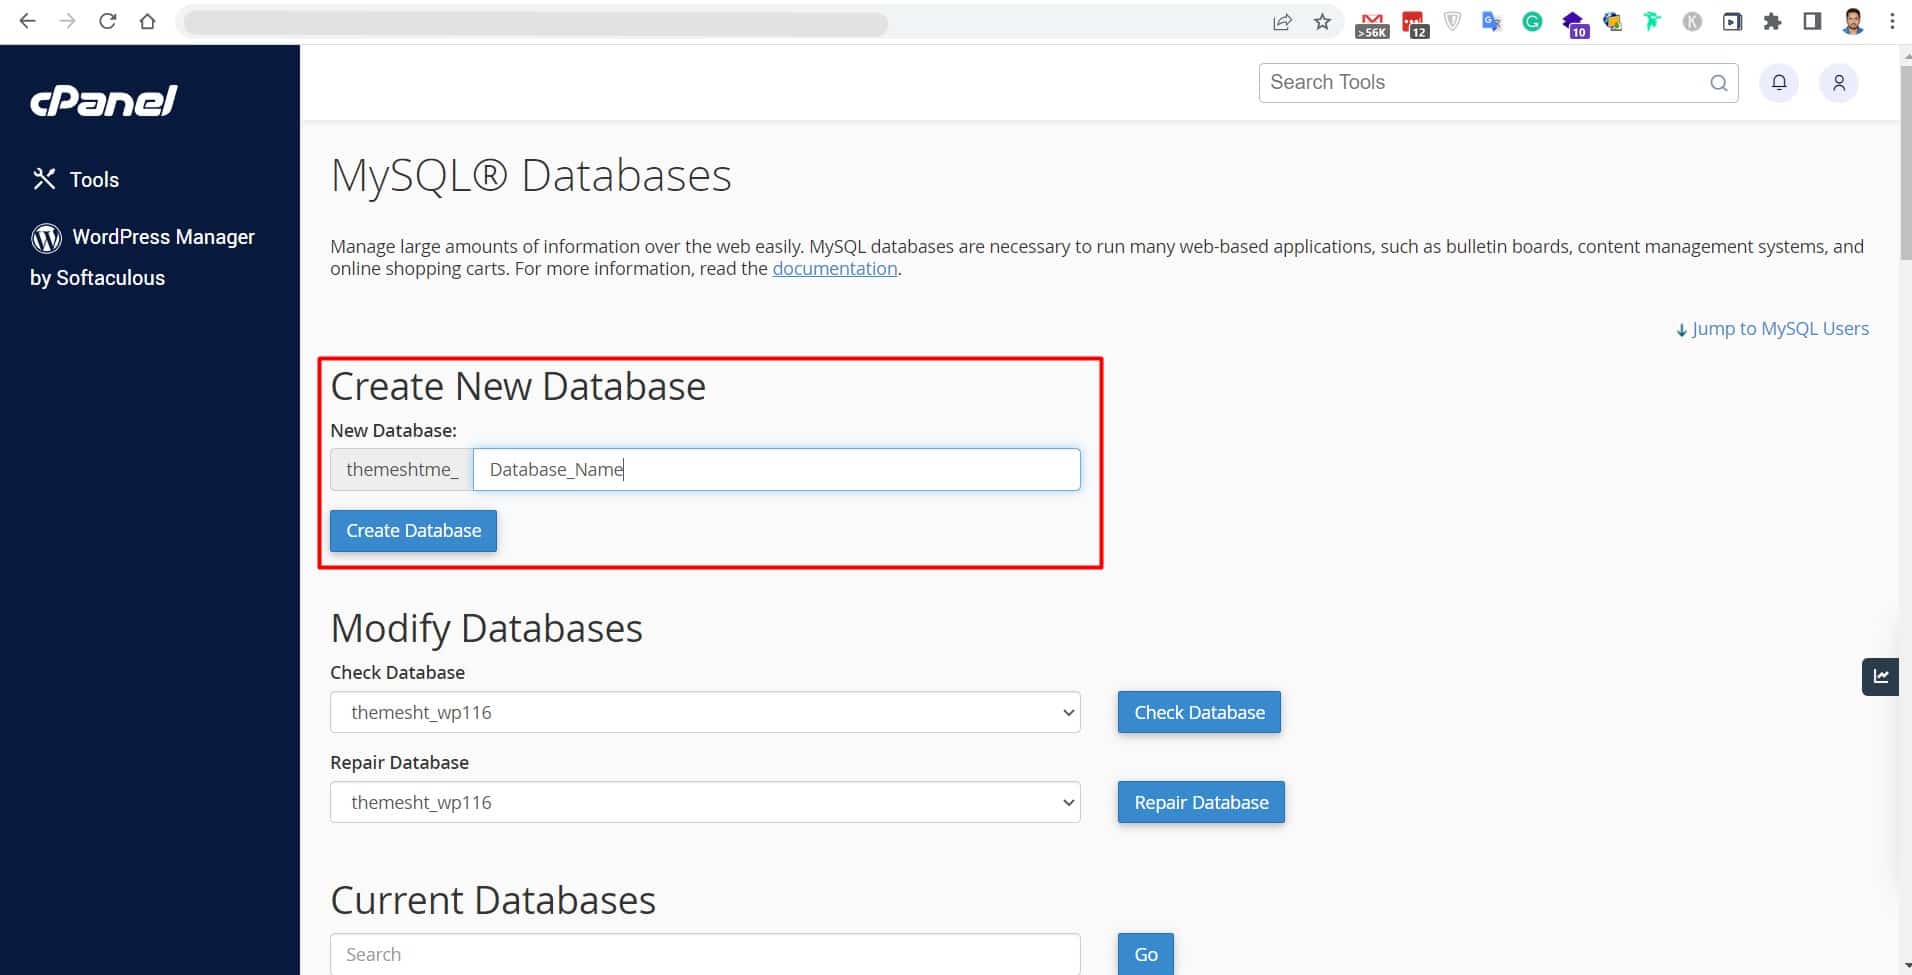
Step 3: Create MySQL Database and User
Your WordPress web server setup requires a dedicated MySQL database. Access your hosting control panel (cPanel) and follow these steps:
- Navigate to the “MySQL Databases” section in cPanel
- Create a new database with a descriptive name (e.g., yoursite_wp)
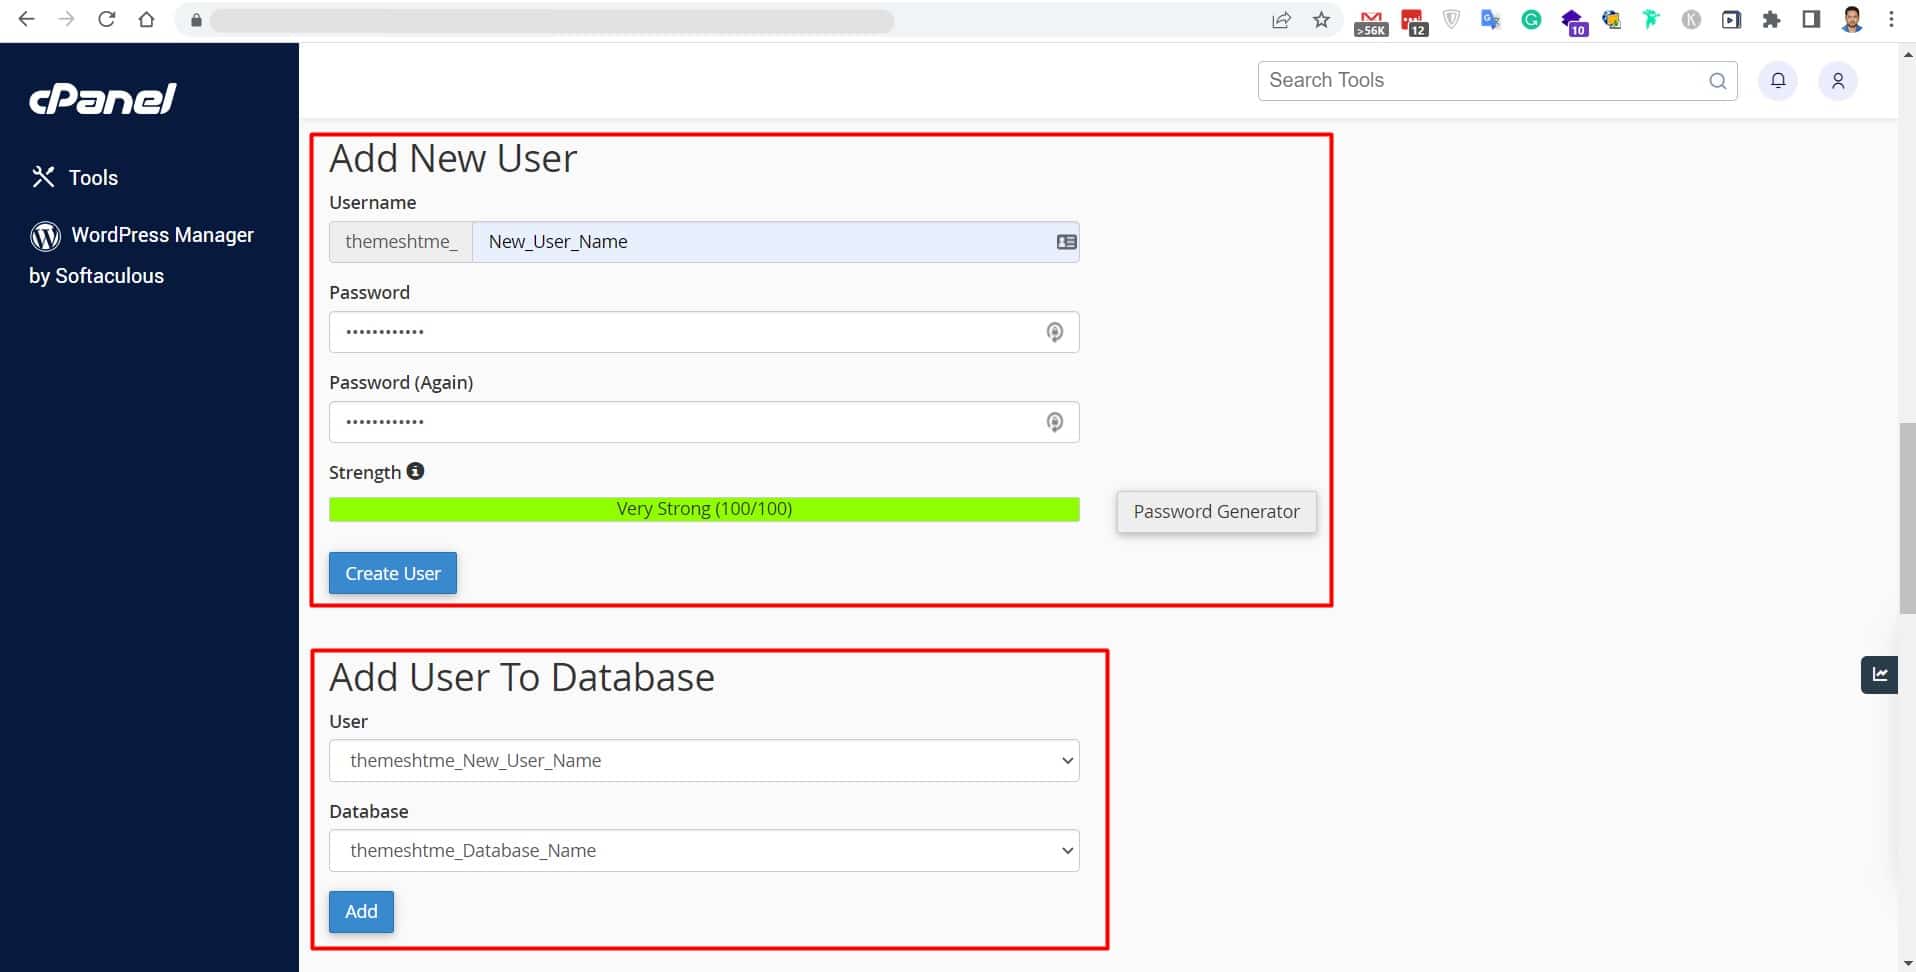
- Create a new MySQL user with a strong password
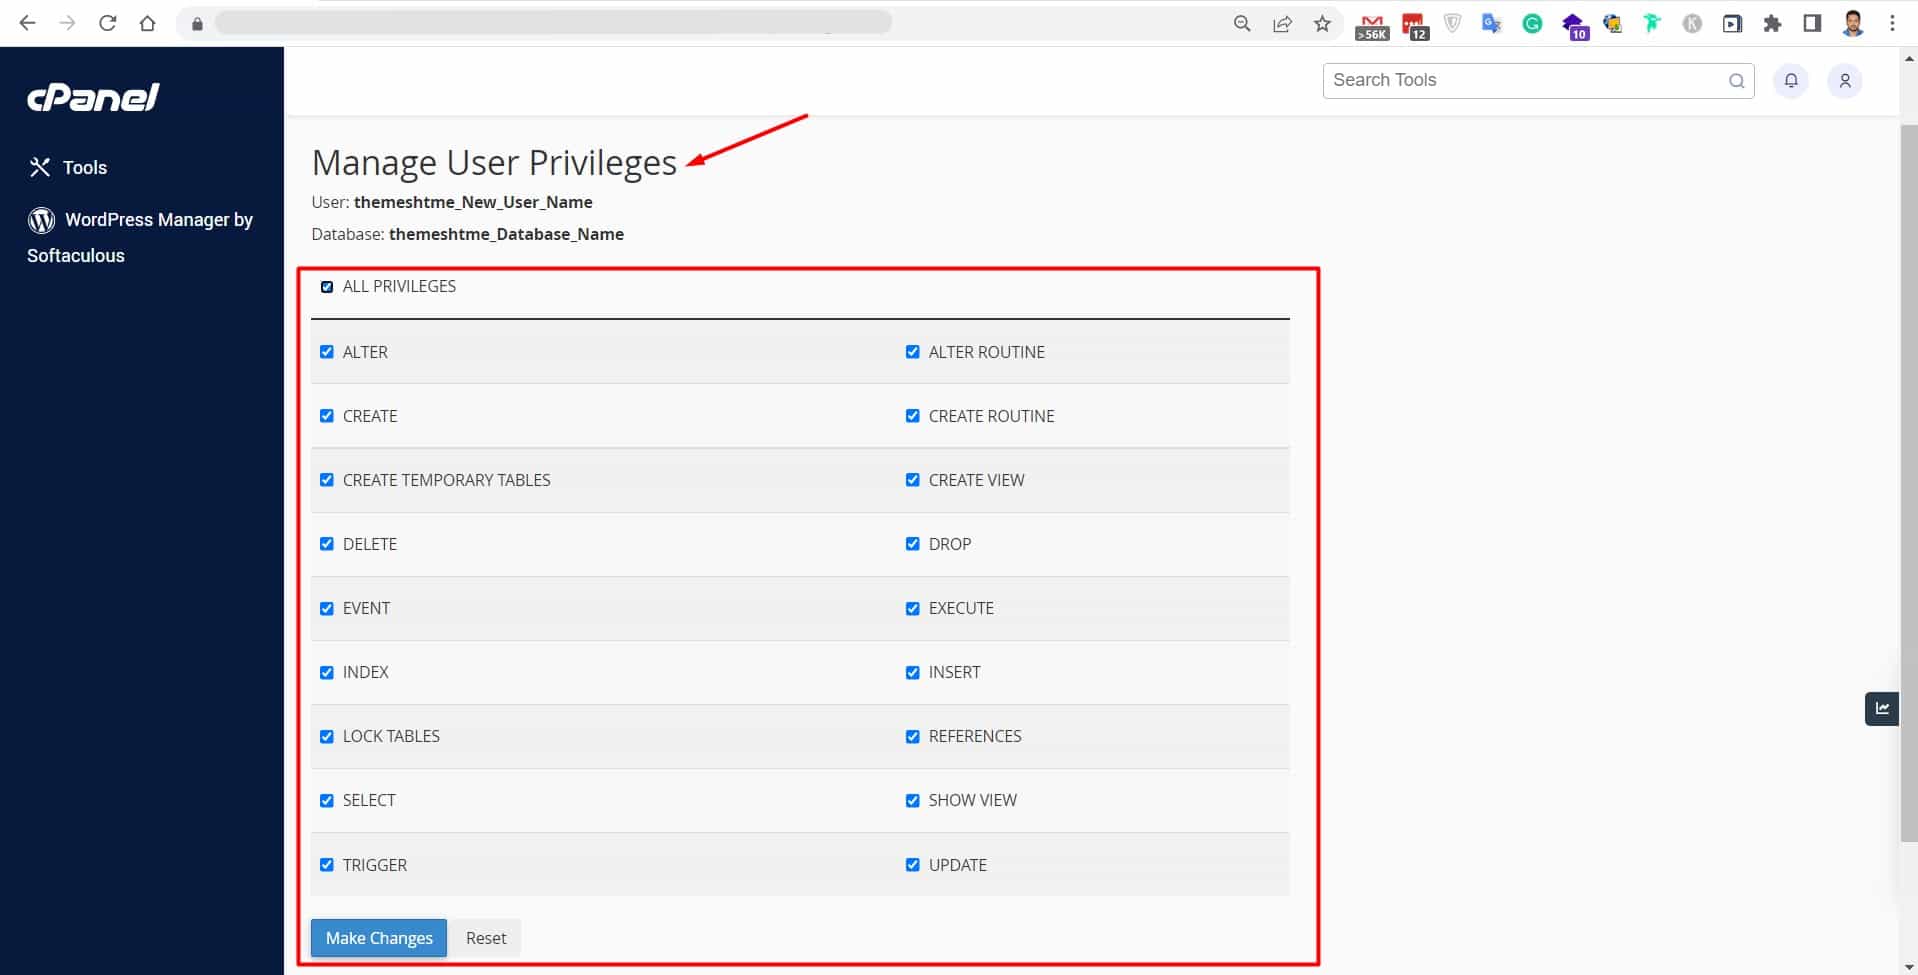
- Assign the user to the database with full privileges
- Note down the database name, username, and password for the next step
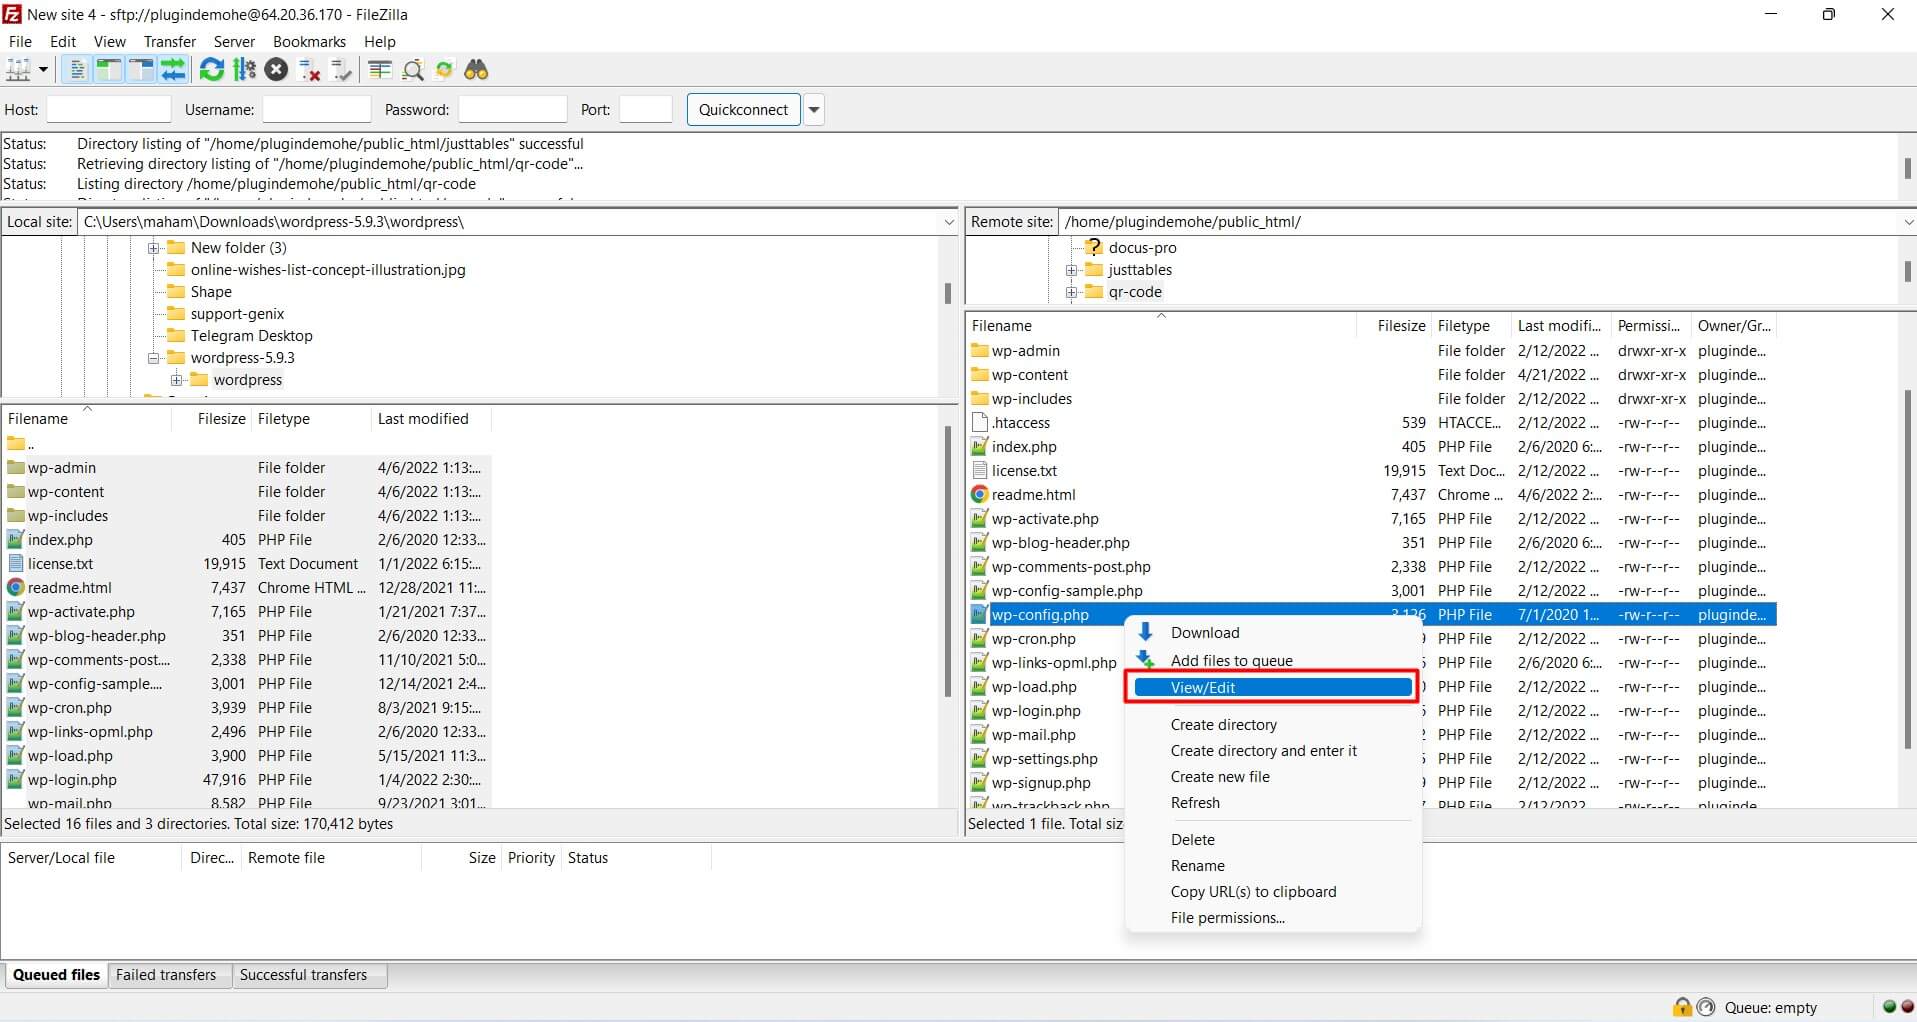
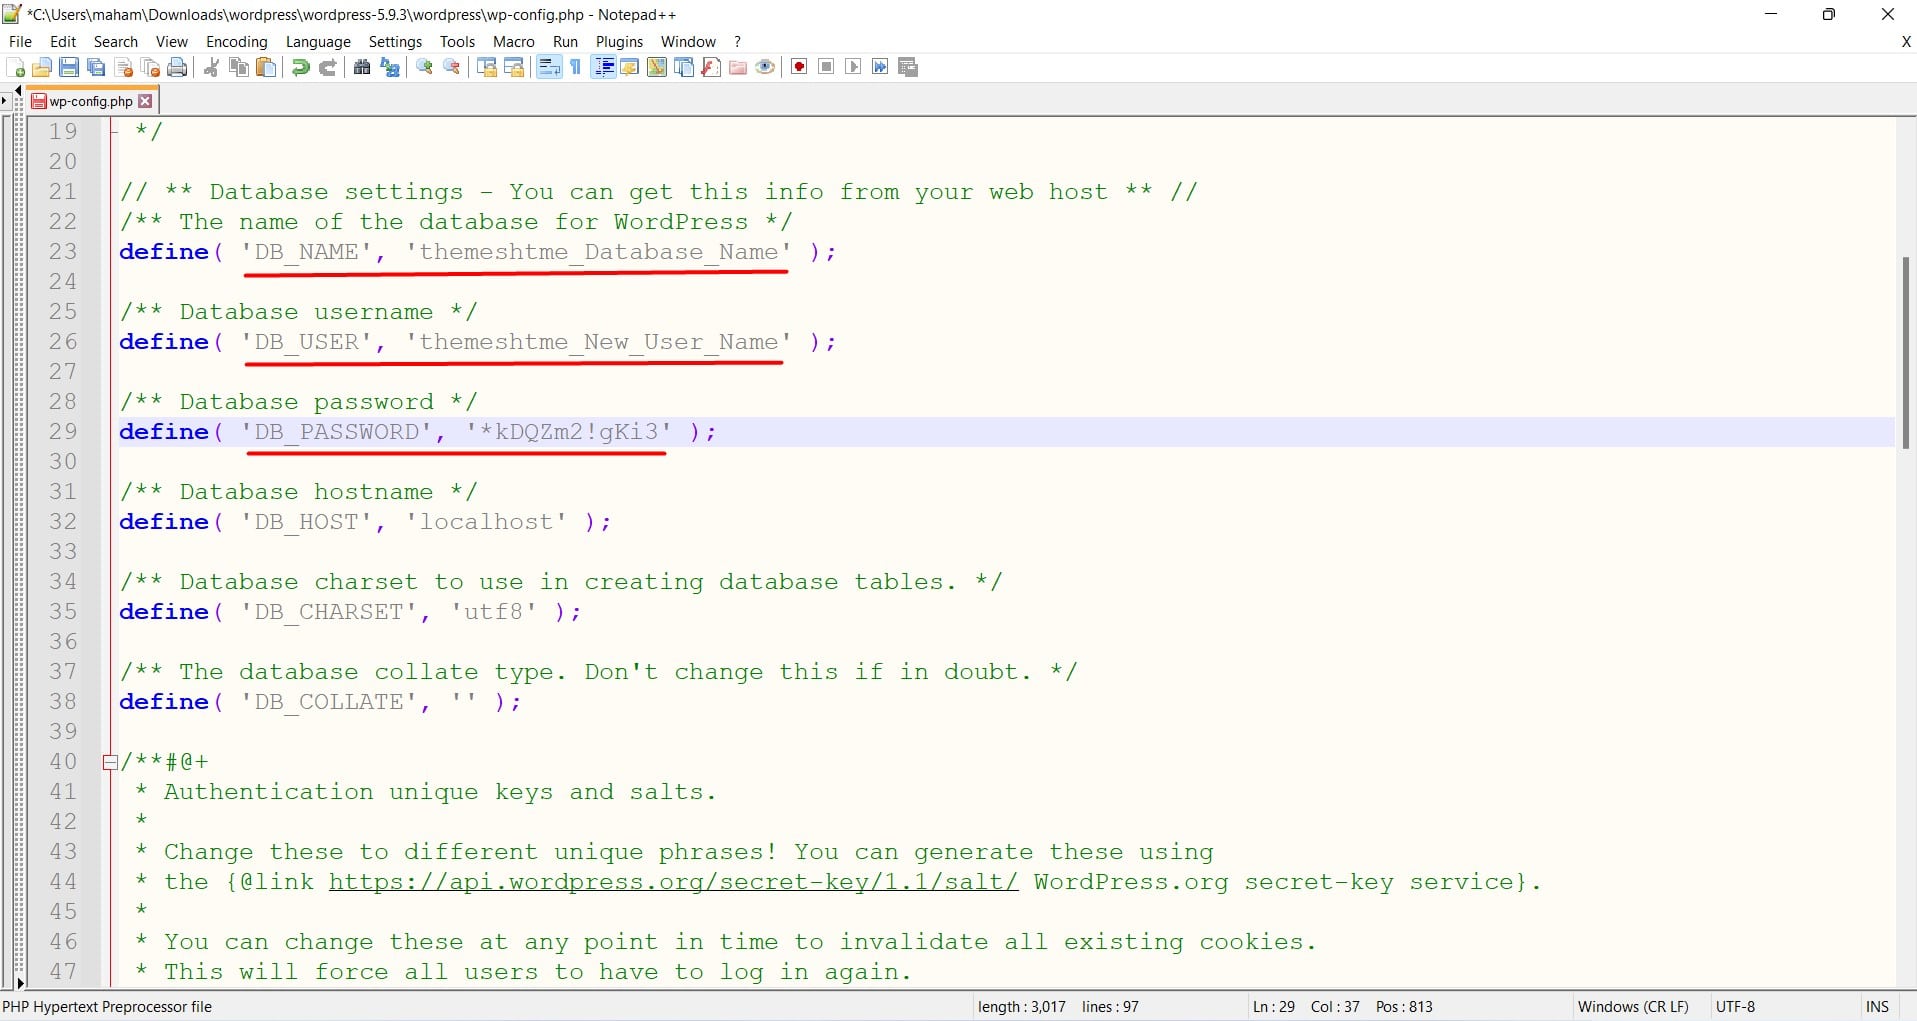
Step 4: Configure the wp-config.php File
The wp-config.php file is crucial for connecting your WordPress installation to the database. Here’s how to configure it:
- Locate the wp-config-sample.php file in your WordPress directory
- Rename it to wp-config.php
- Edit the file and update these database connection details:
php
define('DB_NAME', 'your_database_name');

define('DB_USER', 'your_database_user');

define('DB_PASSWORD', 'your_database_password');

define('DB_HOST', 'localhost');
Step 5: Run the WordPress Installation
After completing the previous steps, it’s time to finalize your WordPress web server installation:
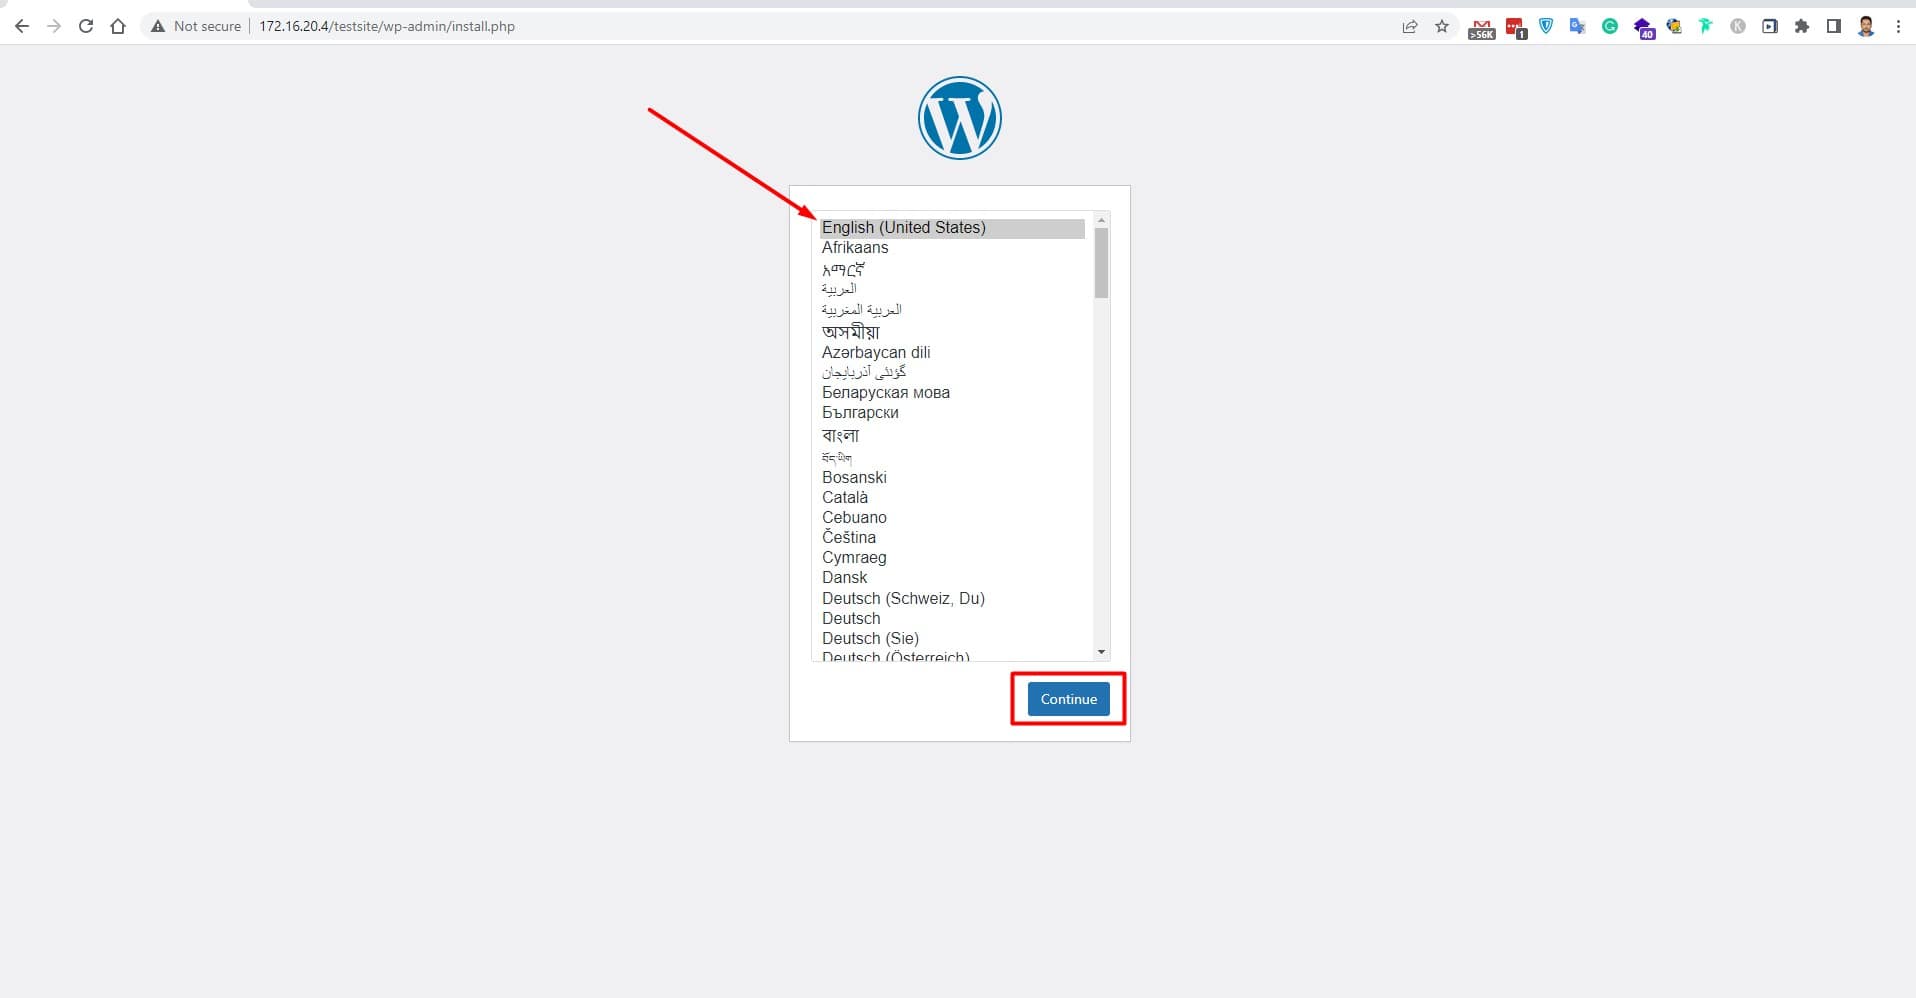
- Open your web browser.
- Navigate to your domain name (e.g., https://yourdomain.com).
- You’ll see the WordPress installation wizard.
- Select your preferred language.
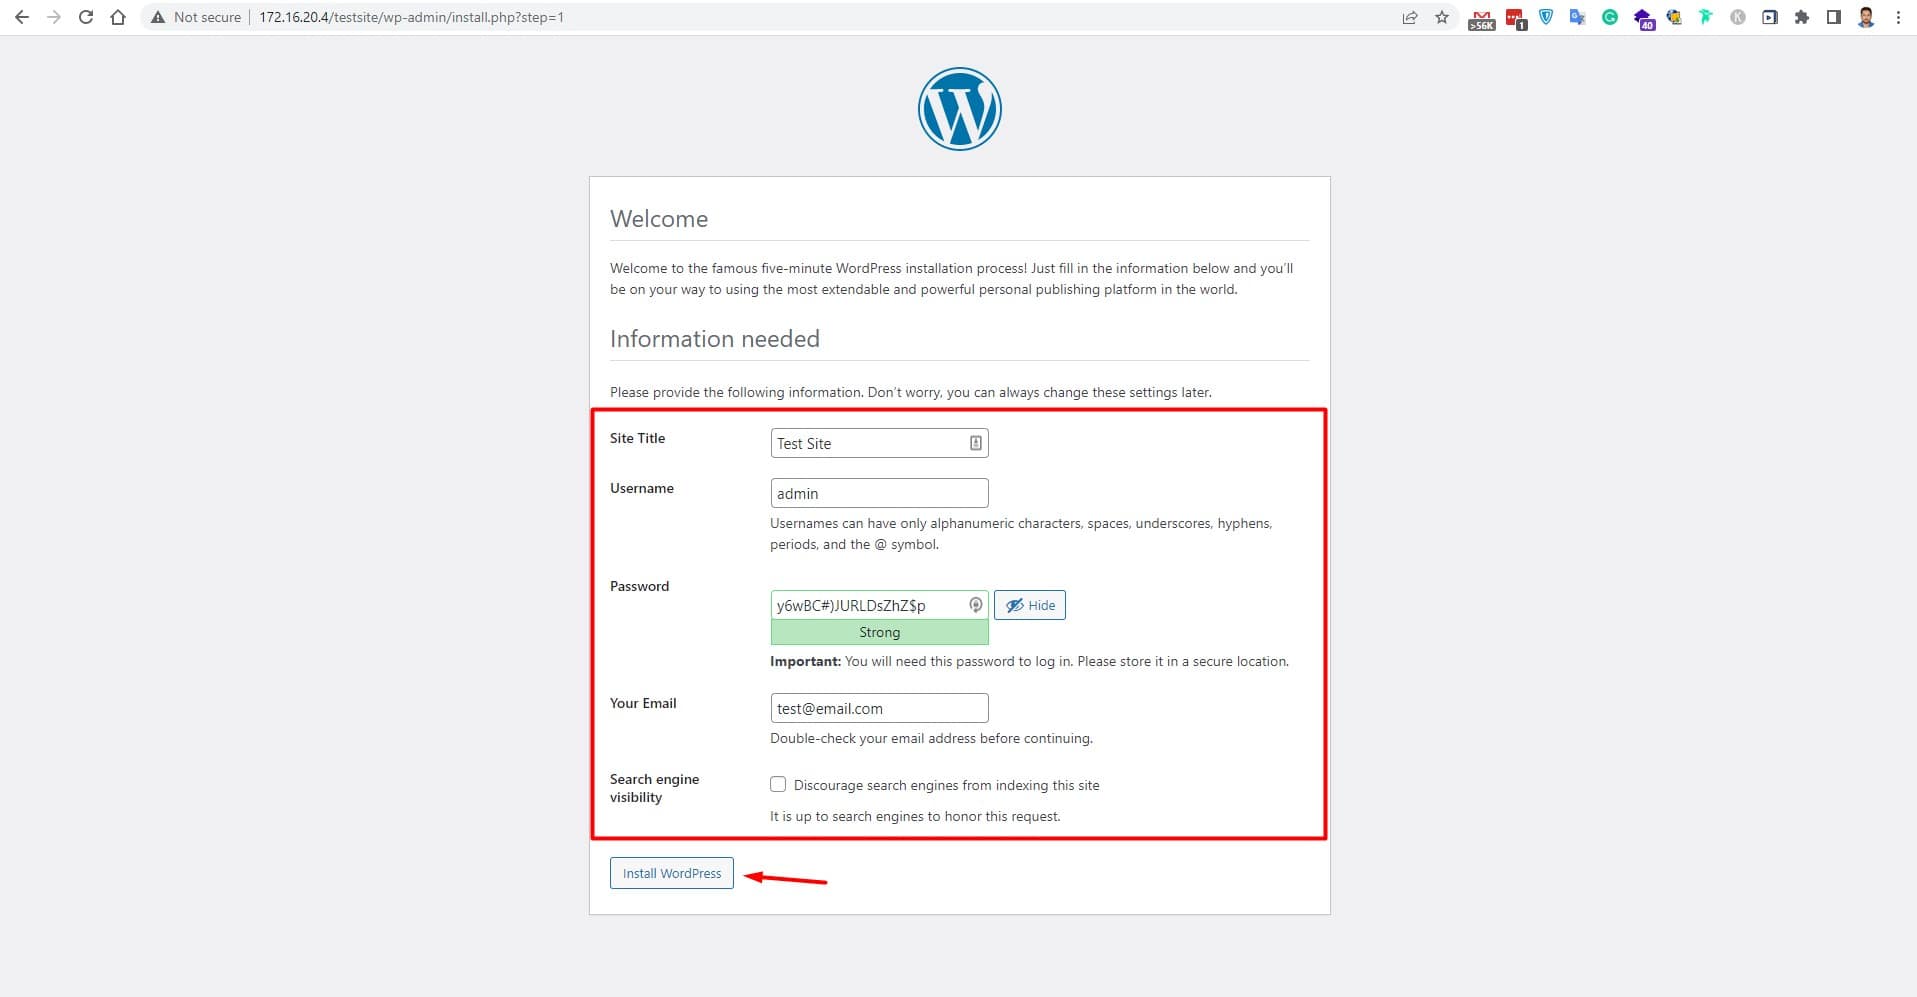
- Fill in your site details: Site title, Admin username (avoid ‘admin’ for security, Strong password, Admin email address.
- Click “Install WordPress”.
How to Install WordPress with Auto-Installers on a Web Server?
Installing WordPress using auto-installers is the fastest and most user-friendly method for setting up WordPress on your web server. Popular auto-installers, such as Softaculous, Fantastico, and QuickInstall, make the WordPress web server installation process incredibly simple, even for beginners with no technical experience.
WordPress Auto-Installer Setup
Step 1: Access Your Web Hosting Control Panel
Log in to your cPanel or hosting control panel using the credentials provided by your web hosting provider. Most modern web servers for WordPress include auto-installer options in their control panels.
Step 2: Locate the Auto-Installer Section
Once logged into cPanel, look for the auto-installer section, which may be labeled as:
- Softaculous Apps Installer
- One-Click Installs
- Website Software
- Auto Installers
Click on the WordPress icon or link to begin your webserver WordPress installation.
Step 3: Configure Your WordPress Installation Settings
The auto-installer will present you with a comprehensive installation form. Here’s what you’ll need to configure:
Domain and Directory Settings
Enter subfolder name for subdirectory installation (yourdomain.com/blog)
- Choose Installation Domain: Select the domain where you want to install WordPress on your web server
- Installation Directory:
- Leave blank for root installation (yourdomain.com)
- Enter subfolder name for subdirectory installation (yourdomain.com/blog)
Site Information Configuration
- Website Name: Enter your site’s title (can be changed later)
- Website Description: Write a brief tagline or description for your WordPress web server site
- Enable Multisite: Choose whether to enable WordPress multisite functionality
After you provide all of the above information, you will be asked to click install and wait for the installation to complete.
Step 4: Complete the WordPress Web Server Installation
After configuring all settings:
- Review your installation details carefully
- Click the “Install” button to begin the process
- Wait for the installation to complete (typically 1-3 minutes)
- You’ll receive a confirmation message with your WordPress site details
Post-Installation Steps for Auto-Installed WordPress
Immediate Actions After Installation
Once your how to install WordPress on web servers process is complete:
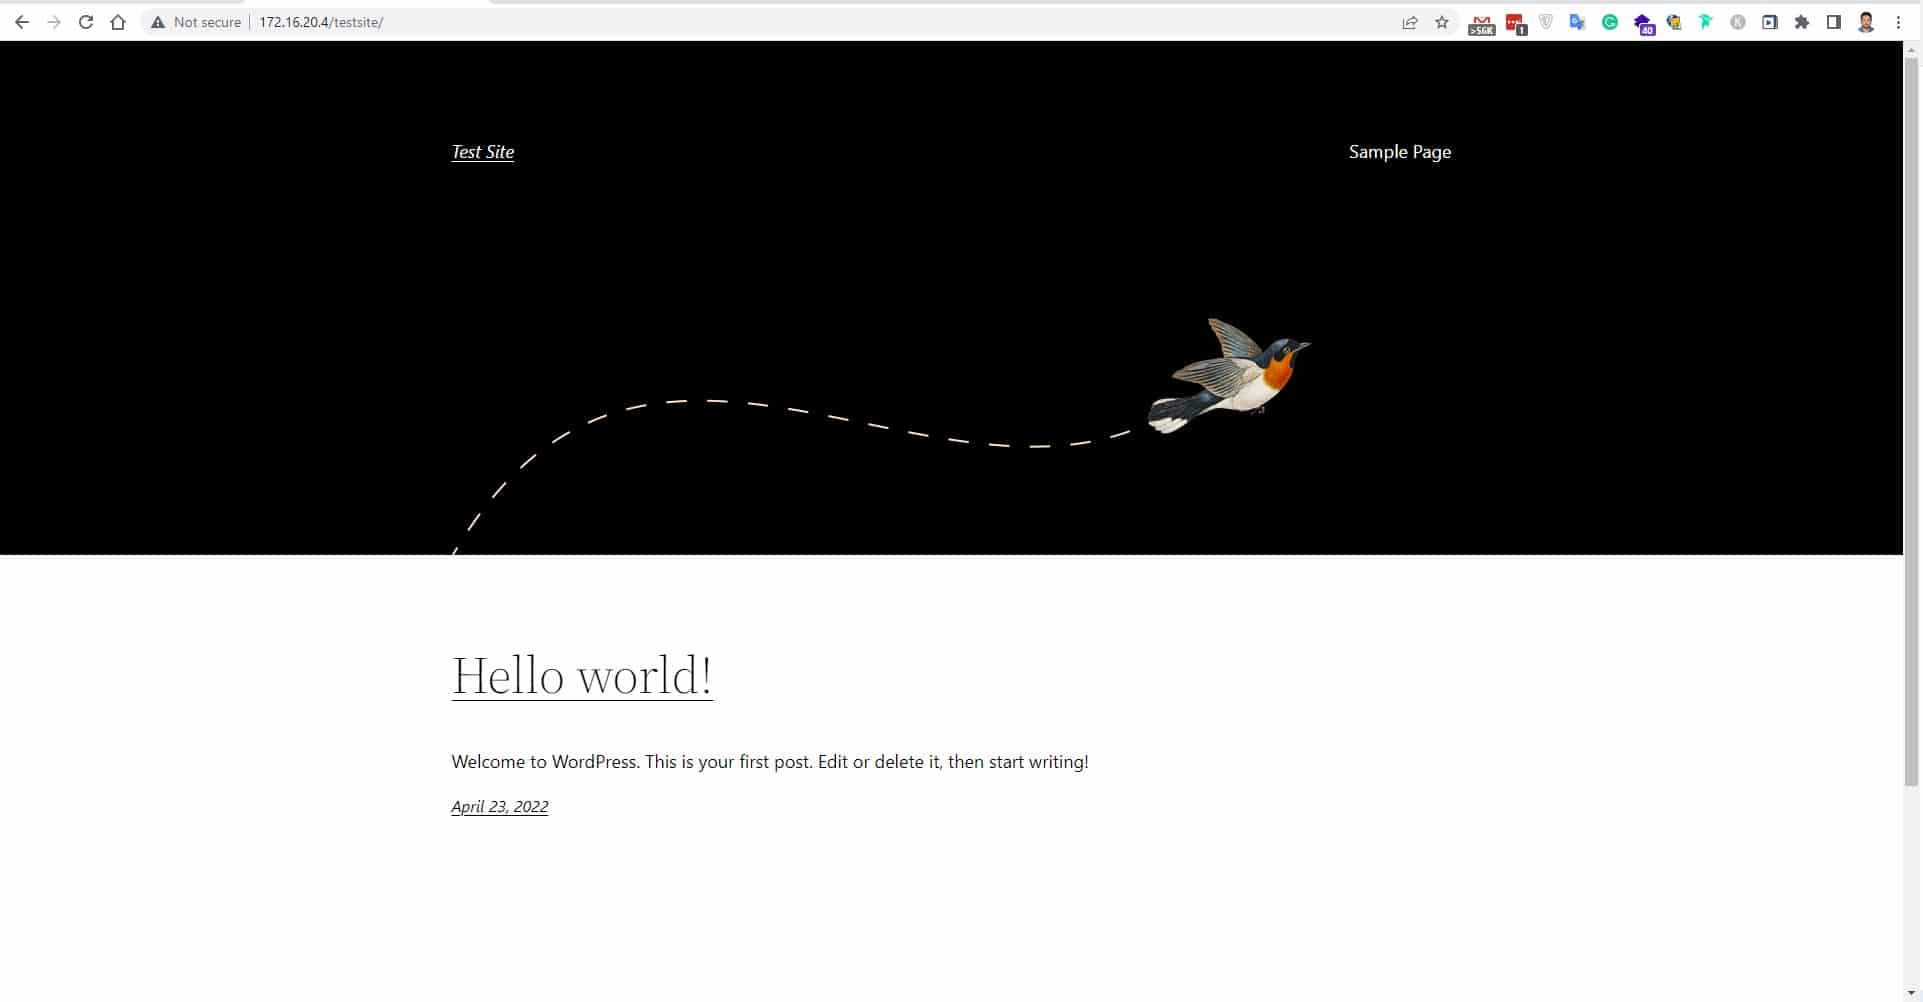
- Access Your Website: Visit your domain to see your new WordPress site
- Login to WordPress Admin: Navigate to yourdomain.com/wp-admin
- Update WordPress: Check for any available updates
- Install Essential Plugins: Add security and SEO plugins
- Choose a Theme: Select and customize your site’s appearance
Security Enhancements for Your WordPress Web Server
- Change the default admin username if you used “admin”
- Install a security plugin (Wordfence, Sucuri)
- Enable two-factor authentication
- Update all plugins and themes
- Configure regular backups
Frequently Asked Questions
What Are WordPress Auto-Installers?
Auto-installers are one-click installation tools provided by most web hosting companies that automate the entire WordPress web server setup process. These tools eliminate the need for manual file uploads, database creation, and configuration, making it possible to install WordPress on server environments within minutes.
Which method is better: manual installation or auto-installers?
Auto-installers are ideal for beginners. They’re fast and require no technical skills. Manual installation suits developers who need custom WordPress web server configurations and enhanced security control.
What are the minimum requirements to install WordPress on web servers?
Your web server for WordPress needs PHP 7.4+, MySQL 5.7+, HTTPS support, and 1GB+ disk space. Most hosting providers meet these requirements.
How long does each installation method take?
Auto-installers complete WordPress web server setup in 1-3 minutes. Manual installation takes 15-30 minutes, depending on your experience.
Can I install WordPress in a subdirectory?
Yes, both methods allow you to install WordPress on server subdirectories. Just specify the folder name during setup (e.g., /blog).
What if my installation fails?
Check database credentials in wp-config.php, verify file permissions (folders: 755, files: 644), and ensure your hosting meets WordPress requirements.
Are auto-installers safe to use?
Auto-installers are completely safe and include security features like automatic updates and backups for your WordPress web server.
Conclusion
Both installation methods work perfectly for how to install WordPress on web servers. Auto-installers offer speed and simplicity, completing your WordPress web server setup in under 10 minutes. Manual installation provides complete control for advanced users.
Choose auto-installers for quick deployment or manual installation for custom configurations. Either way, you’ll have a fully functional WordPress web server. Remember to implement security measures and regular maintenance after installation.
With this guide, you can confidently install WordPress on server environments and manage WordPress web server configurations effectively.