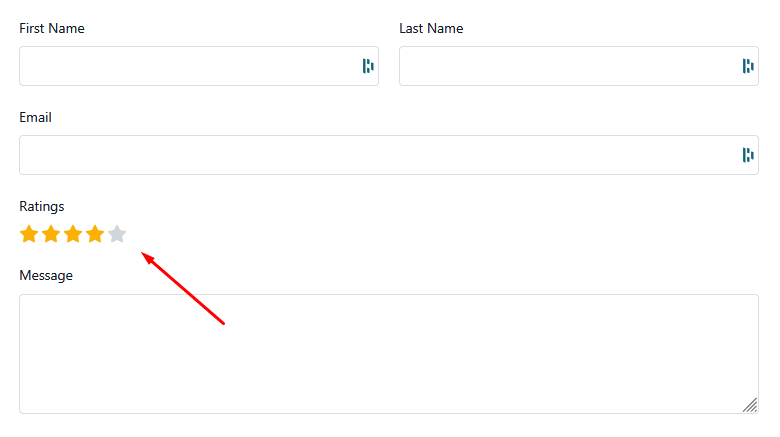
The Ratings field in HT Contact Form lets users rate a product, service, or experience directly within your form using visual stars. It’s a perfect way to collect user feedback in a simple, interactive format.
In this guide, you’ll learn how to add and configure the Ratings field with custom labels, scores, and conditional logic.
Step 1: Add the Ratings Field to Your Form #
- Go to HT Contact Form → Forms in your WordPress dashboard.
- Open an existing form or create a new one.
- From the left-hand field panel, drag the Ratings field into your form layout.
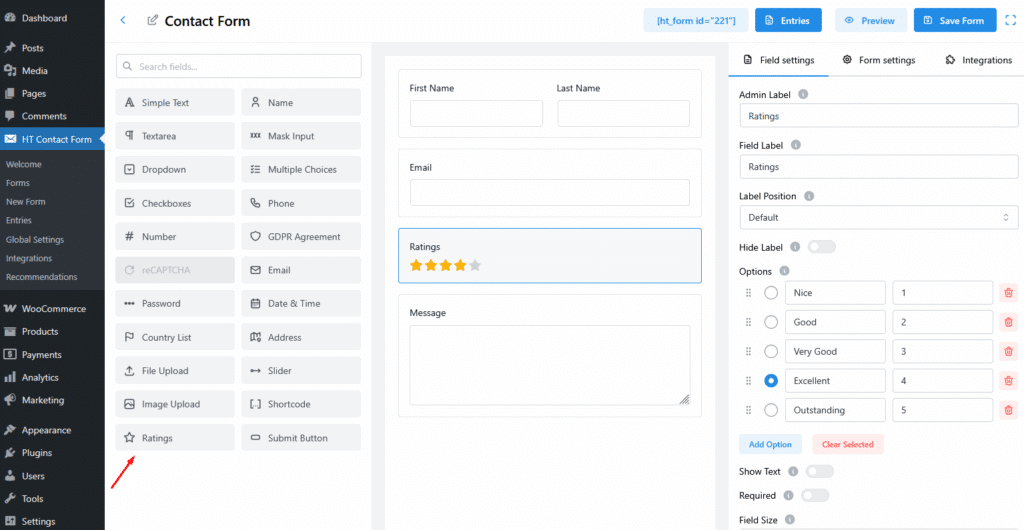
Step 2: Configure Ratings Field Settings #
After adding the field, you can customize the label, rating options, and display behavior.
Available Settings: #
- Admin Label: Internal name for identification (not visible to users).
- Field Label: Public label shown above the rating stars (e.g., “Rate Your Experience”).
- Label Position: Choose where the label is placed (Default, Top, Left, Right).
- Options: Add rating levels with custom labels and values (e.g., “Excellent = 4”).
- Default Selection: Pre-select a rating (optional).
- Add/Remove Options: Use the plus or trash icons to modify the list.

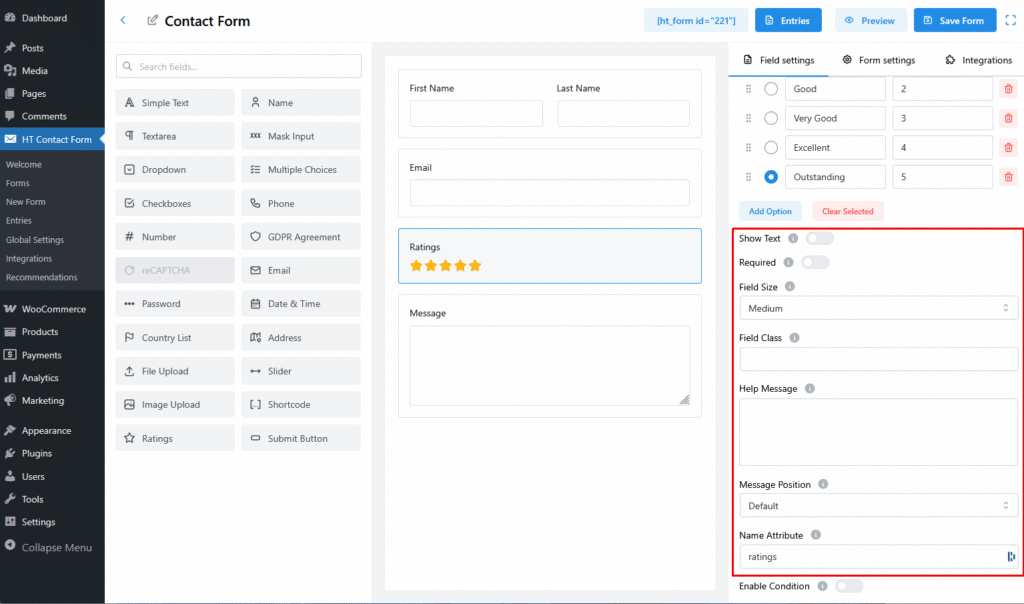
Step 3: Additional Field Options #
Optional Settings: #
- Show Text: Toggle ON to display rating label (e.g., “Good”, “Excellent”).
- Required: Make rating submission mandatory.
- Field Size: Adjust the size (Small, Medium, Large).
- Field Class: Add custom CSS class for styling.
- Help Message: Add extra instruction below the rating stars.
- Message Position: Choose where validation/help messages appear.
- Name Attribute: Used in submission data (developer use).
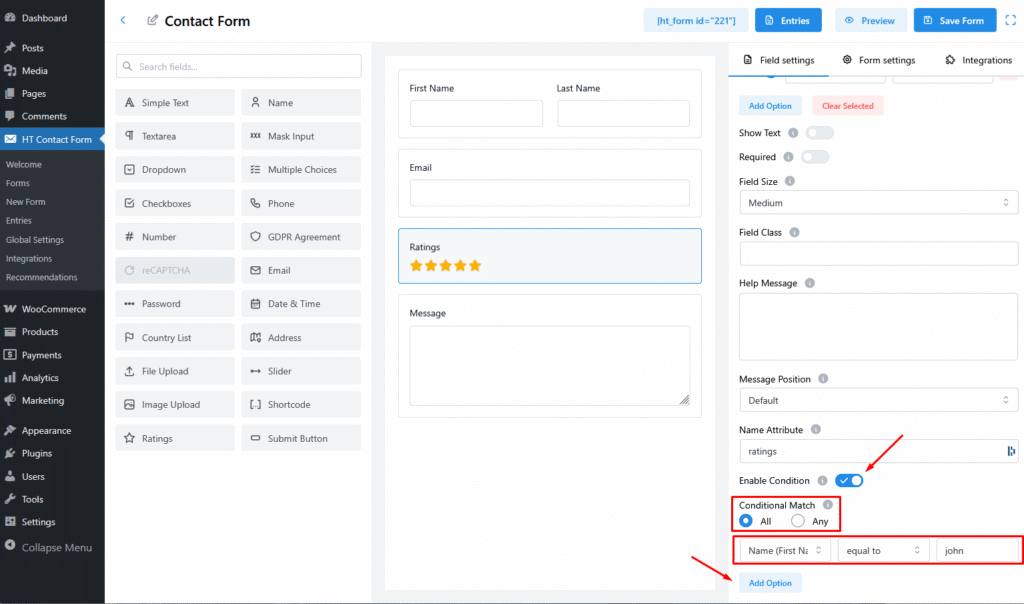
Step 4: Apply Conditional Logic (Optional) #
Want to show the Ratings field only if users meet certain criteria?
- Toggle Enable Condition to ON.
- Choose All or Any match type.
- Set up field-based rules using dropdowns.
Example: Only show Ratings field if “Dropdown = Product Feedback”.
Preview #