The Terms & Conditions field allows you to display a customizable agreement checkbox that users must accept before submitting the form. It’s ideal for legal agreements, privacy policies, or service terms. This guide explains how to add the field, customize its content, and apply conditional logic to control when it appears.
How to Add the Terms & Conditions Field #
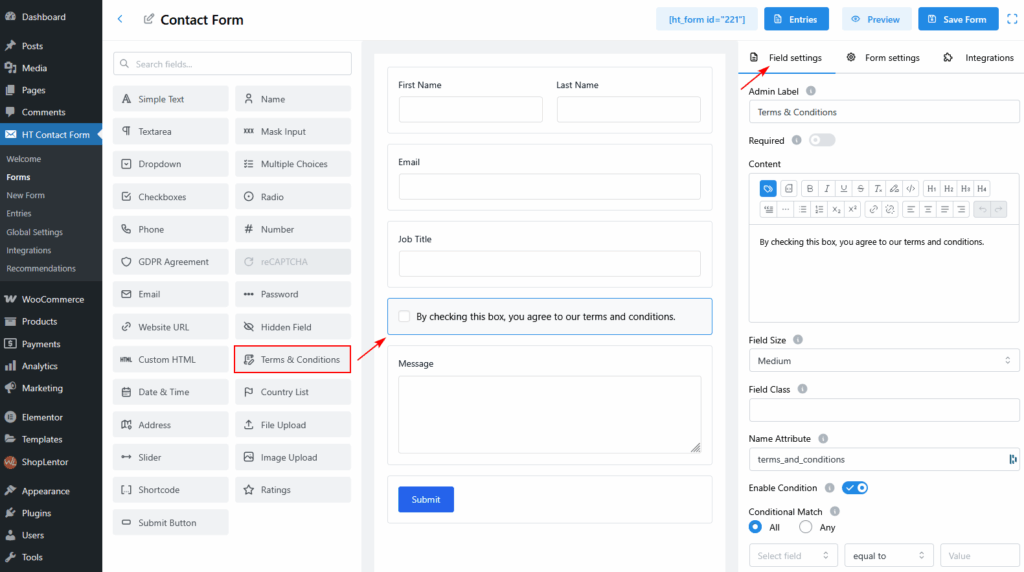
- Go to your WordPress Dashboard and navigate to HT Contact Form > Forms.
- Open an existing form or create a new one.
- From the left-side field panel, drag and drop the Terms & Conditions field into your form layout.
Configuring Field Settings #
Once added, click the field to access its settings under the Field Settings tab.
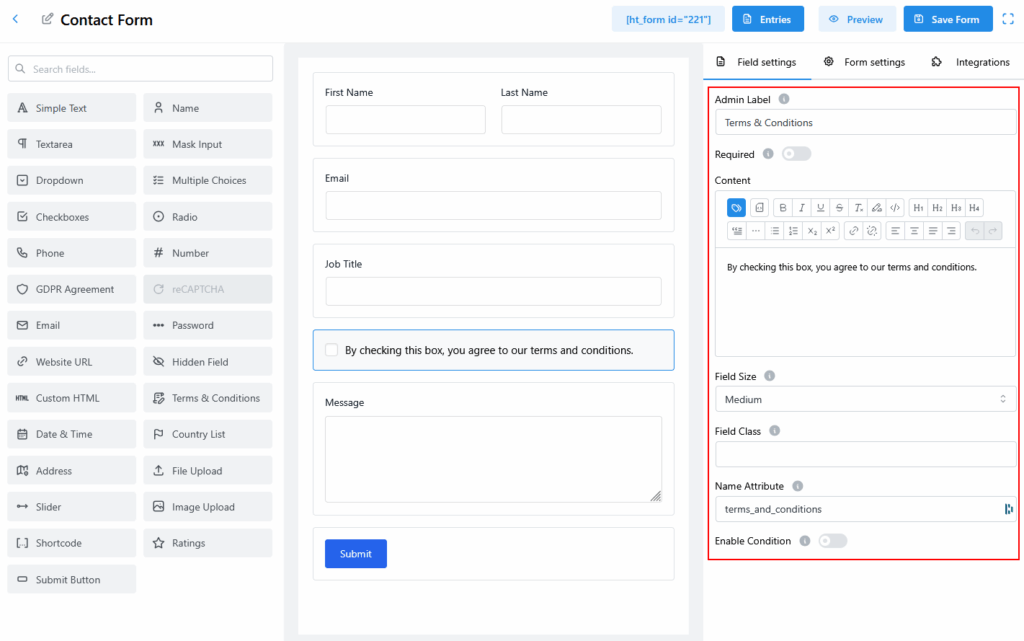
Admin Label #
Set an internal label to help identify the field in your form backend.
Example: Terms & Conditions
Required #
Toggle ON to make this field mandatory for form submission. Users must check the box to proceed.
Content #
Use the built-in rich text editor to customize the message shown next to the checkbox.
Example:By checking this box, you agree to our terms and conditions.
You can style the content using bold, italic, links, bullet points, and headings (H1–H4).
Field Size #
Choose the width of the field: Small, Medium, or Large.
Default: Medium
Field Class (Optional) #
Add a custom CSS class if you want to apply custom styles to this field.
Name Attribute #
This is the name used for backend processing and form data handling.
Default: terms_and_conditions
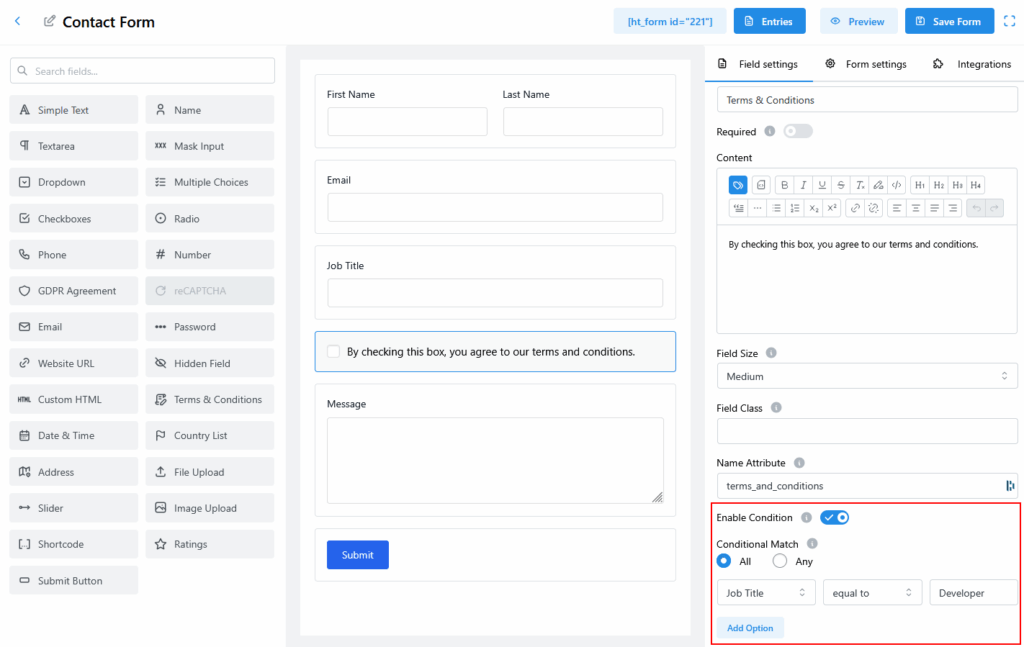
Applying Conditional Logic (Optional) #
You can display the Terms & Conditions field based on user input by enabling conditional logic.
- Toggle Enable Condition to ON.
- Select the condition type:
- All: All conditions must be true.
- Any: At least one condition must be true.
- Define the logic using:
- Field: Select a field to evaluate (e.g., Job Title)
- Condition: Choose the comparison (e.g., equals to)
- Value: Specify the target value (e.g., Developer)
- Click Add Option to include more rules if needed.
Example Use Case #
Use the Terms & Conditions field to ensure users agree to your website's terms before submitting their information. Pair it with conditional logic to show the field only when specific criteria are met, such as displaying it only when a user selects “Yes” to a consent-related question.


