Brevo (formerly Sendinblue) is a popular email marketing and CRM platform. With HT Contact Form, you can seamlessly connect your form submissions to Brevo and automatically add new contacts to your selected Brevo list.
This guide will walk you through the entire process of connecting Brevo and mapping form fields for automation.
Step 1: Generate Your Brevo API Key #
To connect Brevo with HT Contact Form, you’ll need an API key:
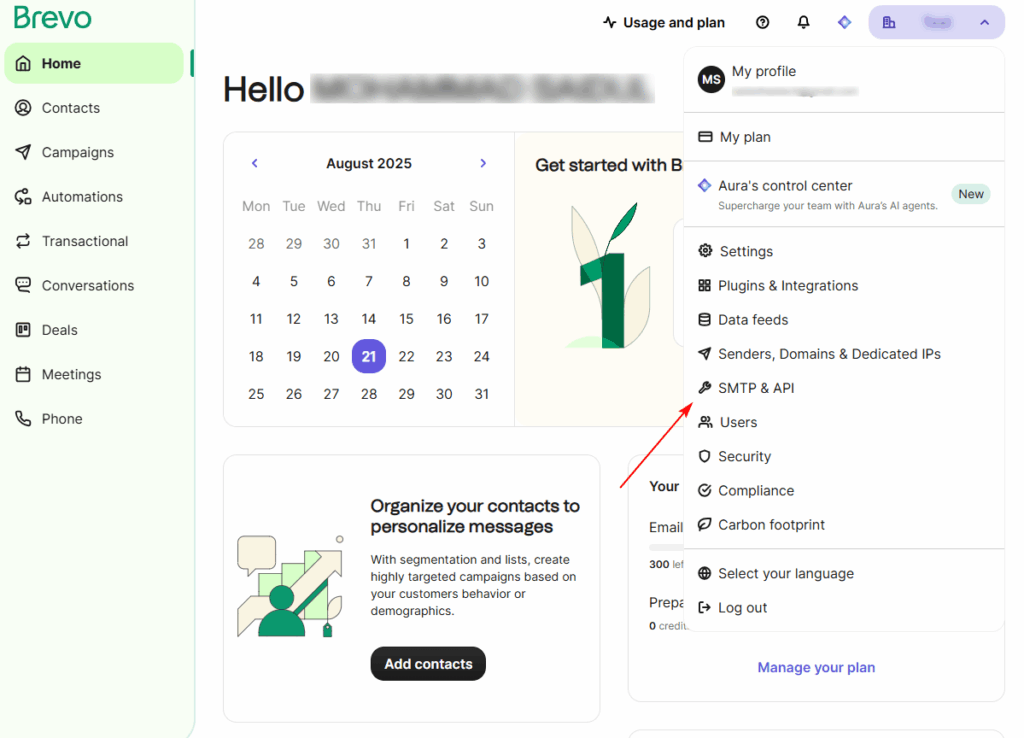
- Go to https://app.brevo.com and log in.
- Click your profile icon (top right) → choose SMTP & API.
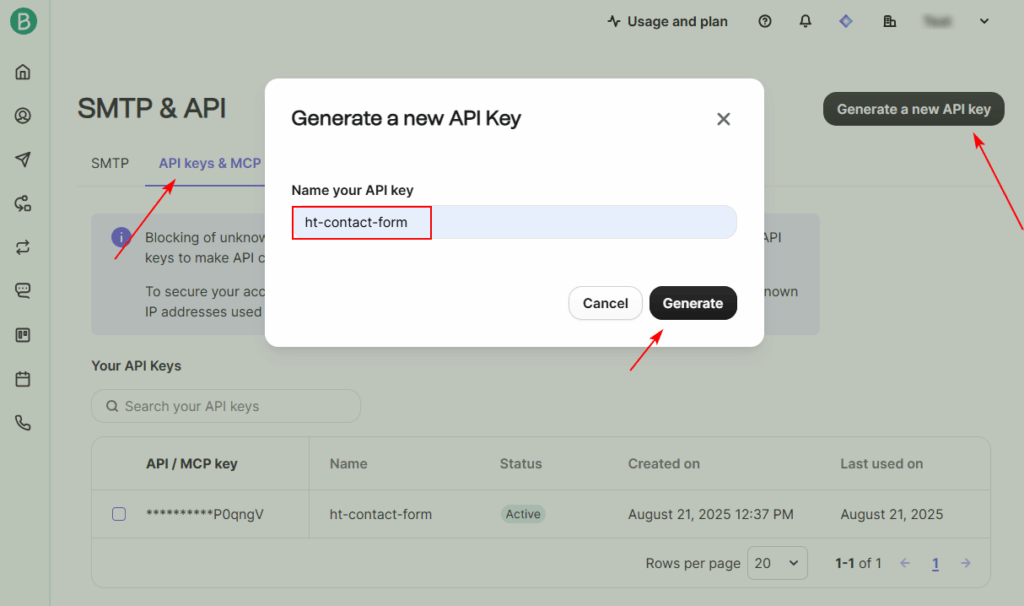
- Under the API Keys tab, click Create a New API Key.
- Give it a name (e.g., “HT Contact Form”) and click Generate.
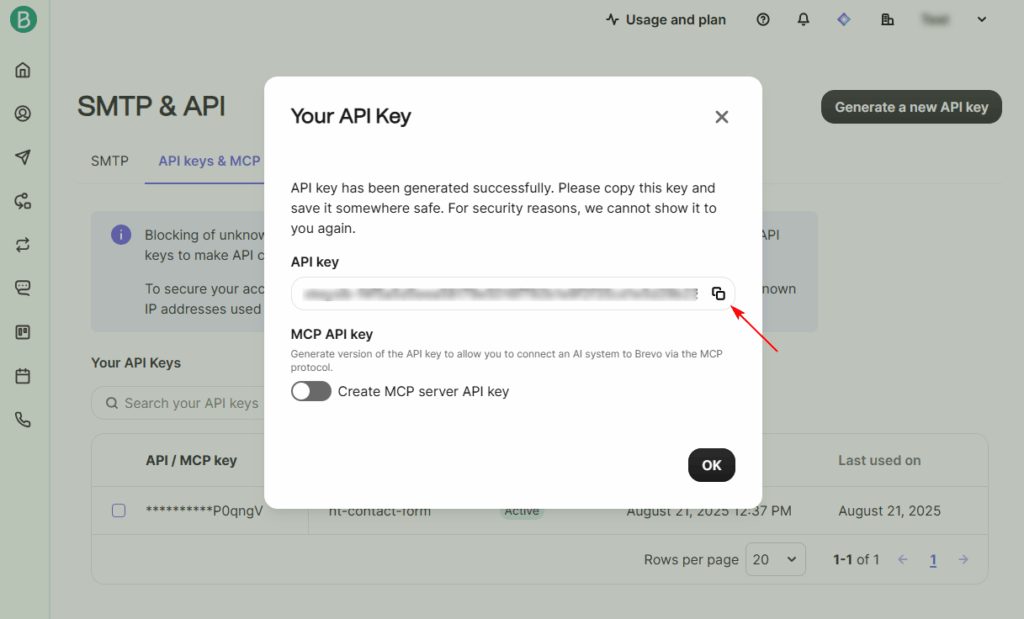
- Copy the key immediately — you won't be able to see it again.
Step 2: Connect Brevo in HT Contact Form #
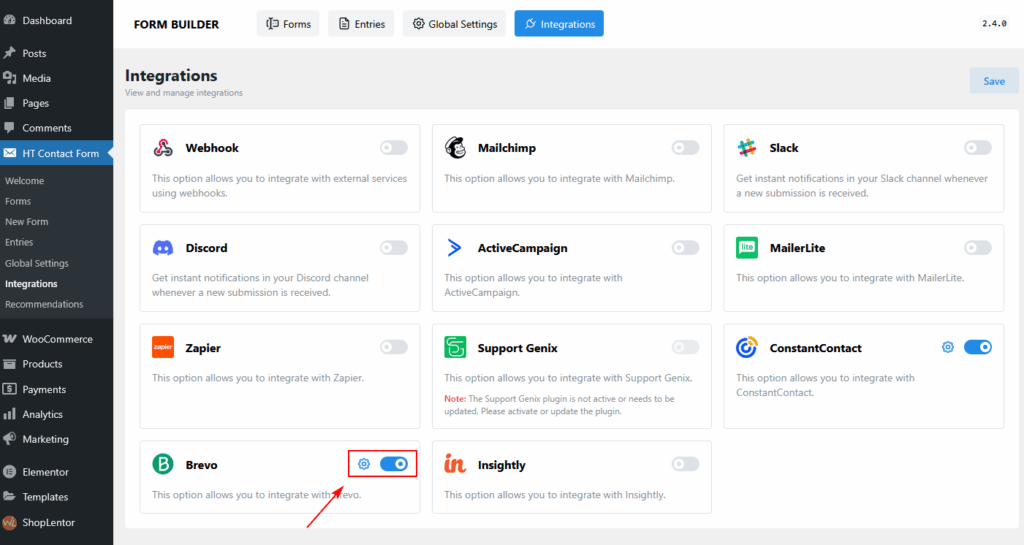
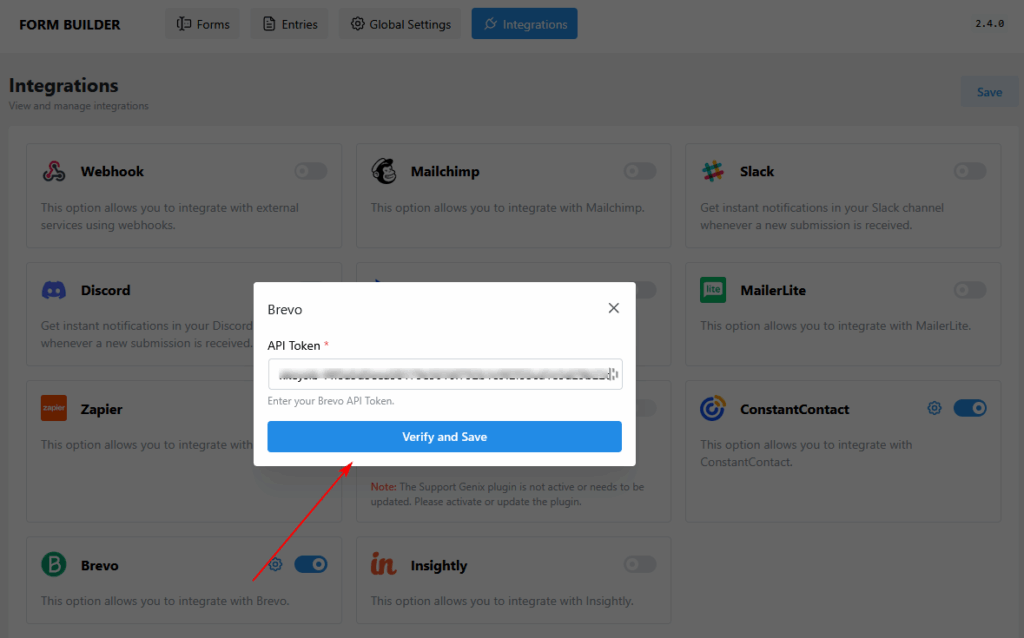
- In your WordPress dashboard, go to HT Contact Form → Global Settings → Integrations.
- Find Brevo and click the settings gear icon.
- Paste your API Key into the field provided.
- Click Verify and Save.
- Once verified, the integration toggle will turn on.
Step 3: Enable Brevo on a Form #
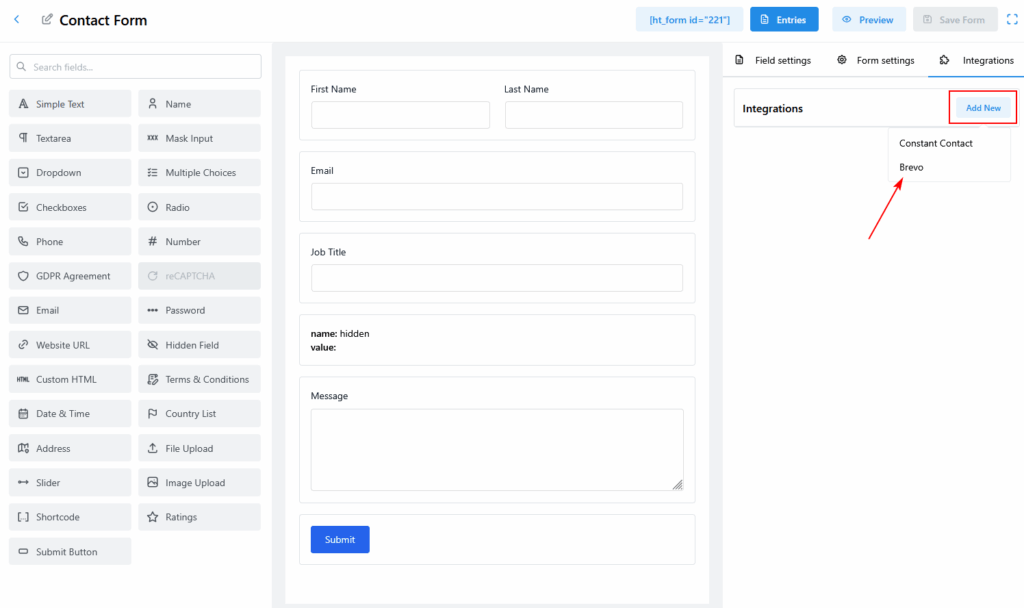
- Edit any contact form from HT Contact Form → Forms.
- Click the Integrations tab on the top-right.
- Click Add New.
- Select the Brevo.
Step 4: Configure Integration Settings #
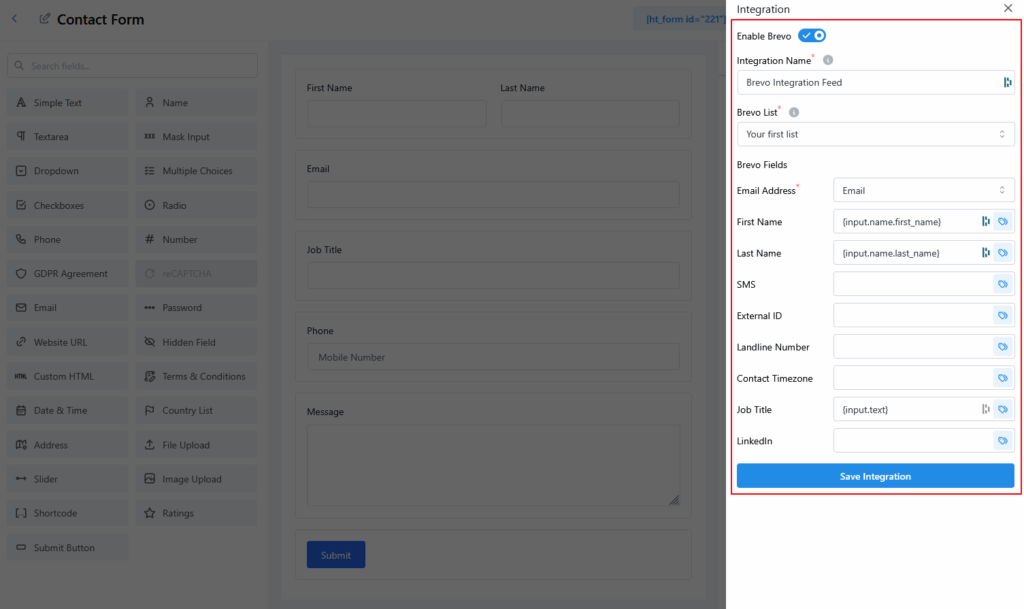
In the integration drawer:
- Enable the Brevo toggle.
- Integration Name: Set a custom name (e.g., “Brevo Integration Feed”).
- Brevo List: Select the list where new contacts will be added.
- Brevo Fields: Map each Brevo field to the corresponding HT Contact Form field using the field picker.
Example:
- Email Address →
Email - First Name →
{input.name.first_name} - Last Name →
{input.name.last_name} - Job Title →
Job Title - Additional optional fields: SMS, LinkedIn, Timezone, etc.
Once done, click Save Integration.
Test Your Integration #
- Go to the frontend of your form.
- Fill in the fields and submit the form.
- Check your Brevo list — the new contact should appear instantly.


