The “Conditional Field” extension is really handy when it comes to adding various conditions to your contact forms. For example, you can set a condition to display the email address field only when a user inserts a value in the name field.
Enable The Conditional Field Extensions #
Like any other extensions, enabling the “Conditional Field” extension is a breeze. To do so, here's what you need to do:
First, visit the dashboard of your website and navigate to the “HT CF7 Extension” menu.
You can find the option to enable the “Conditional Field” extension in the “Extensions” tab. Once you click the gear icon of the extension, it will show a popup including an option panel to configure the extension.
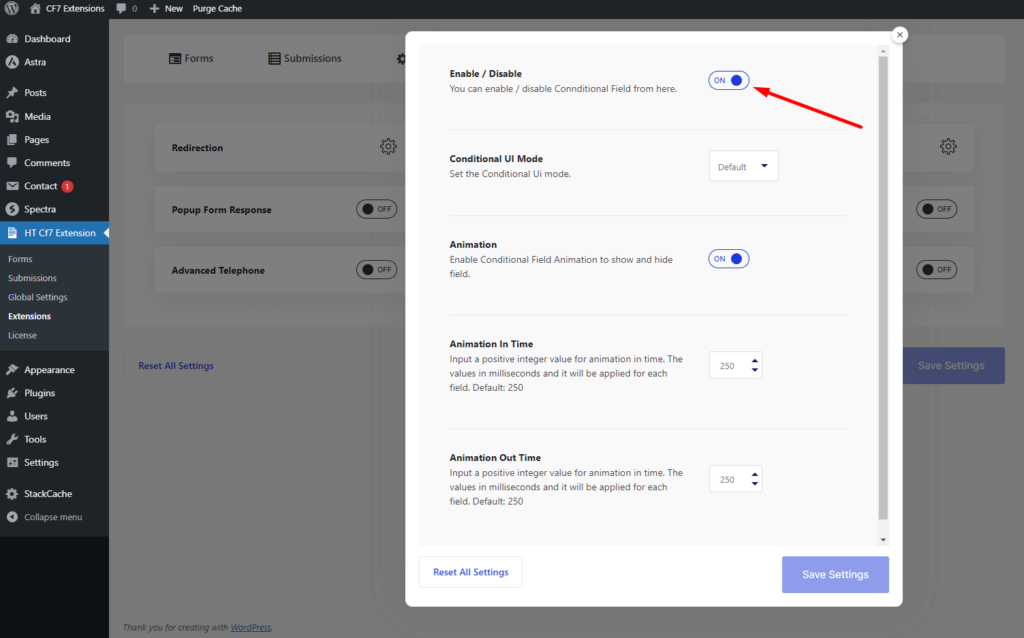
- Enable / Disable: Turning on the option to enable the “Conditional Field” extension will unlock the option to apply conditions to your contact forms.
- Conditional UI Mode: Set your preferred mode for Conditional UI. Available options are “Default” and “Text”.
- Animation: Enable the “Animation” option to display an animation when a conditional field is shown and hidden.
- Animation In Time: Set how long to show an animation when a conditional field appears (in milliseconds). Default value: 250
- Animation Out Time: Set how long to show an animation when a conditional field disappears (in milliseconds). Default value: 250
Once you are done configuring the settings for the “Conditional Field“, save the settings.
“HT Conditional Fields” Option displayed on the form #
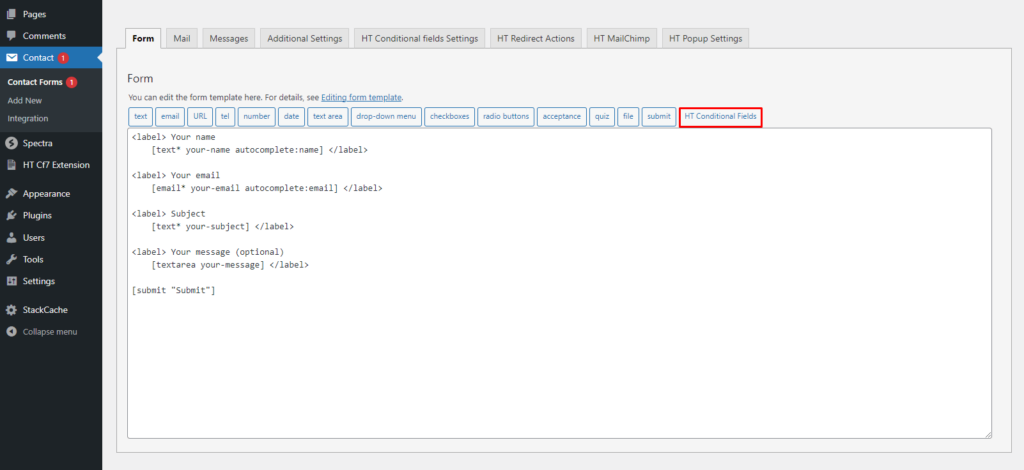
After enabling the “Conditional Field” extension, you can see a new tag called “HT Conditional Fields” added to the edit screen of each form. Now, all you need to do is insert the tag where you want to add a conditional field.
Introduction to “HT Conditional Fields” options. #
Let's see how to include a conditional field in a contact form.
First, click on the “HT Conditional Fields” tag. It will open a popup with a few options to configure the field settings before adding it to the form.
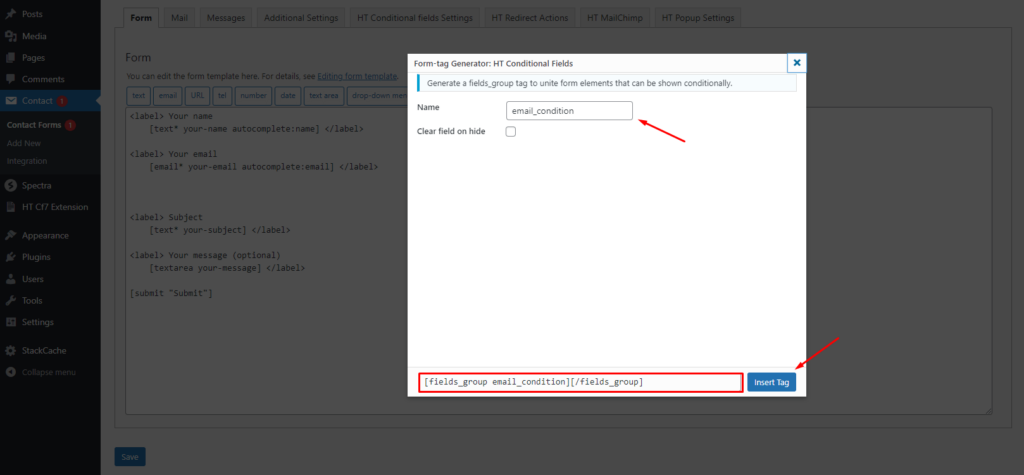
- Name: Set a unique name for the conditional field.
- Clear field on hide: If you check the “Clear field on hide” checkbox, any data you previously entered into a conditional field will be erased once the field disappears. If you don't want this, leave the checkbox unchecked, and your data will remain intact for the conditional fields.
After configuring the options, click Insert Tag.
Setup a field as a Conditional Field. #
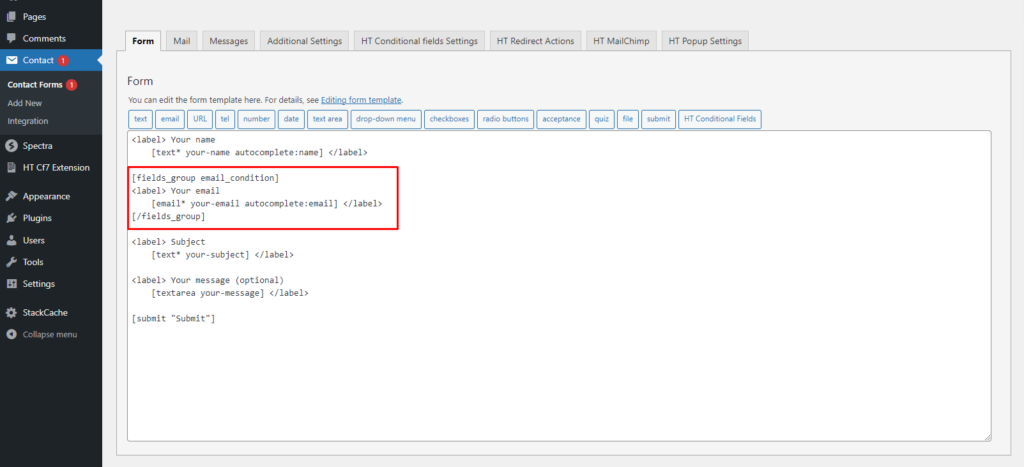
In this section, you can learn how to make a field conditional. Let's see how it's done.
First, choose the field that you want to use as a conditional field. Then, select the respective code for that particular field and put it under the conditional field tag.
Apply the Condition #
Now that you have set a field as conditional, the next step is to apply conditions to that field. To do so, open the “HT Conditional Fields Settings” and add conditions according to your requirements.
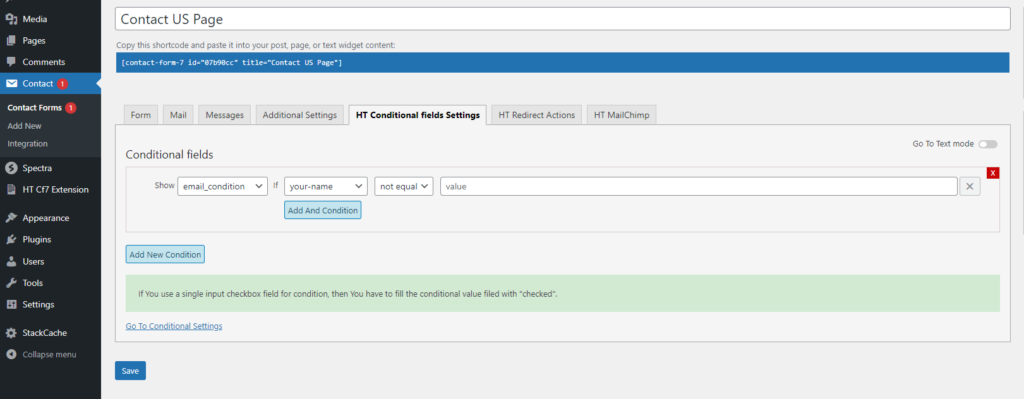
Note: If You use a single input checkbox field for a condition, then you have to fill the conditional value field with “checked”.
After completing the setup of the Conditional Field Extension #
As you can the email filed are hide, when name field is file up or add a value then the email field ( Conditional Field ) are appear.
In the form shown in the screenshot above, the email address field is hidden, while the name field is visible. The email address field will appear when a user inserts any value into the name field.


