The WP Plugin Manager plugin now lets you disable any plugin using custom URL-based conditions. This gives you advanced control over plugin behavior on specific URLs—whether it's a single page, a campaign link with UTM parameters, or any dynamic query.
Step-by-Step Guide #
- Navigate to the WP Plugin Manager dashboard in your WordPress admin panel.
- Go to the top menu and click on the General tab (⚙️).
- Inside the General tab, scroll down to find the Page Type option and select Custom.
- You will now see the URI Conditions option.
- Under URI Condition Settings, you can define how plugin deactivation should behave based on different URL matching rules.
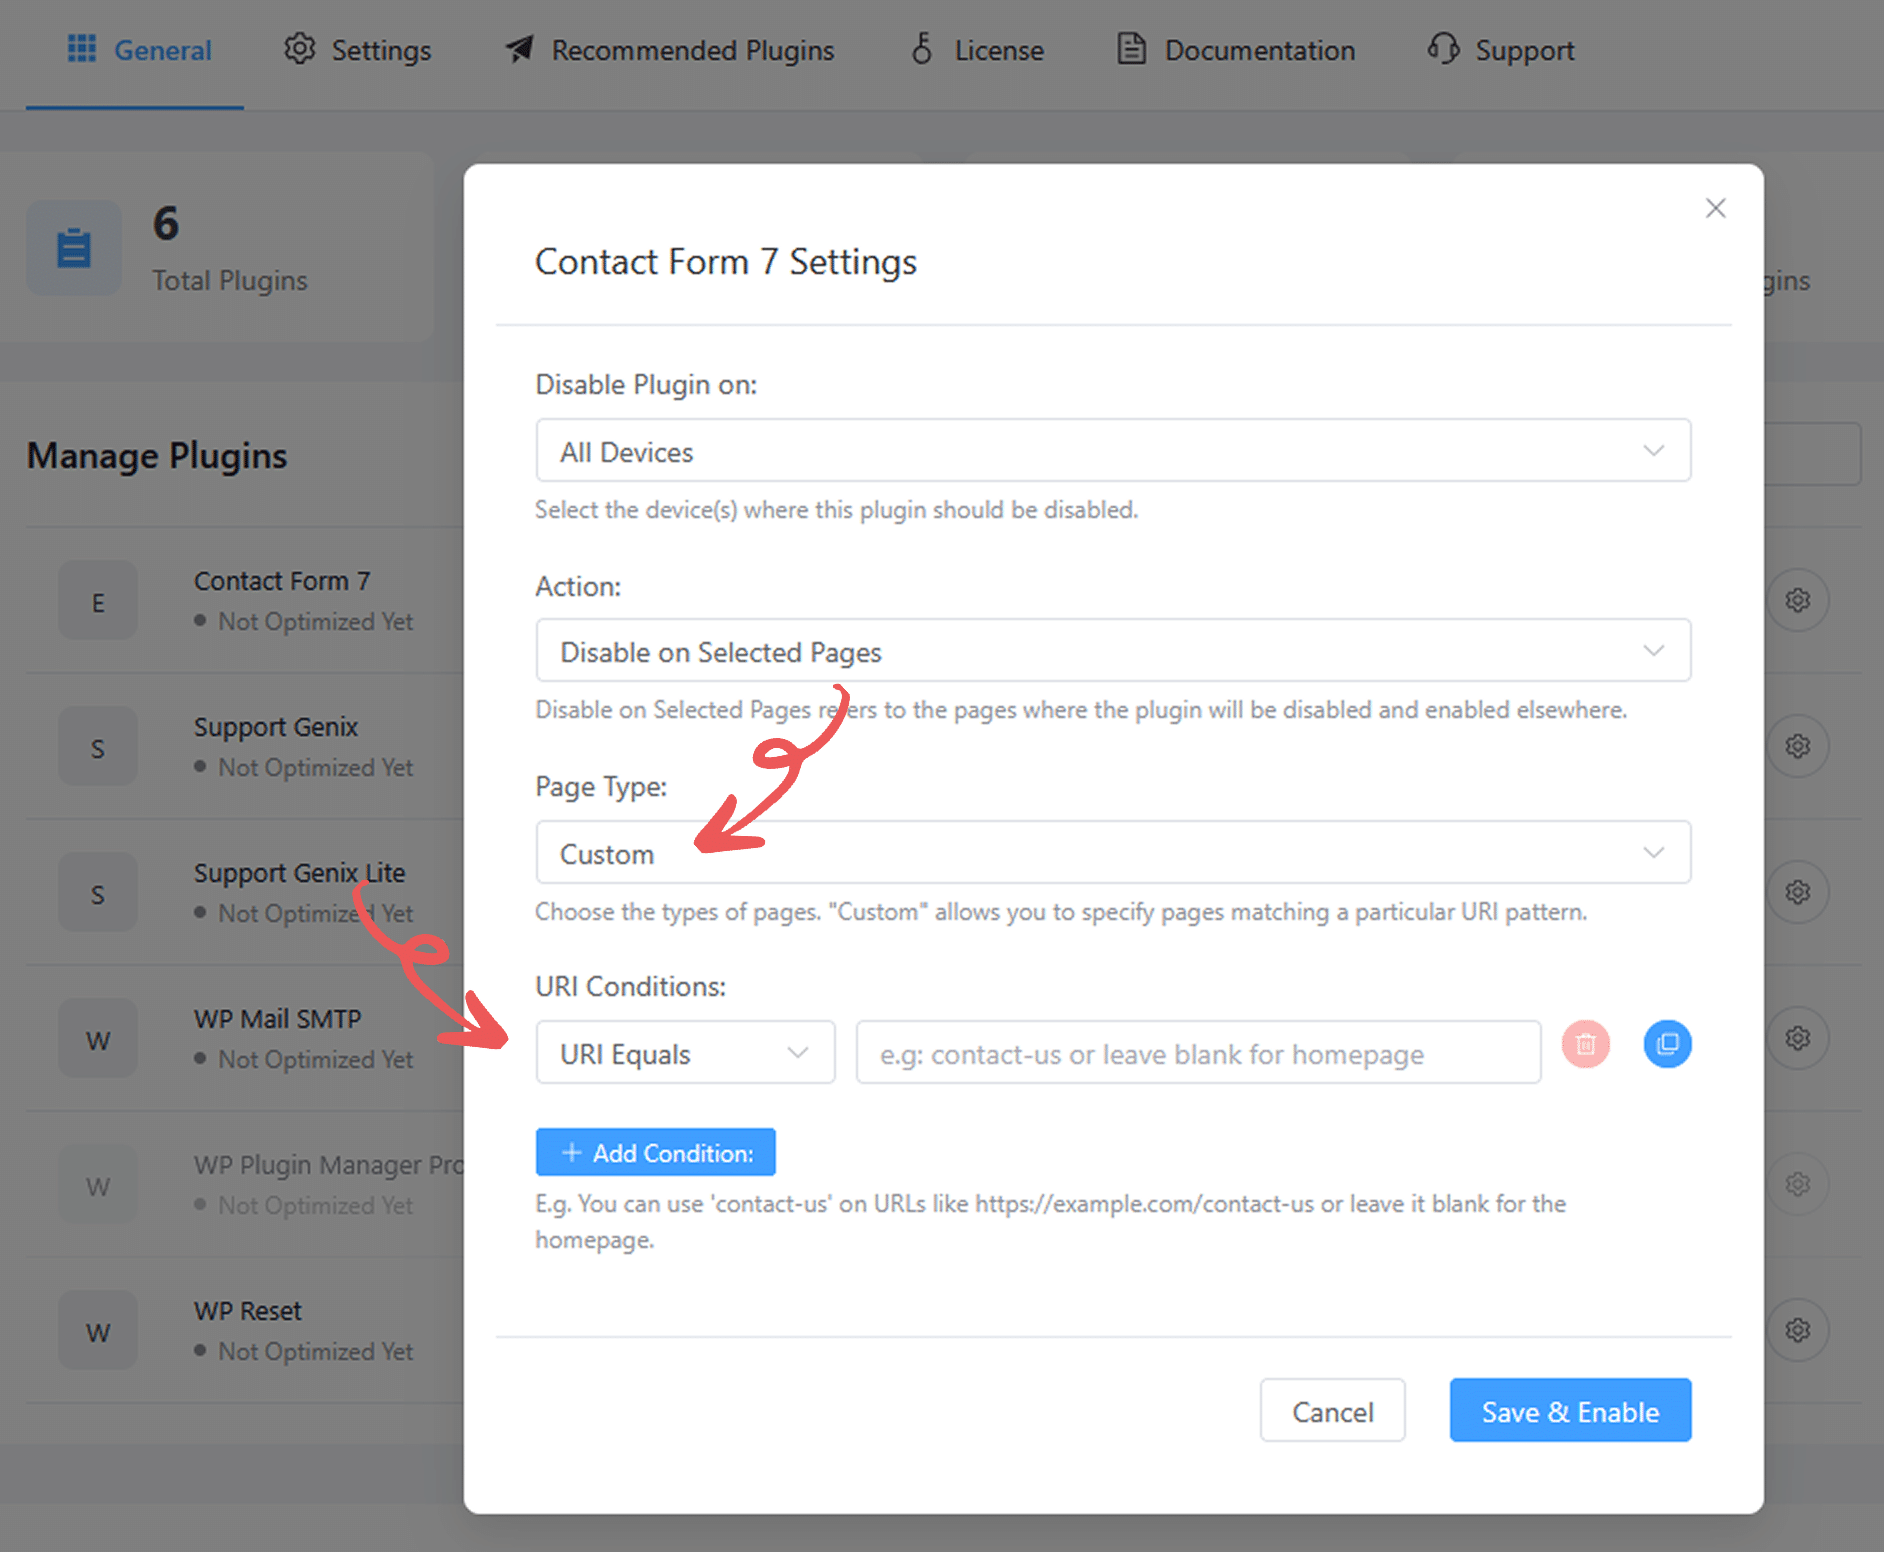
URI Condition Types Explained (with Screenshot Placement Instructions) #
1. URI Equals #
- Use Case: Disable plugin on exactly one specific page based on slug.
- Example:
about-us - Effect: The plugin is only disabled on
/about-us.
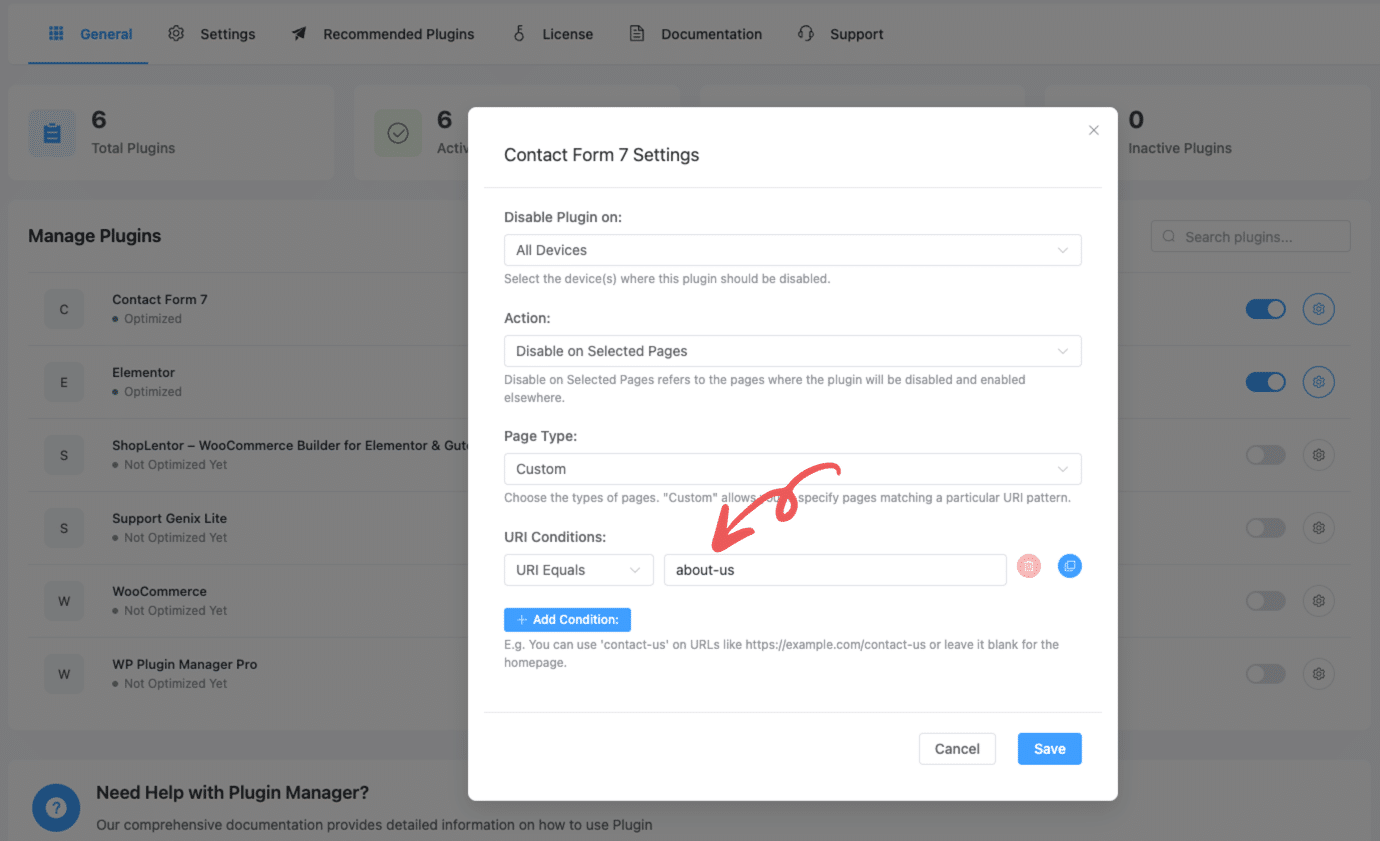
Use this when you want strict, one-to-one targeting.
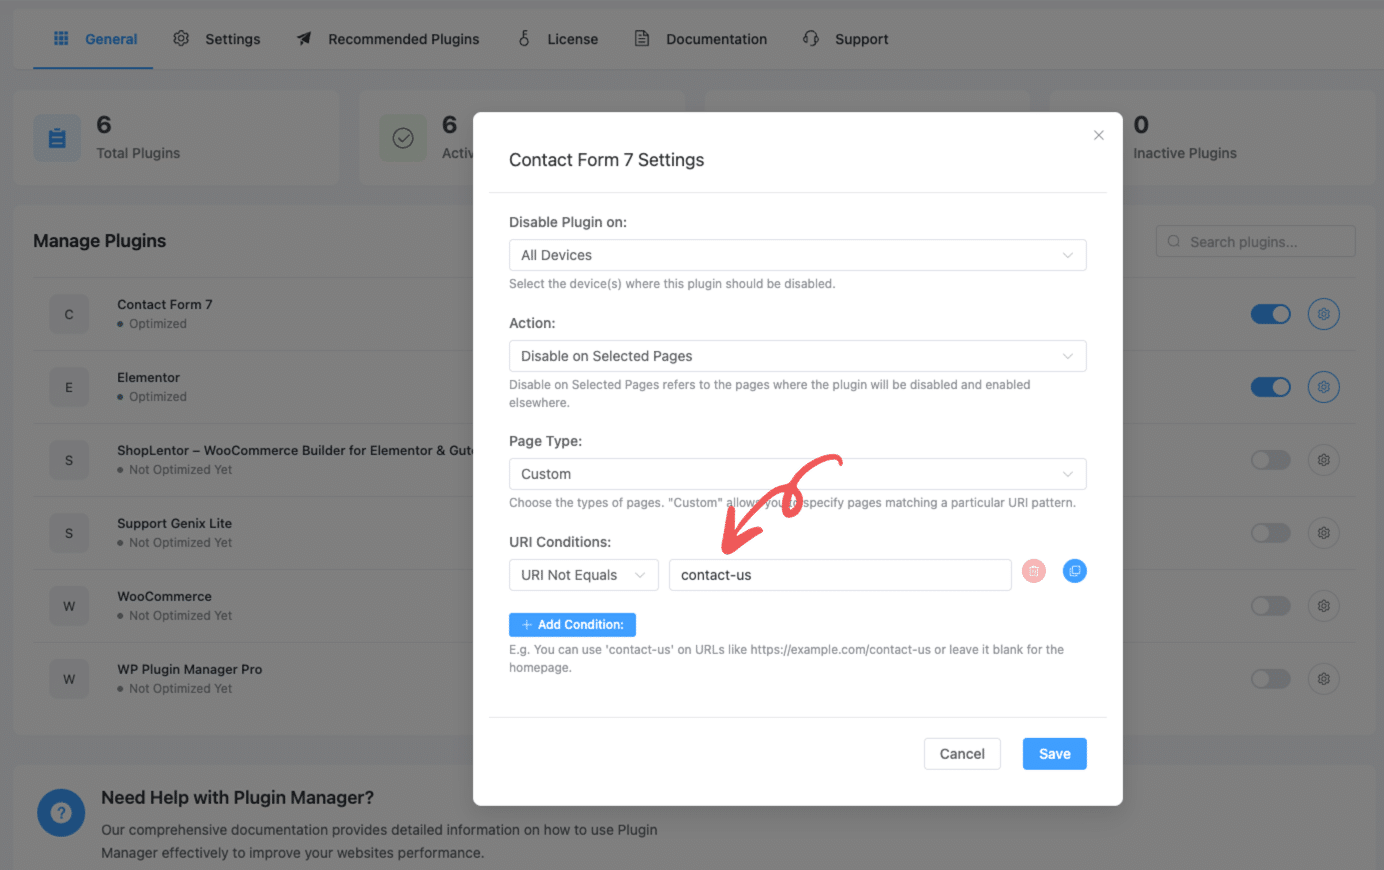
2. URI Not Equals #
- Effect: The plugin will be disabled for any URL that contains this string.
- Example:
contact-us - Effect: Plugin is disabled sitewide, but stays active on
/contact-us.
3. URI Contains #
- Use Case: Disable plugin on any page that includes a specific string in the URL.
- Example:
?utm_source=wppluginmanage - Effect: The plugin will be disabled for any URL that contains this string.
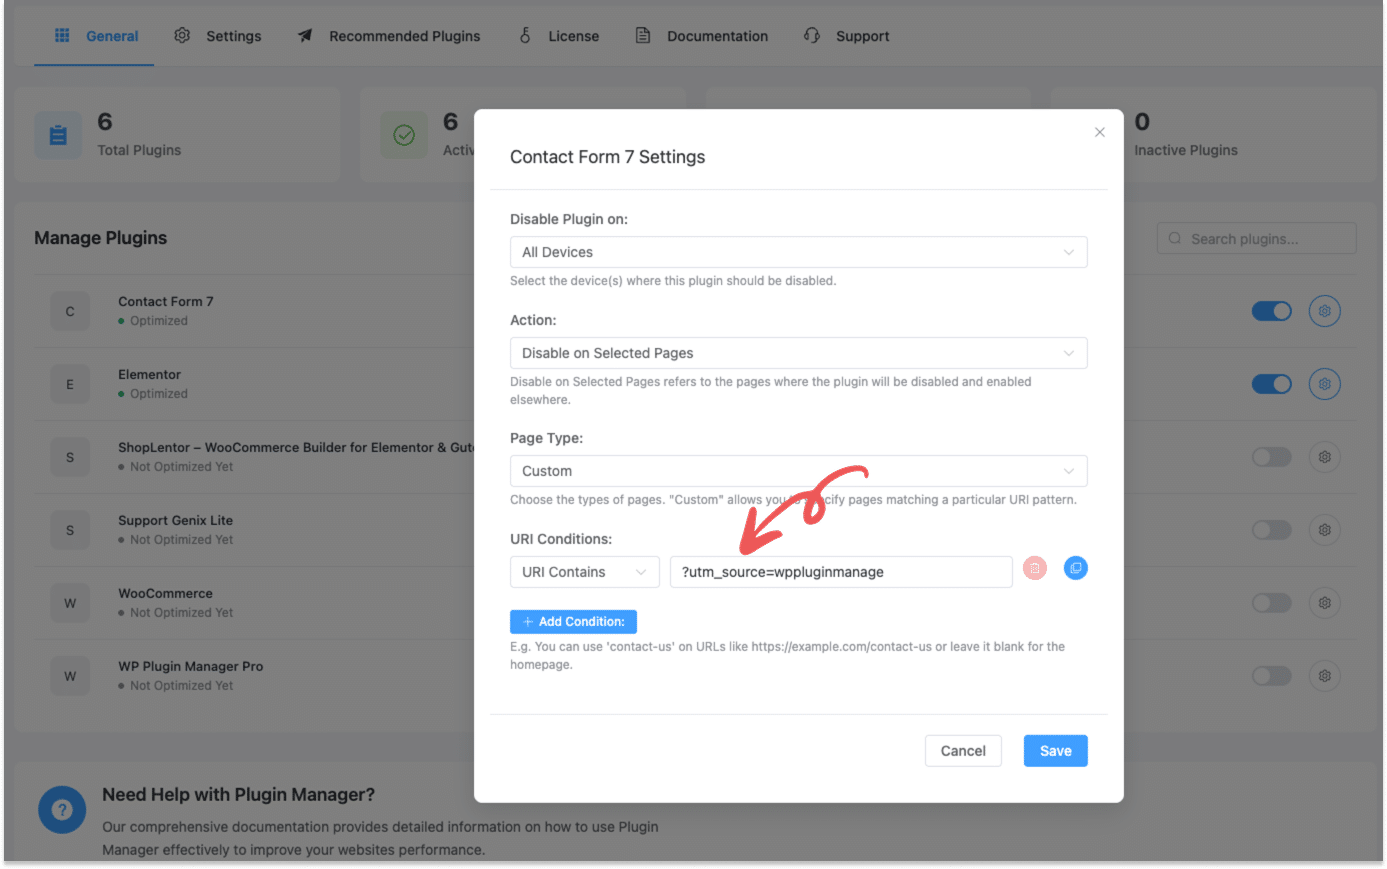
This is ideal for campaign or referral-based URLs.
4. URI Not Contains #
- Use Case: Disable plugin on all pages except those that include a specific string.
- Example:
?utm_campaign=sale - Effect: Plugin is disabled everywhere else, but not on pages containing this string.

Perfect for excluding marketing or tracking URLs from the disable logic.
Add Multiple Conditions #
- Click + Add Condition to define more than one URI rule.
- You can create flexible logic such as:
- “Disable plugin on all pages except homepage and pricing page”
- “Only disable on URLs with campaign tracking parameters”
This allows powerful and layered control over plugin visibility.
Final Step #
Once you’ve set your custom URI rules:
- Scroll to the bottom of the General tab.
- Click the Save Settings button.
Your custom logic will now take effect across your site.


