The “Select Post Type” feature in WP Plugin Manager allows you to manage plugins on custom post types—something not possible by default. Before disabling any plugin for a custom post type, you must first enable plugin management for that specific post type from the settings.
Step 1: Go to Post Type Settings #
- Navigate to Plugin Manager → Settings.
- Under the Post Types Settings section, locate the field labeled Select Post Types.
- From the dropdown, select your desired custom post types.
For example:product,woolentor-template.
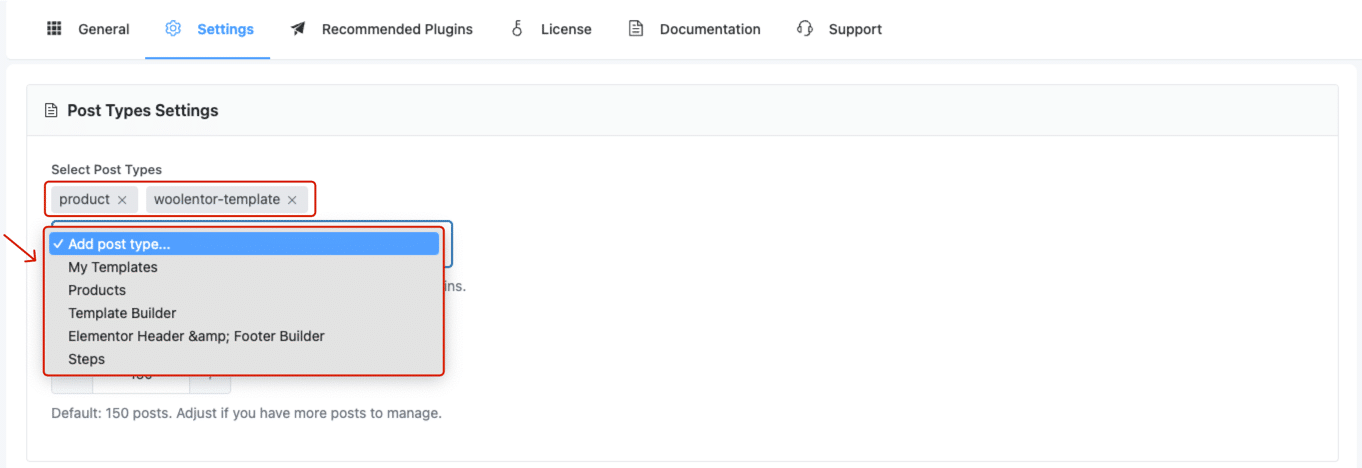
✅ Once selected, these post types become available for plugin control.
Step 2: Reload and Open General Tab #
After saving the post types:
- Reload the dashboard to apply the changes.
- Go to Plugin Manager → General.
You will now see the plugin list interface with the newly available post types included.
Step 3: Open Plugin Manage Settings #
- Locate the plugin you want to disable.
- Click the gear/settings icon beside it.
- Under the popup, switch to the Backend or Frontend tab depending on your preference.
- Under Page Type, select:
Posts, Pages & Custom Post Type.
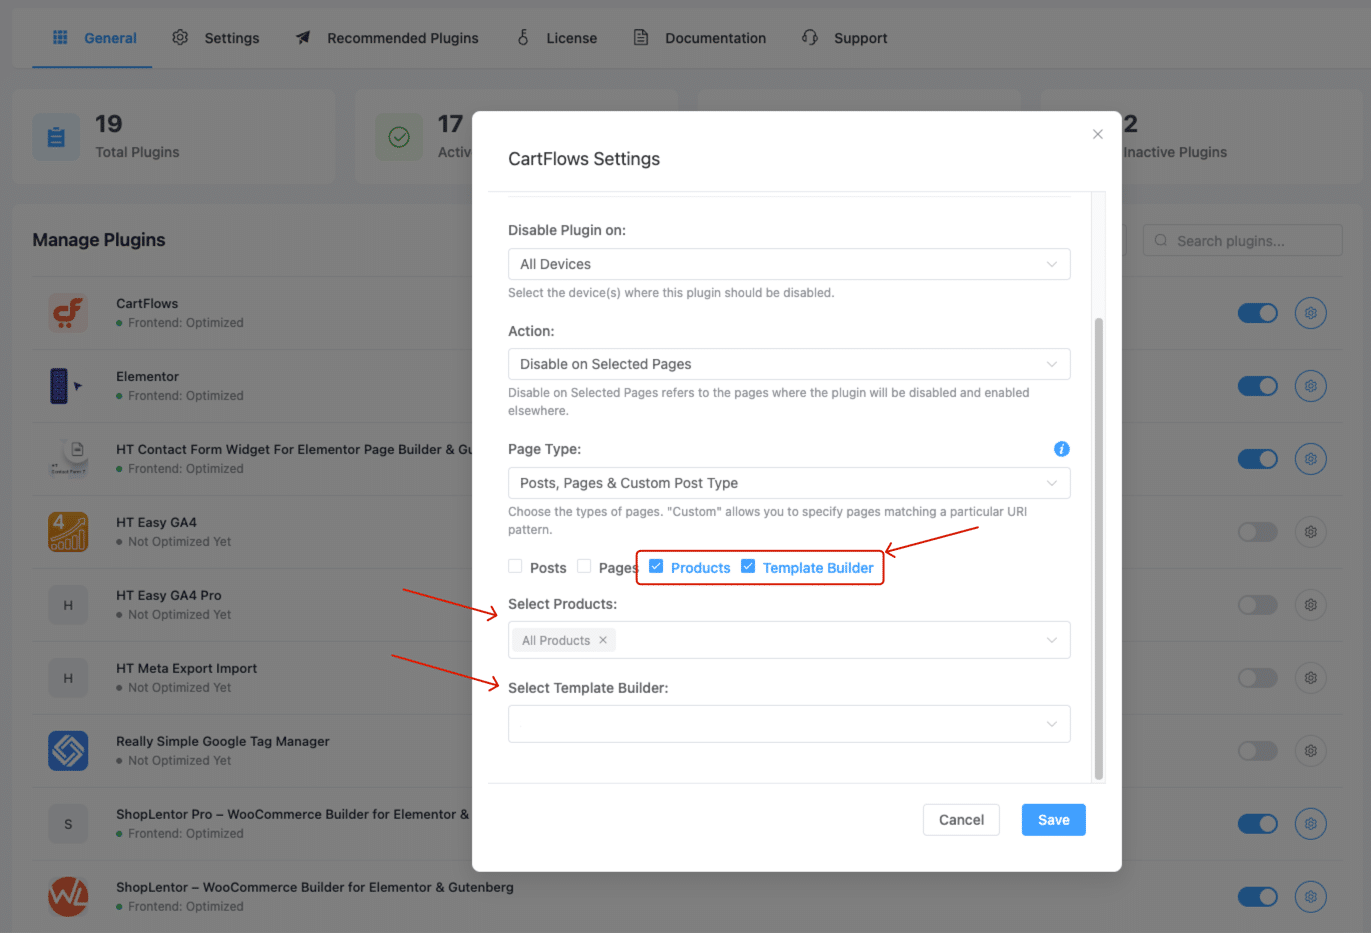
This option will reveal the selected custom post types from your earlier configuration.
Step 4: Select Post Types and Disable Plugin #
- You’ll see checkboxes for the post types you previously added (e.g.,
Products,Template Builder). - Check the specific post types you want to disable the plugin on.
- If available, use the dropdowns to further filter by specific products or templates.
- Click Save to apply the settings.
Summary #
The “Select Post Type” feature is essential if you want to manage plugins on custom content types like WooCommerce products or Elementor templates. This flexible control helps optimize performance and plugin behavior on specific parts of your site.


