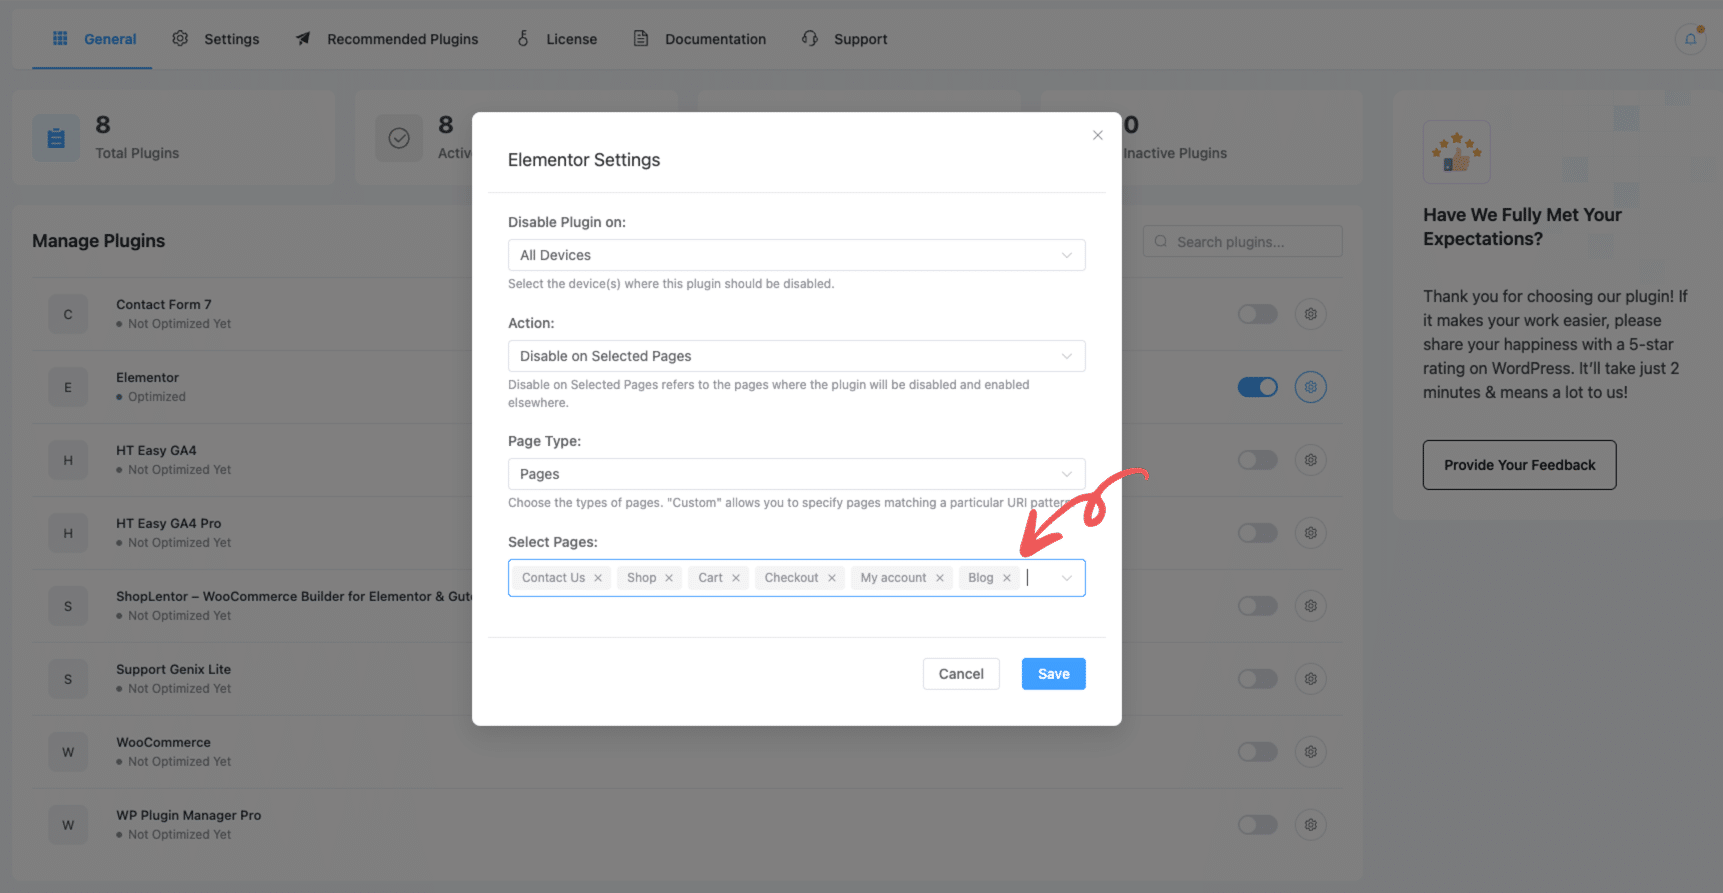
Disable Plugins on Specific Pages #
To disable a plugin on selected pages (like Contact, Shop, Blog, etc.), follow these steps:
- In the Manage Plugins screen, click the settings icon (⚙️) next to the plugin you want to configure.
- In the popup settings window:
- Set Disable Plugin on to your preferred devices (e.g., All Devices).
- Set Action to:
Disable on Selected Pages - Under Page Type, choose:
Page, orPost And Pages, orPost And Pages & Custom Post Type
- In the Select Pages field, search and select the pages where you want to disable the plugin (e.g.,
Contact Us,Shop,Blog, etc.).
- Click Save to apply the changes.
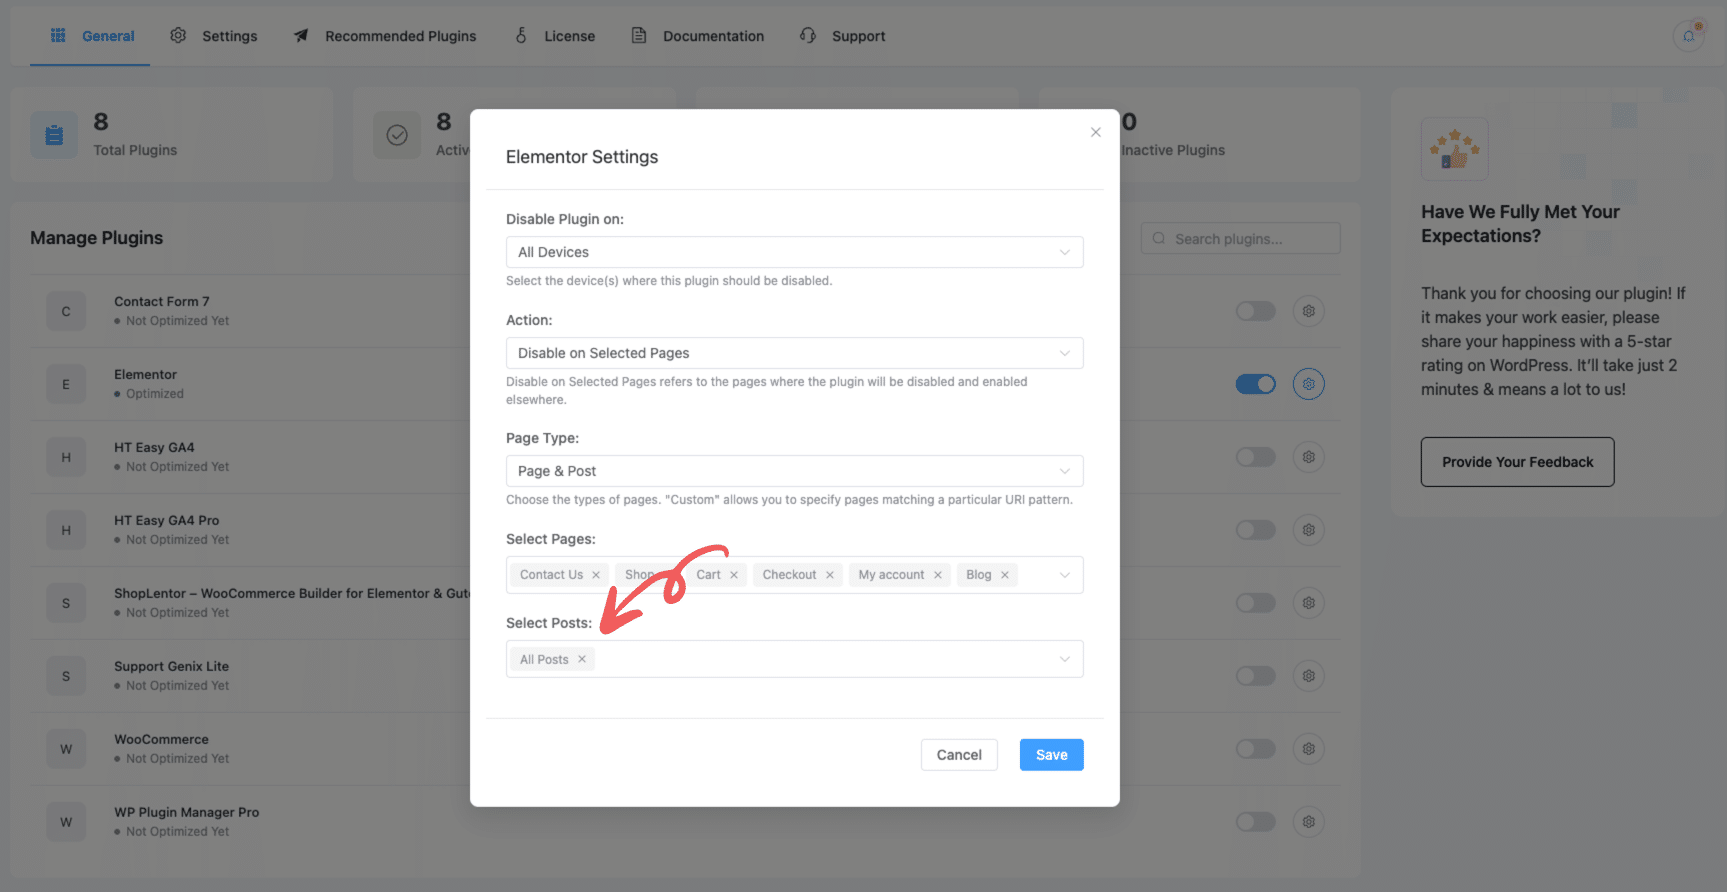
Disable Plugins on Specific Posts #
If you want to disable a plugin for selected blog posts or any specific post:
- Follow the same steps as above.
- Under Page Type, select:
Post, orPost And Pages, orPost And Pages & Custom Post Type
- Scroll to the Select Posts section and choose the individual posts you want to target.
- Click Save.
Disable Plugins Based on Custom Post Types #
To disable or remove plugins associated with unused custom post types, follow these updated steps using the WP Plugin Manager plugin:
Step 1: Set Page Type to “Post, Pages & Custom Post Type” #
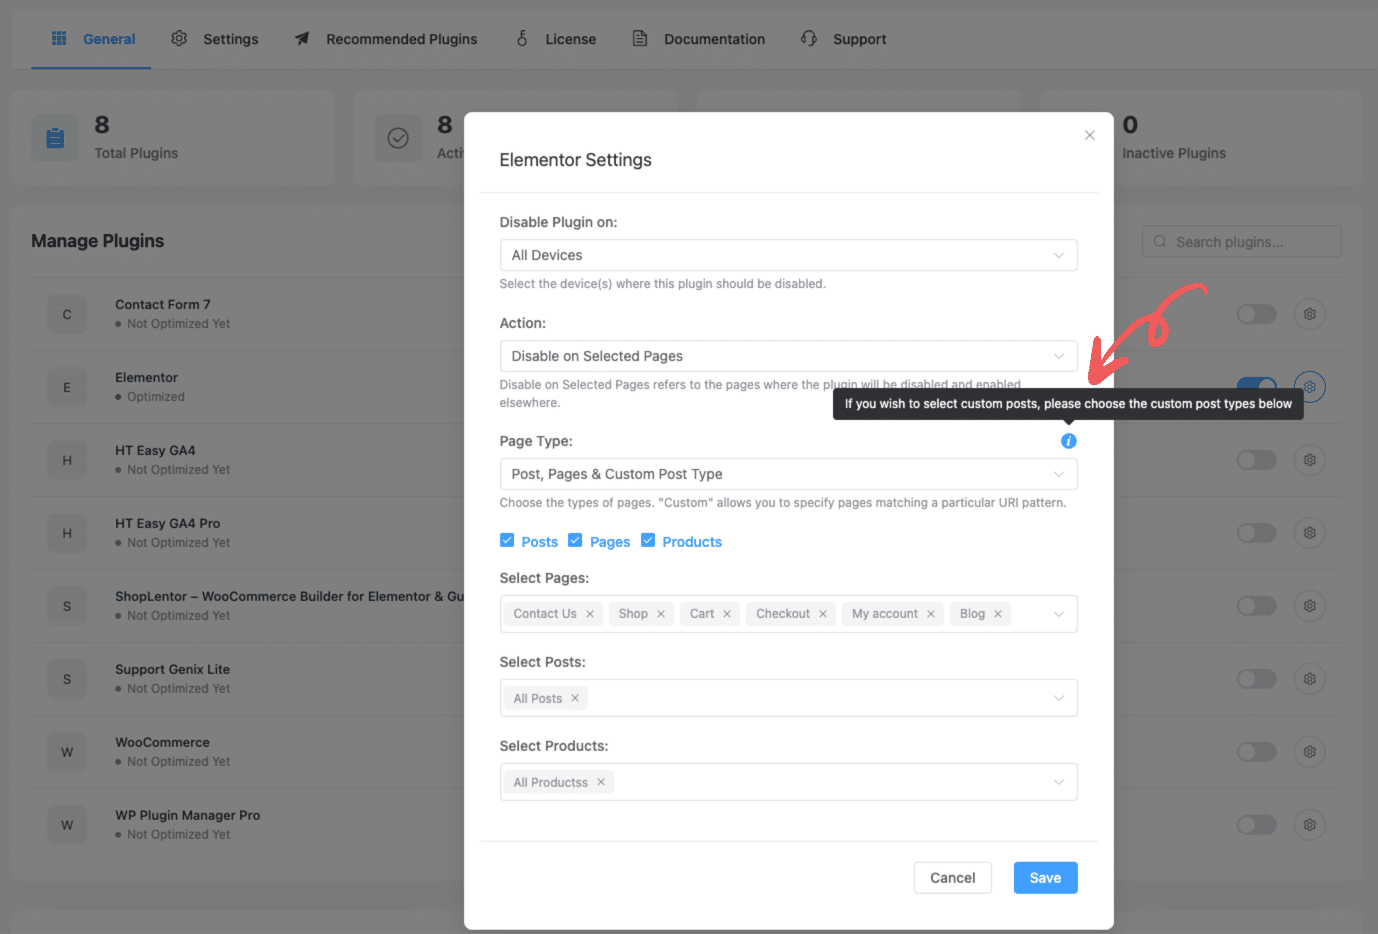
- Go to the plugin settings and open the configuration for the desired plugin (e.g., Elementor).
- In the Elementor Settings modal:
- Set “Disable Plugin on” to your preferred device(s) (e.g., All Devices).
- Set “Action” to Disable on Selected Pages.
- For Page Type, choose:
Post, Pages & Custom Post Type
- Make sure to check the boxes for
Posts,Pages, or other post types as needed. - Click Save to apply this setting.
Step 2: Select Custom Post Types from the Settings Tab #
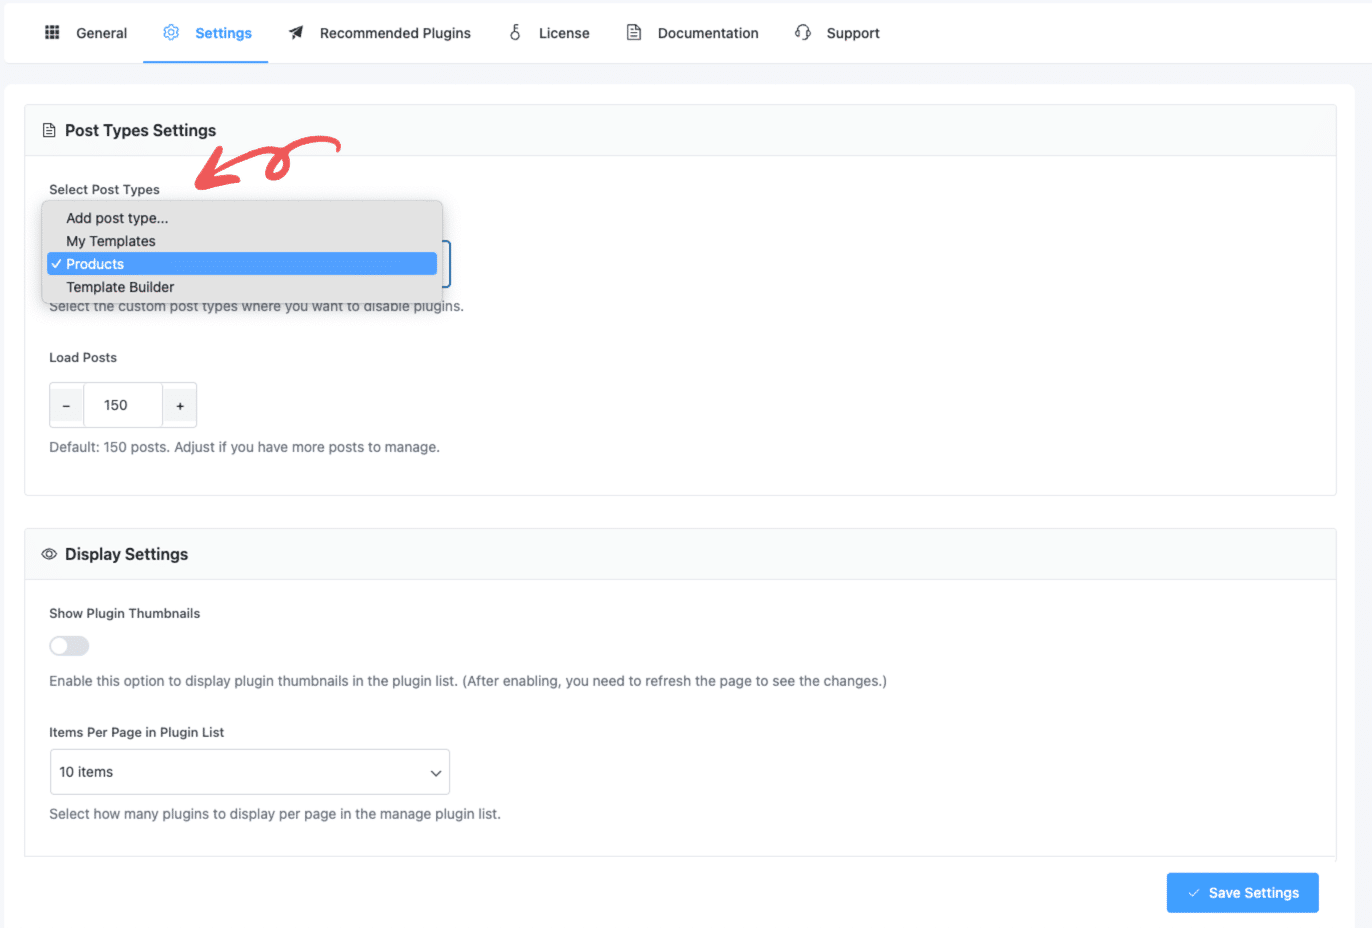
- Now, navigate to the Settings tab at the top.
- Under Select Post Types, choose the specific custom post types you want to include (e.g.,
Products,Template Builder, etc.). - Click Save Settings to finalize your changes.
By completing both steps above, WP Plugin Manager will disable the selected plugin(s) for the specified post types effectively.
Verify Plugin is Disabled #
After applying the settings, ensure the plugin’s CSS/JS assets are no longer loading on the disabled pages or posts. This confirms the plugin is successfully deactivated for those targets.


