Configure the popup form response to show a message to your users in an interactive popup. It will inform users whether their form submissions are successful or not.
Enable The Popup Form Response Extensions #
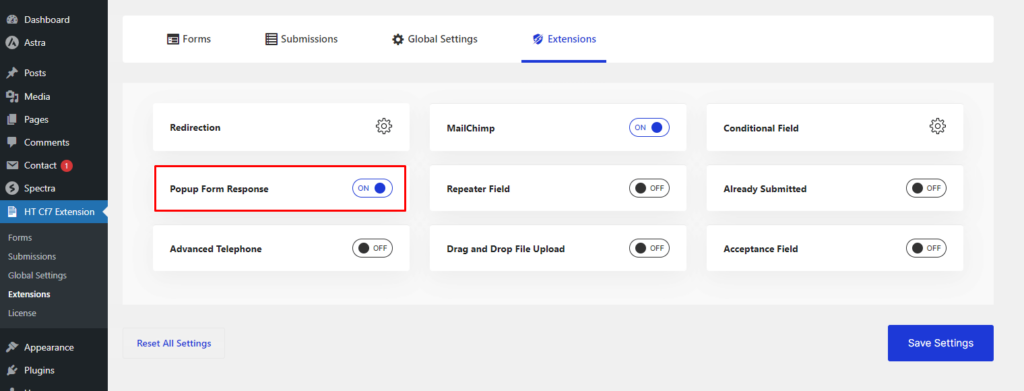
To enable the “Popup Form Response” extension, first, visit the “HT CF7 Extension” menu from your WordPress dashboard.
Then open the “Extensions” tab, and you will notice an option to turn on the “Popup Form Response” extension.
All you have to do is turn on the switcher to enable the extension and save the settings.
Configure the Popup Response on the form. #
In this step, you will learn how to activate the popup response in a particular contact form.
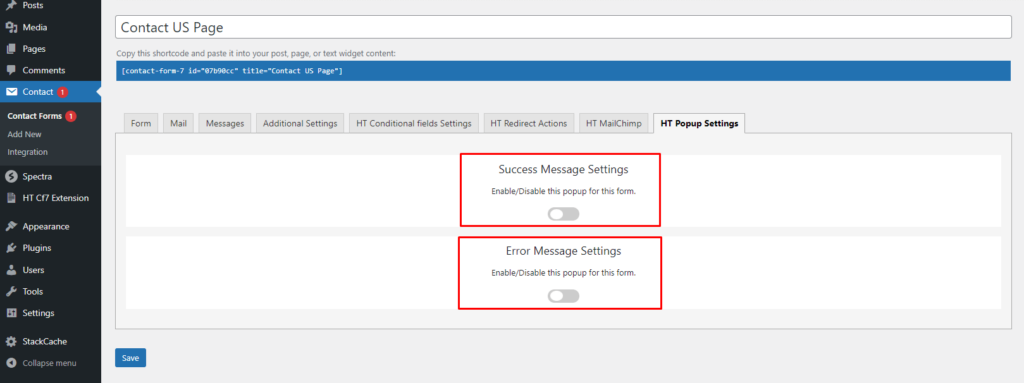
First, open the contact form where you want to enable the popup response. Once you open the form, it will take you to the edit screen.
There will be a new tab named “HT Popup Settings“, where you can enable the popup for your form.
You can also choose what type of popup messages will appear once a user submits the form.
Enable the popup message settings. #
After you enable the settings for success or error popup message, some necessary options will appear. You can leverage these options to configure the settings for the popup messages.
General Settings #
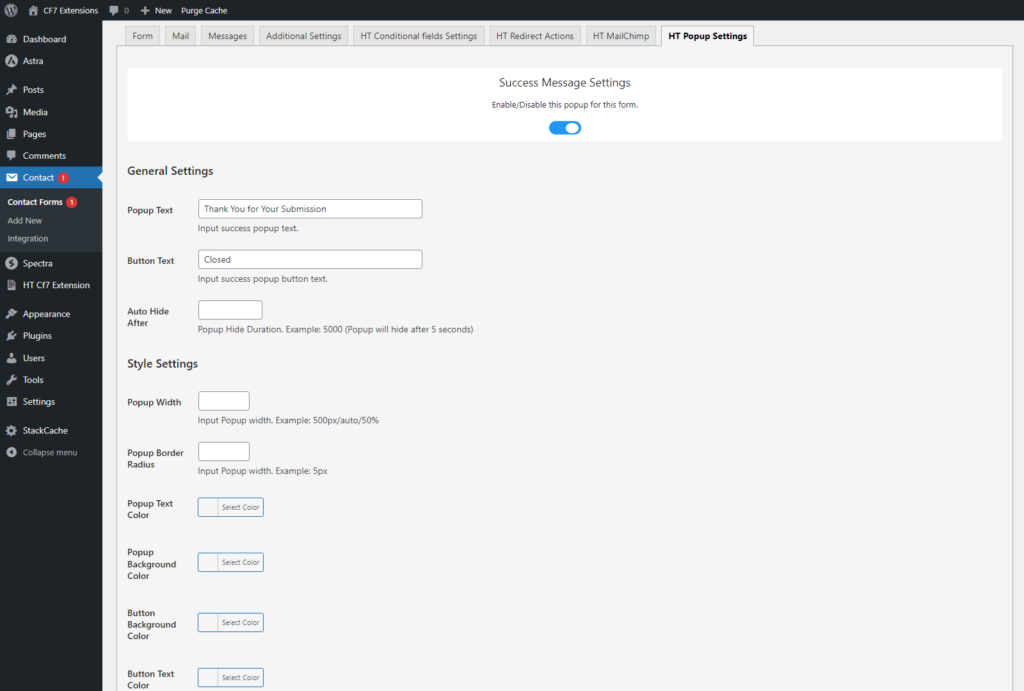
General settings include the following options that enable you to configure some primary popup settings.
- Popup Text: Insert a text or message you want to display in the popup.
- Button Text: Insert a text for the popup button.
- Auto Hide After: Set a specific time duration after which the popup message will automatically disappear. e.g. 1000 = 1 sec.
Style Settings #
When it comes to customizing the popup appearance, the options from the Style settings come into play.
- Popup Width: Set a popup width in pixels or a percentage. You can also keep the width to “Auto”. e.g. 500px / 50% / Auto
- Popup Border Radius: Add a border radius to your popup in pixels if you want to create rounded corners around the popup border. e.g. 5px
- Popup Border Color: Set a border color for the popup.
- Popup Text Color: Control the text color of the popup message.
- Popup Background Color: If you need to design a popup with a particular background color, you can choose a popup background color.
- Button Background Color: Set a background color for the button that closes your popup.
- Button Text Color: Set a color for the close button text of your popup.
After configuring the settings above, please make sure to save the changes.
After you finish setting up the Popup Form Response Extension #
After the popup form response extension added on the form then you can see the a popup message after submission the form. If you setup both Success and Error Message then you have seen it when form submission is successful you have seen a success popup or if your submission is not successful you can see a error popup.
Once you are done configuring the “Popup Form Response” extension for any of the contact forms, a popup message will appear after submitting the form.
If you set up both success and error messages for the popup, a popup message will be displayed when a user submits the form. A success message will appear for successful submissions, and an error message will appear for failed ones.


