Installation and Activation Guide #
Streamline the installation process with our user-friendly guide. Follow these step-by-step instructions to seamlessly integrate the plugin into your WordPress platform, enhancing your website's functionality and performance effortlessly.
1. Manual Installation #
To manually install WP Plugin Manager, follow these steps:
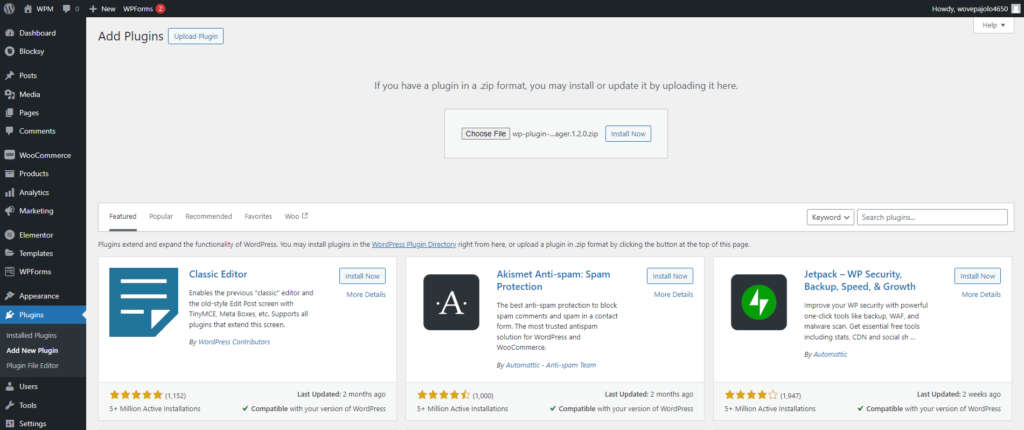
- Download the Plugin Zip File: Visit the WP Plugin Manager and download the plugin zip file to your local machine.
- Log in to Your WordPress Admin Dashboard: Navigate to your WordPress admin dashboard and go to the “Plugins” section.
- Click on “Add New”: In the Plugins section, click the “Add New” button at the top of the page.
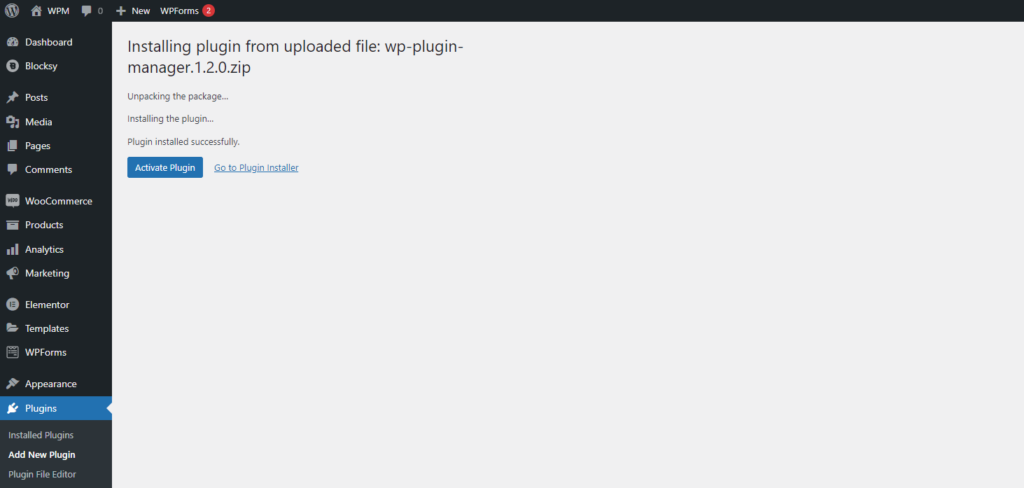
- Upload the Plugin: Click the “Upload Plugin” button. Select the WP Plugin Manager plugin zip file you downloaded and click “Install Now.”
- Activate the Plugin: After the installation is complete, click “Activate Plugin” to activate WP Plugin Manager on your WooCommerce store.
2. Installing from WordPress Directory #
To install WP Plugin Manager from the WordPress plugin directory:
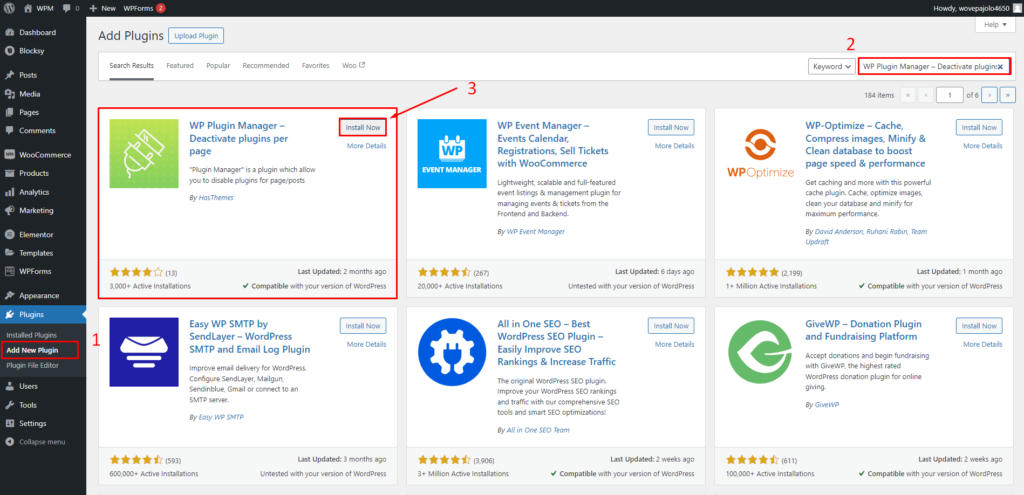
- Navigate to your WordPress dashboard and access the “Plugins” menu.
- Inside the “Plugins” menu, select the “Add New” submenu.
- In the search bar, input “WP Plugin Manager – Deactivate plugins per page” and hit Enter.
- Locate the “WP Plugin Manager – Deactivate plugins per page” plugin in the search results and click on the “Install Now” button.
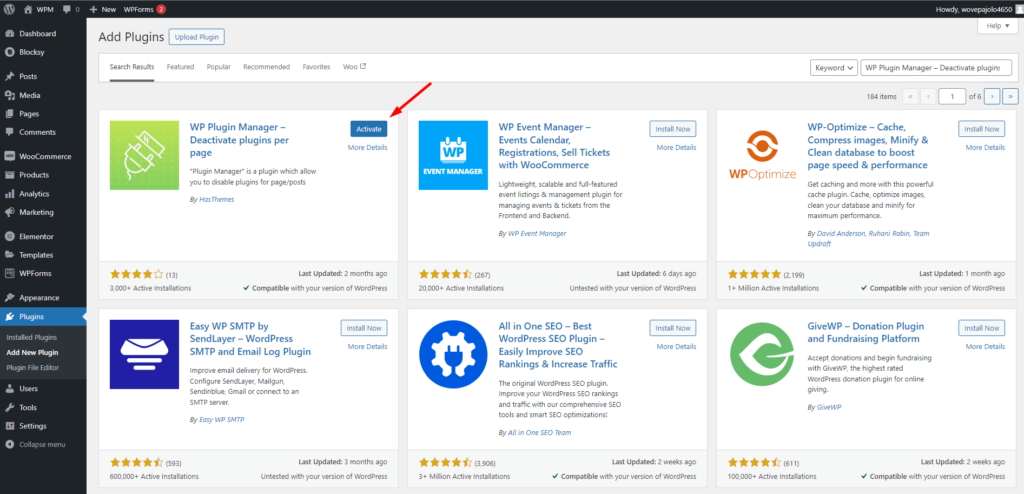
- Once the plugin is successfully installed, click on the “Activate” button to activate it.
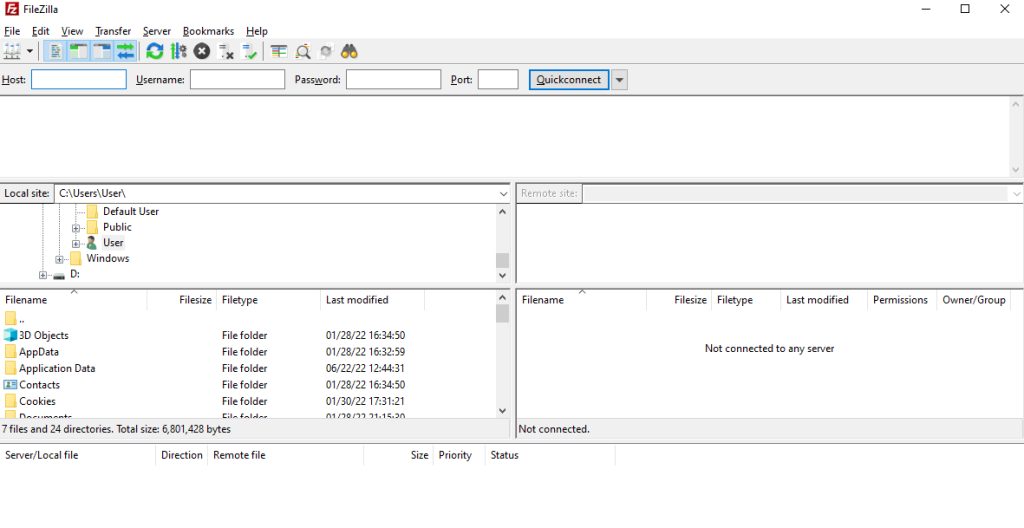
3. Install the Plugin Using FTP Client #
To install WP Plugin Manager using an FTP client, follow these steps:
- Download the Plugin Zip File: Visit the official WP Plugin Manager plugin page and download the plugin zip file to your local machine.
- Extract the Plugin Folder: Extract the downloaded zip file to obtain the WP Plugin Manager plugin folder.
- Connect to Your Server via FTP: Use an FTP client (e.g., FileZilla, WinSCP, Cyberduck, etc) to connect to your web server.
- Upload the Plugin Folder: Navigate to the wp-content/plugins/ directory on your server and upload the WP Plugin Manager plugin folder.
- Activate the Plugin: Log in to your WordPress admin dashboard, go to the “Plugins” section, and find WP Plugin Manager. Click “Activate” to activate the plugin.
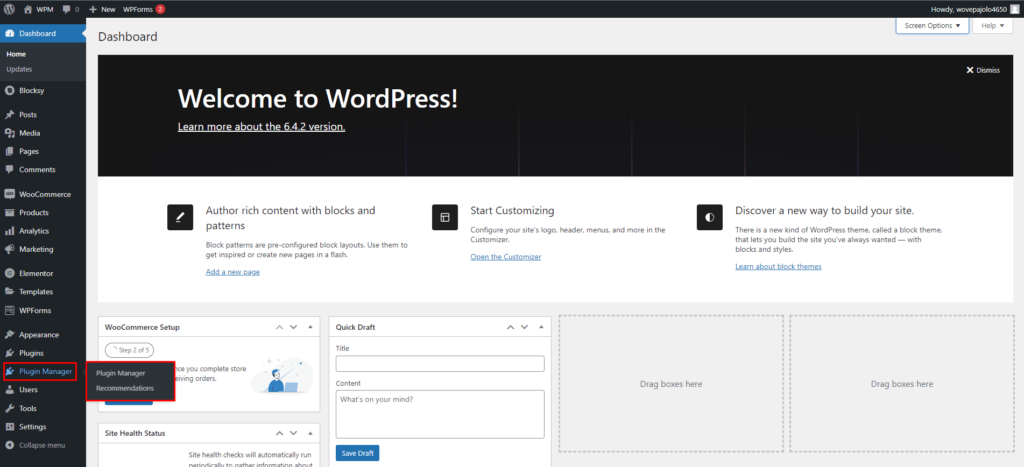
Upon activation, a new menu labelled “Plugin Manager” will appear in your WordPress dashboard, granting you access to the plugin's features and settings.
System Requirements #
- WordPress 5.0 or Higher
- PHP version 7.2 or greater
- MySQL version 5.6 or greater OR MariaDB version 10.0 or greater
Recommended PHP Configuration Limits #
Many issues that you may run into such as: white screen, demo content fails when importing, empty page content and other similar issues are all related to low PHP configuration limits. The solution is to increase the PHP limits. You can do this on your own, or contact your web host and ask them to increase those limits to a minimum as follows:
- max_input_vars = 3000
- memory_limit = 128M
- max_execution_time = 300
- max_input_time = 300
- upload_max_filesize = 64M
- post_max_size = 64M


