Navigate through this documentation to gain insights into configuring the plugin effectively. Follow the simple steps to tailor it to your specific needs and optimize its functionality.
After activating the “HT Easy Ga4” plugin, you will get a new menu called “HT Easy Ga4”. Click on this menu to the settings page and configure the plugin settings.
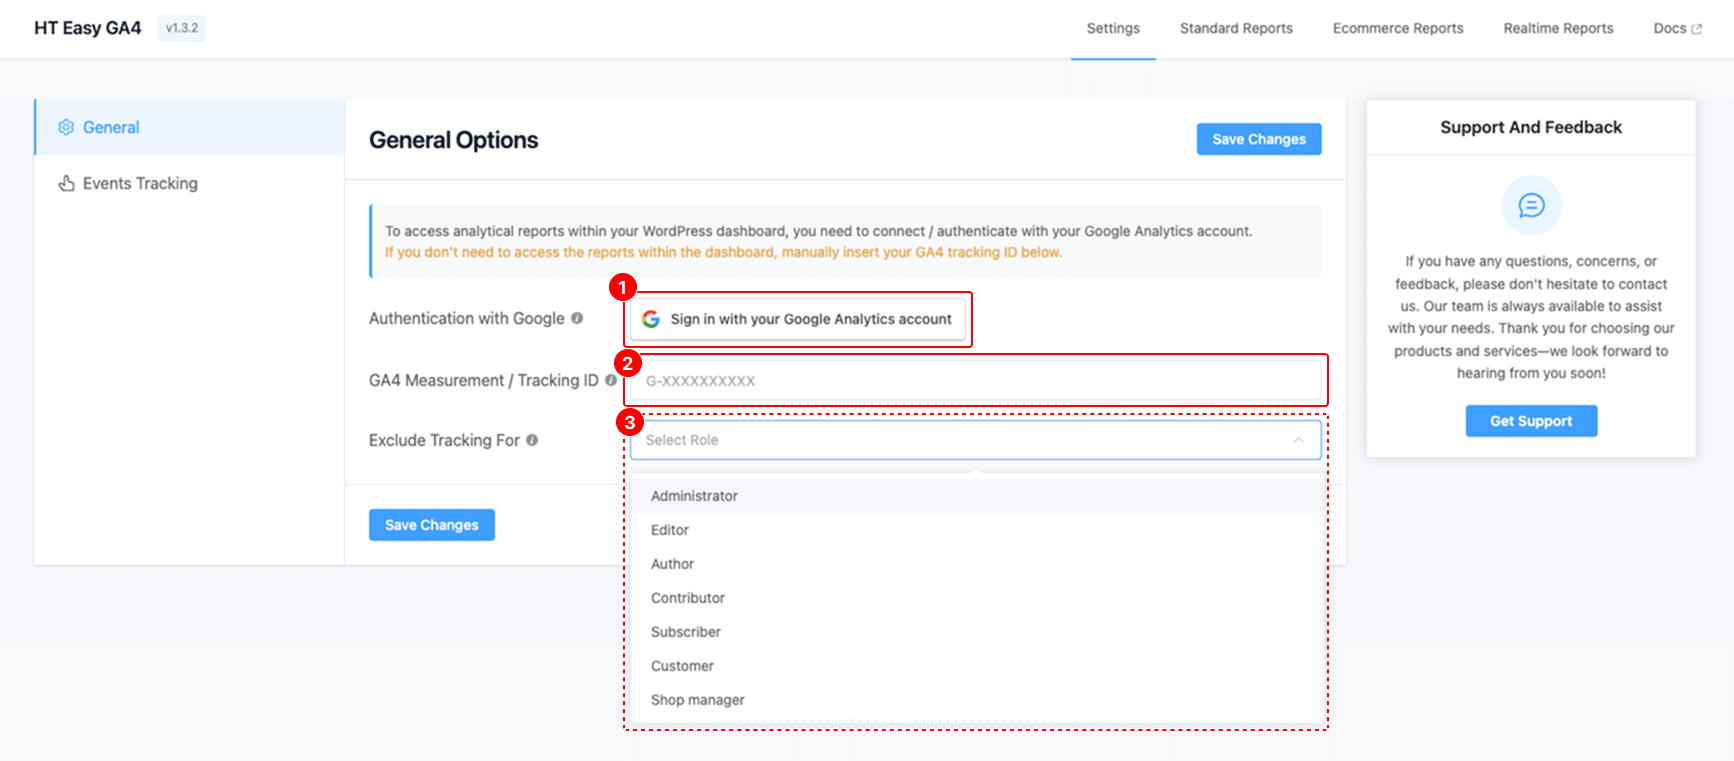
1. Authentication with Google #
Click the “Sign in with your Google Analytics account” button to connect the plugin with your Google account. A new window will open, prompting you to log in and grant access.
- If you're already logged in, simply select your preferred Google Analytics account.
- This connection enables the plugin to fetch available GA4 properties and provide access to reporting features within WordPress.
2. GA4 Measurement / Tracking ID #
Enter your GA4 Measurement ID (e.g., G-XXXXXXXXXX) in this field.
- This step automatically adds the GA4 tracking script to your website’s
<head>section. - While you can add the ID manually, it is recommended to first authenticate with Google. This ensures:
- Seamless ID selection from your account
- Enhanced access to plugin-integrated reports
3. Exclude Tracking For #
This dropdown allows you to exclude specific WordPress user roles from being tracked.
- For example, selecting “Administrator” or “Shop Manager” ensures their visits and actions are not recorded in GA4.
- Helps keep analytics data clean by omitting internal traffic.
Available roles:
- Administrator
- Editor
- Author
- Contributor
- Subscriber
- Customer
- Shop manager
2. Click on this button to sign in with Google. This will open a new window where you can sign in to your Google account using your username and password. If you are already logged in, you will be able to select the account that you are currently using.
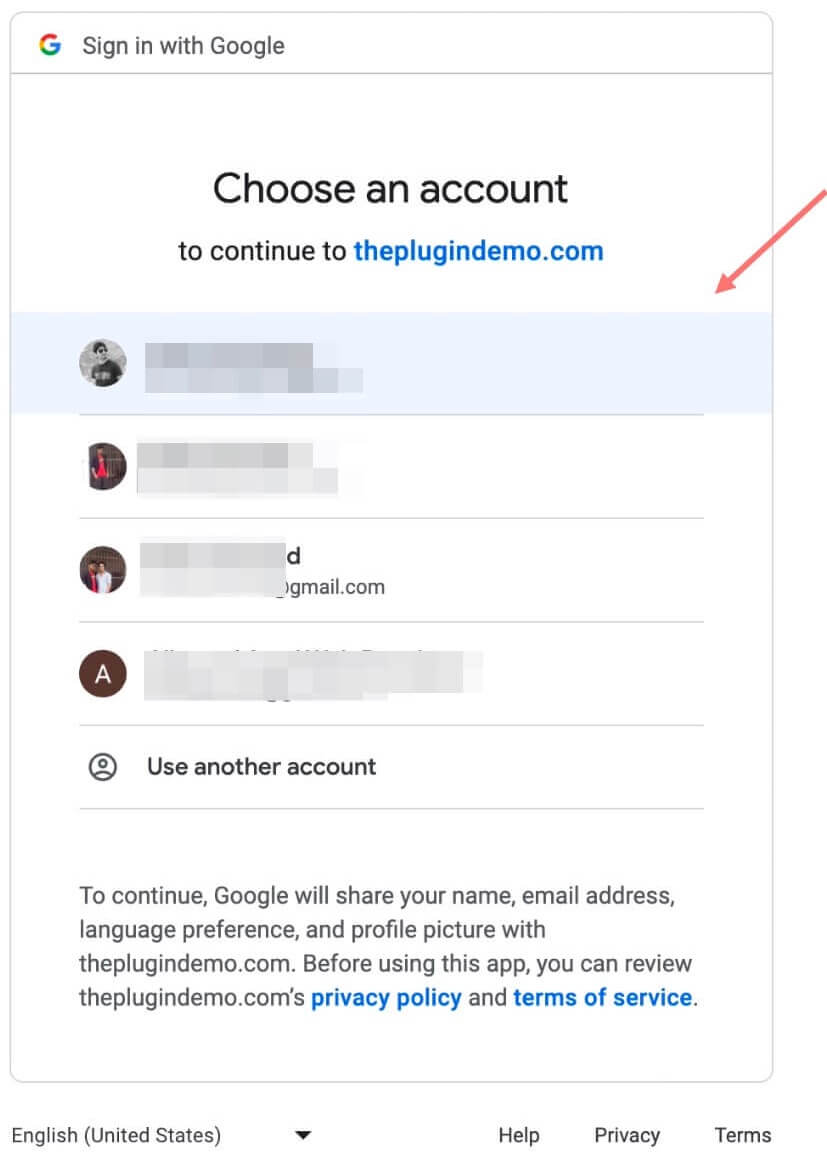
Select the account that is associated with your Google Analytics.
Authorize Access to Our Plugin #
Grant our plugin secure read-only access to your Google Analytics account so we can turn raw data into easy-to-understand visualizations and actionable recommendations that help you make better decisions to increase your website traffic, leads, and revenue
Step 1: Log in with Google or Manually Set Measurement ID
Step 2: Authorize Access to Our Plugin
Step 3: Choose your Property and Configure Events
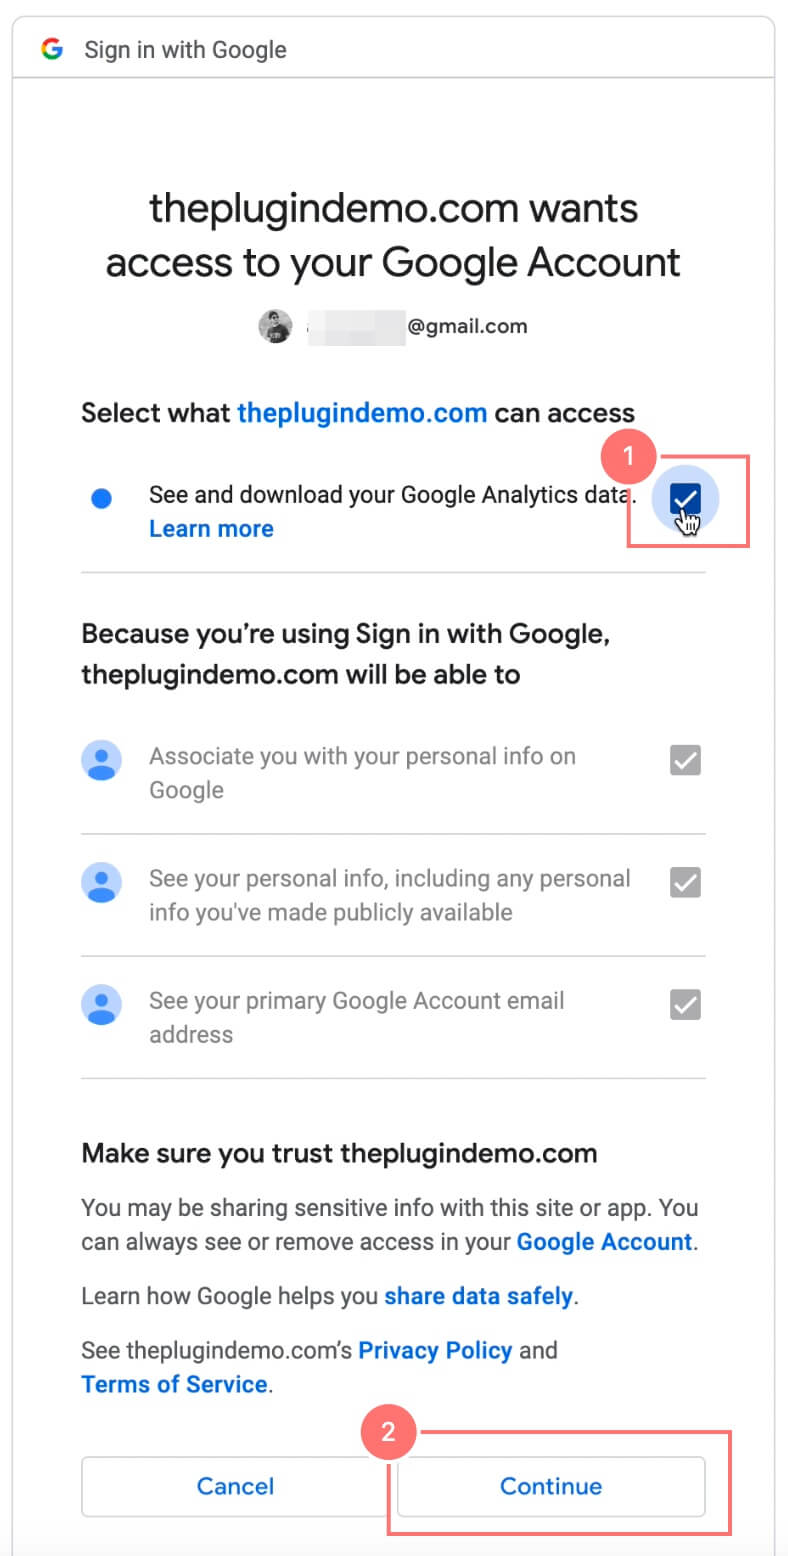
- Check the box to allow the plugin to connect with Analytics.
- Click on the Continue button after granting access.
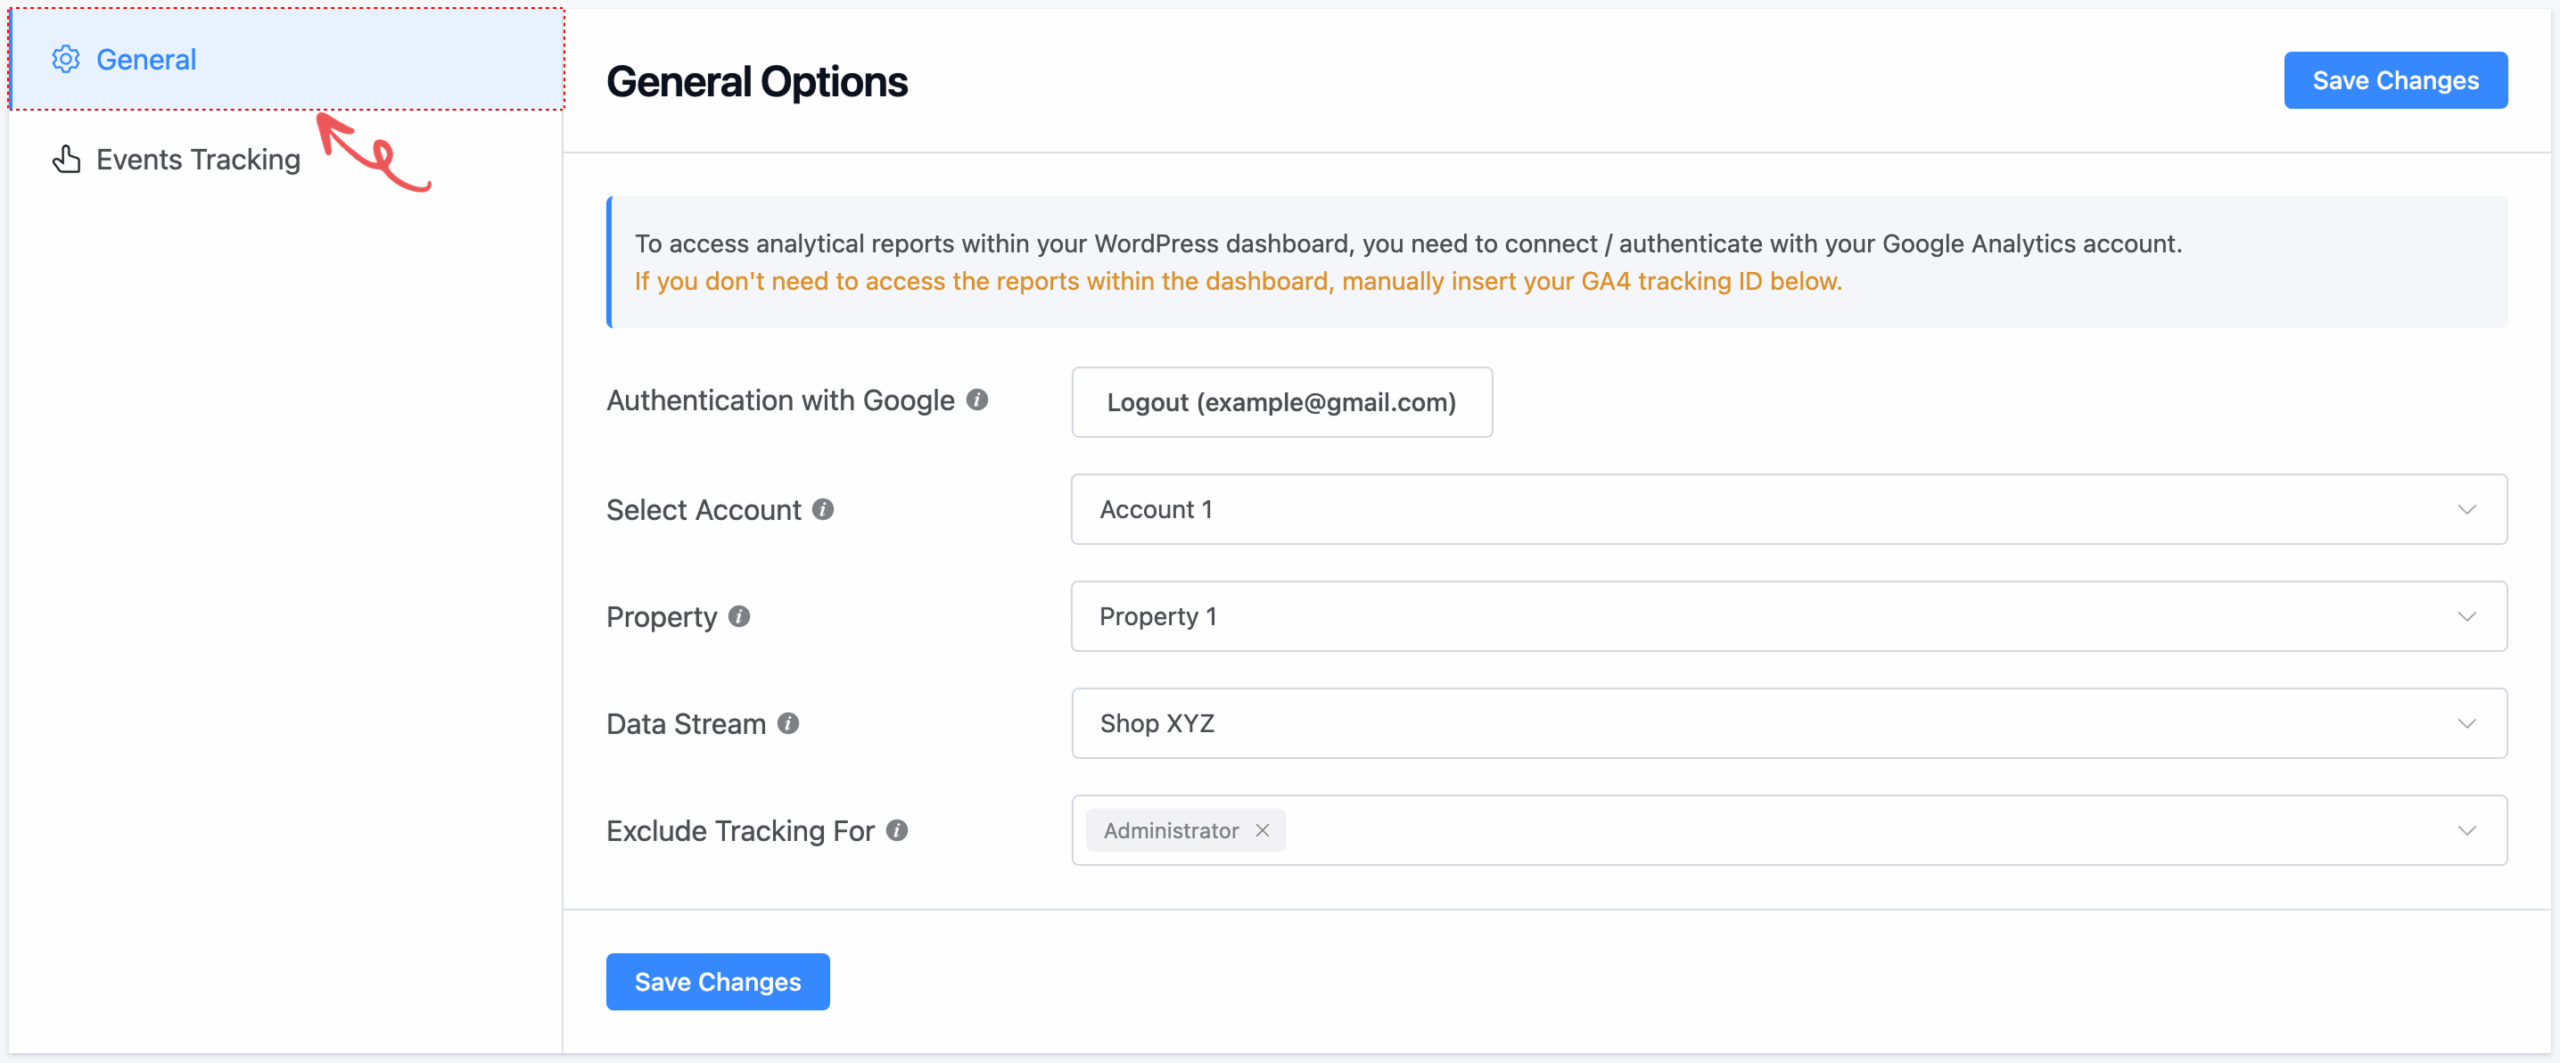
1. Authentication with Google #
After signing in, your connected email address will appear alongside a “Logout” button.
This confirms the plugin is successfully authenticated with your Google Analytics account.
- Click Logout to disconnect the plugin from Google Analytics if needed.
2. Select Account #
Use the Account dropdown to choose the Google Analytics account you wish to use.
- Once selected, the plugin will load the properties associated with that account.
3. Select Property #
Choose the GA4 property from the dropdown menu.
- After selecting a property, all linked measurement IDs (data streams) will become available for selection.
4. Select Data Stream (Measurement ID) #
Choose the specific Data Stream you want to track from the available list.
- This ensures accurate and relevant data collection for your chosen property/site.
5. Exclude Tracking For #
This option allows you to exclude specific user roles (e.g., Administrator, Editor) from being tracked in Analytics.
- Excluding roles like Admins helps maintain clean and accurate data by filtering out internal traffic.
6. Save Changes #
After configuring all options, click Save Changes to apply them.
- The plugin will insert the GA4 tracking script into your site's header automatically.
- If you were previously using custom tracking code or another plugin, you may now remove those to avoid duplicate tracking.
1. Enable E-Commerce Events (Pro) #
Toggle this option to enable enhanced eCommerce tracking on your site.
⚠️ Note: You must have the Pro version of both the HT Easy GA4 plugin and WooCommerce activated to use this feature.
Once enabled, you’ll be able to track valuable customer actions like product views, cart additions, and purchases.
2. E-Commerce Events #
- View Product: Triggered when a user views a single product page. Helps determine product popularity and interest.
- View Category: Triggered when a user views a category archive. Useful for identifying popular product groups.
- Add to Cart: Triggered when an item is added to the cart. Helps analyze buyer intent and optimize upsell strategies.
- Initiate Checkout: Triggered when a customer starts the checkout process. Useful for identifying abandonment points.
- Purchase: Triggered upon successful order placement. Allows tracking of sales performance and revenue generation.
3. Video Events #
Monitor how visitors engage with video content on your site:
- Vimeo Video: Tracks playback of embedded Vimeo videos on your site.
- Self-Hosted Video: Tracks play activity for videos hosted directly on your WordPress site.
These insights help gauge the effectiveness of multimedia content in capturing user attention and conveying messages.
4. Audio Events #
Track interaction with audio content on your site:
- Self-Hosted Audio: Tracks playback of audio files hosted locally on your website. Useful for podcasts, product walkthroughs, or announcements.
✅ Final Step #
Click “Save Changes” after making your desired event tracking selections.


