
How to add Google Analytics to WordPress Website
Aslam Hasib
- Reader Disclosure Reader Disclosure: Some of the posts on our site may contain affiliate links. Clicking may earn us a commission at no extra cost to you. Thank you for your support! Read our Disclosure
Want to add Google Analytics to WordPress site? You’re in the right place.
Setting up Google Analytics on a WordPress website is a straightforward process that anyone can complete in just a few minutes.
Google Analytics for WordPress websites provides essential insights into your site’s performance. It helps you understand user behavior, track conversions, and make data-driven decisions to improve your site’s performance.
Once set up, you can even change business objectives in GA4 to ensure your tracking aligns with your evolving business goals.
With over 3.5 million websites in the US using Google Analytics 4, it’s become the standard for website tracking and analysis.
In this guide, we’ll show you exactly how to add Google Analytics to WordPress, with clear step-by-step instructions that work for both beginners and experienced users.
Why Do You Need Google Analytics?
If you’re running an online business, understanding your website’s performance is essential for growth. Google Analytics for WordPress sites provides detailed insights into user behavior. It helps you optimize your eCommerce marketing strategy effectively.
- Track user behavior and demographics: Implementing Google Analytics on WordPress websites helps you monitor visitor trends and better understand your target audience’s preferences, interests, and browsing patterns.
- Boost sales and conversions: Businesses leveraging data analytics have seen up to a 15% increase in sales by identifying and resolving bottlenecks in the customer journey.
- Analyze website performance: Track crucial metrics like bounce rates and session duration to understand how users interact with your site. It helps you improve the user experience and reduce cart abandonment.
- Measure marketing campaign ROI: Monitor the performance of different marketing channels and campaigns to ensure your marketing budget is spent effectively, maximizing return on investment.
- Enhance SEO strategies: Find top-performing keywords and optimize your content to boost organic traffic by up to 30%, improving your search engine rankings.
- Make data-driven decisions: Organizations with advanced data and analytics maturity have seen increased revenue, underscoring the value of informed decision-making.
Using Google Analytics on WordPress websites delivers clear insights into your audience and traffic sources. A data-driven eCommerce marketing strategy helps your business stay effective and outperform your competitors.
How to Sign up for Google Analytics?
To use Google Analytics on your WordPress website, you will need to sign up for Google Analytics. There are a few simple steps to sign up.
Step 1. Sign Up for Google Analytics
Go to the Google Analytics website at analytics.google.com. Log in with your Gmail account to enable Google Analytics tracking on your site. If you don’t have a Gmail account, create one first. Once logged in, you’ll be directed to the Google Analytics homepage.
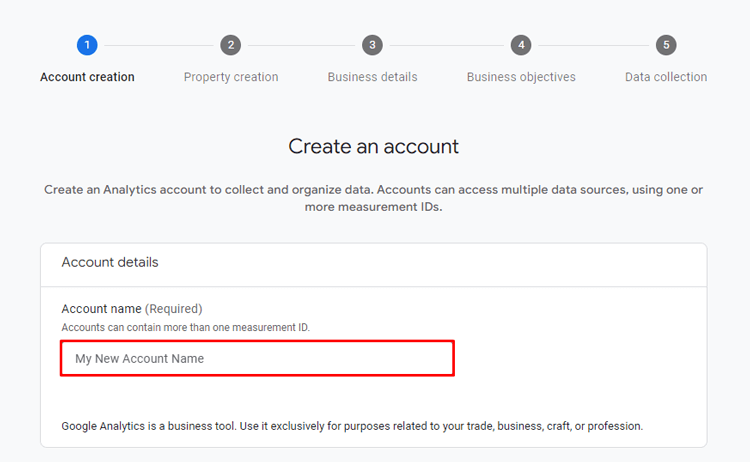
Step 2. Set Up an Account
Click the “Start Measuring” button and create an account on the following page.
Provide a name for your account. If you intend to monitor multiple websites or properties within the same account, opt for a general name like your business name.
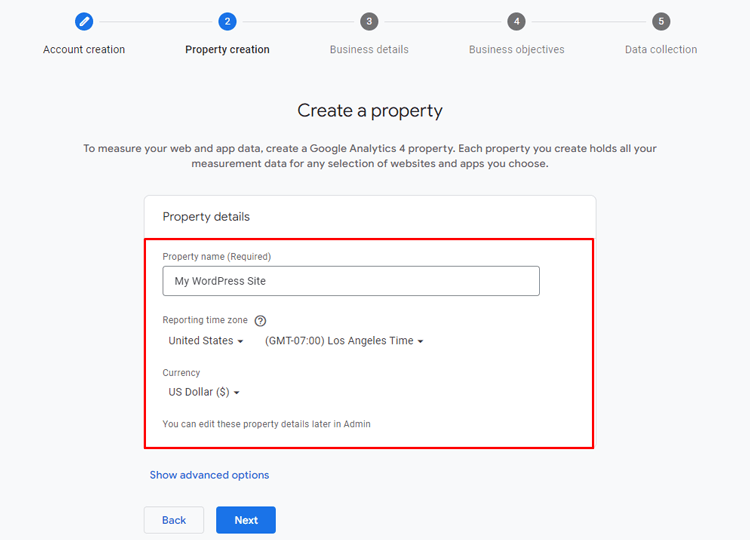
Step 3. Set Up Analytics Property
Once your account is set up, you will proceed to configure the Analytics property. Provide your website’s name, choose the correct time zone, and select the currency based on your business’s location.
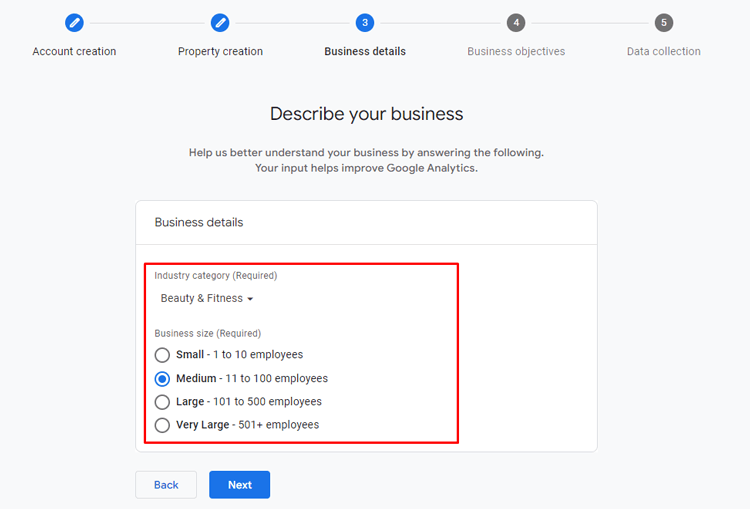
Google Analytics will inquire about your business and its platform usage. Answer these queries thoughtfully.
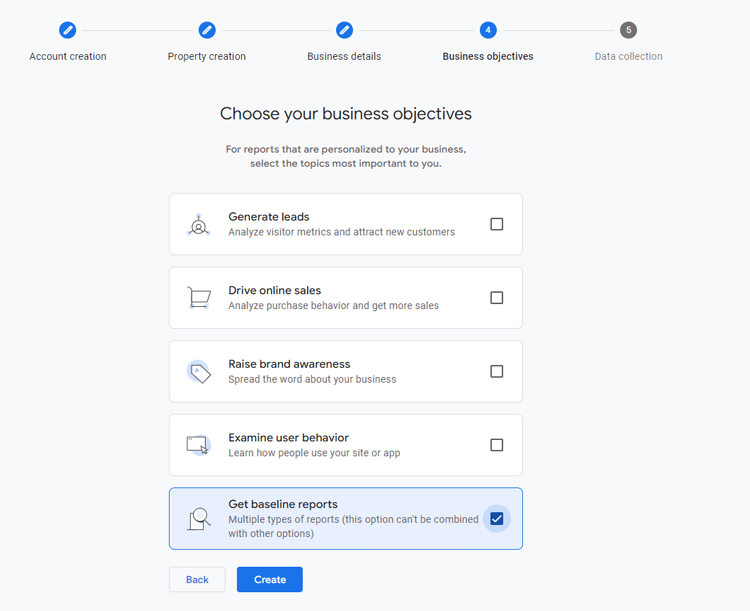
Choose your most suitable topic from the list of business objective topics.
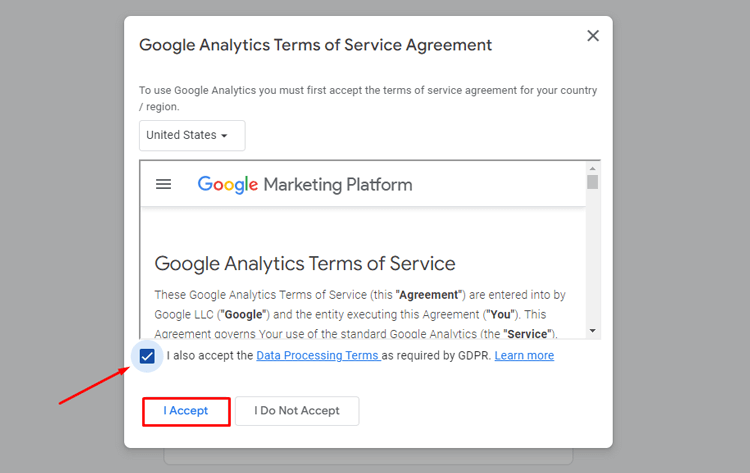
Step 4. Consent to Terms and Receive Email Communications
Please review the terms of service and privacy policy before agreeing to them. You have the option to opt in for email communications from Google Analytics if you desire.
Step 5. Choose Web Stream
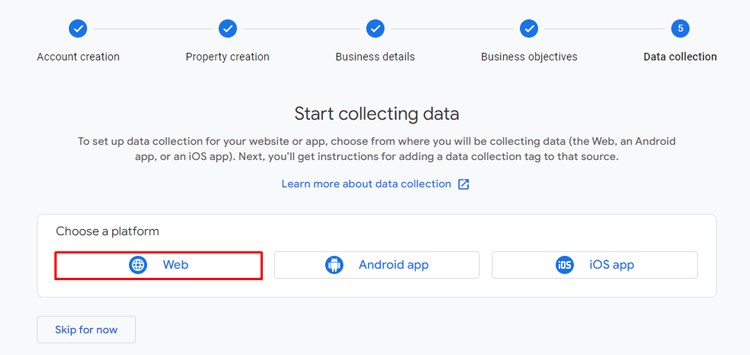
When connecting Google Analytics to your WordPress site, choose “Web” as the stream type.
- Input your website’s URL and assign a name for the data stream (often your WordPress site’s name).

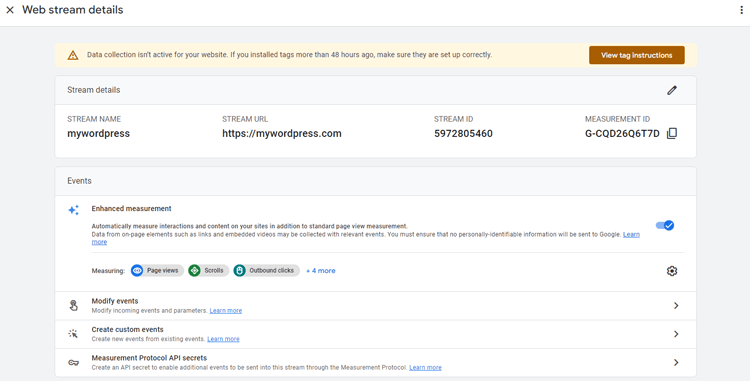
- After creating the data stream, you will find details such as the stream name, stream URL, stream ID, and crucially, the Measurement ID.
- The Measurement ID is a unique identifier for your website, essential for integrating Google Analytics with your WordPress site.
Once you have the Measurement ID, incorporate it into your WordPress site. You can use a Google Analytics WordPress plugin or by adding the tracking code manually to your site’s header.
After adding the code, Google Analytics will start tracking data from your website, providing detailed reports and insights through your Google Analytics account.
Recommended Blogs for You:
👉 WooCommerce Product Import: A Beginner’s Guide [Error-Free!]
👉 Top 11 Ways for eCommerce Marketing Strategy to Grow your WooCommerce Store
👉 How to Get Facebook Pixel Tracking Code: Step-by-Step Guide
👉 The 6 Best Facebook Pixel Plugins for WordPress
👉 Tips to Finding the Right PDF Editor: Enhance WordPress Websites with PDF Editing Capabilities
How to Add Google Analytics WordPress Plugin
Optimizing your WordPress site is easy with the right analytics tools. Using a plugin makes Google Analytics integration easy and provides accurate data without any coding.
Now, let’s walk through how to add Google Analytics to WordPress website using the HT Easy GA4 plugin. This integrated Google Analytics for WordPress helps you quickly set up tracking and access valuable insights to boost your site’s performance and user engagement.
Let’s learn how to add a GA4 WordPress plugin(HT Easy GA4).
Plugin Installation
To set up and enable the “HT Easy GA4” analytics plugin on your WordPress website, follow these steps:
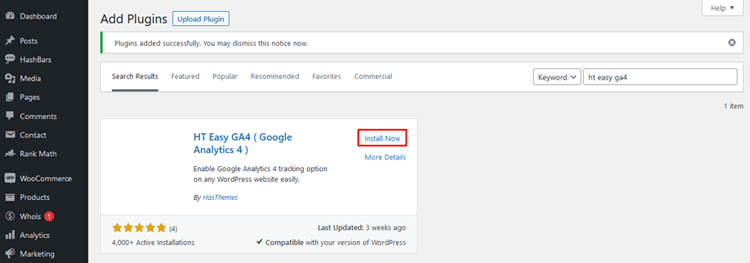
Log in to your WordPress dashboard. Navigate to the “Plugins” section and choose “Add New.”
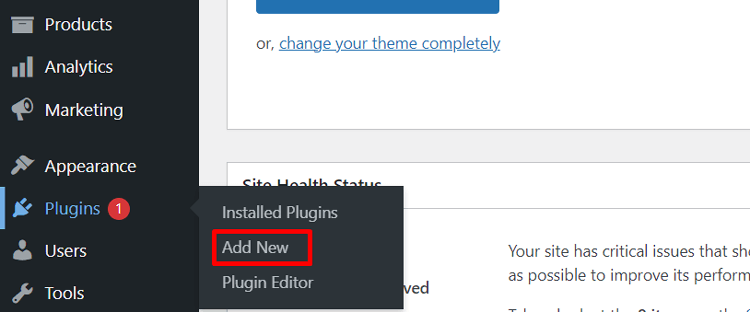
Use the search bar at the top right to look for “HT Easy GA4” analytics plugin and hit Enter. Click on the “Install Now” button beside the plugin’s name. WordPress will download and install the “HT Easy GA4” Google Analytics WordPress plugin.
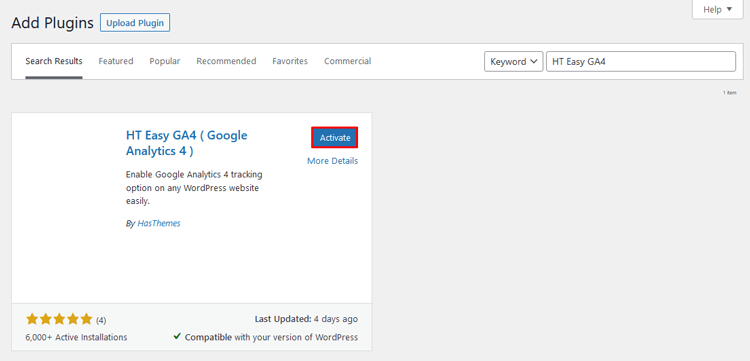
Once the installation finishes, click “Activate” to enable the “HT Easy GA4” analytics plugin.
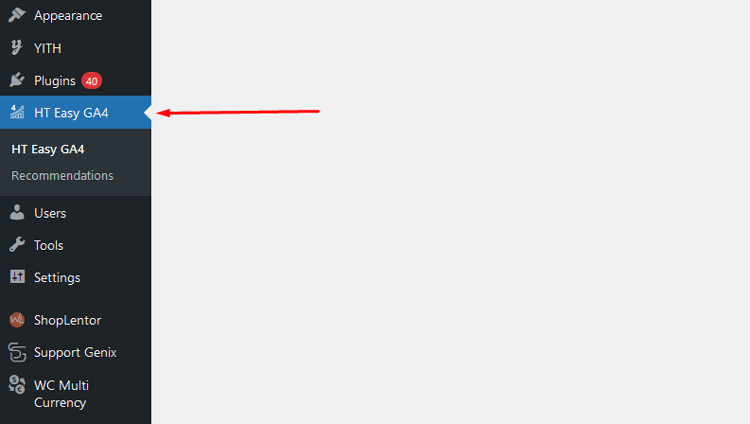
Upon activation, a new menu item labeled “HT Easy GA4” will appear on your WordPress dashboard. Access the plugin’s settings and features by selecting the “HT Easy GA4” menu.
Configuring the Plugin
The “HT Easy GA4” plugin is set for configuration with your Google Analytics Measurement ID. Start tracking your website data with Google Analytics 4 (GA4) seamlessly.
After activating the plugin, a new menu named “HT Easy GA4” will appear in your WordPress dashboard. Follow these steps to configure the plugin settings:
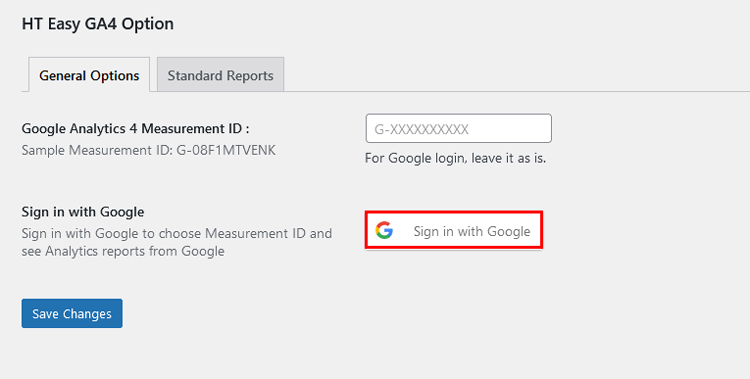
Add the Measurement ID directly (Basic Method):
You can enter your Google Analytics Measurement ID directly in the field provided. This will automatically insert the tracking script (gtag) into your site’s header for website tracking.
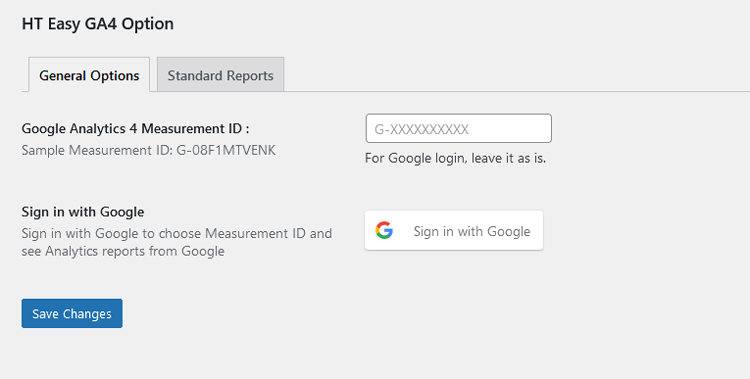
We suggest signing in with Google and setting up the Measurement ID to unlock the full range of the plugin’s capabilities. This will provide access to valuable Google Analytics reports and enable you to select any Measurement IDs from your Google Analytics account directly within the WordPress dashboard.
Sign in using your Google account:
Click the “Sign in with Google” button. A new window will open for you to log in to your Google account with your username and password.
If you’re already logged in, you can choose the Google account linked to your Google Analytics.
Grant Access:
After choosing the correct Google account, tick the box to permit the plugin to link with Google Analytics. Proceed by clicking the “Continue” button once access has been granted.

Connected to Google Analytics:
Once you’ve linked the plugin to Google Analytics, a “Logout” button will appear next to the email address you used to sign in. This button allows you to disconnect the plugin from the Google Analytics API.
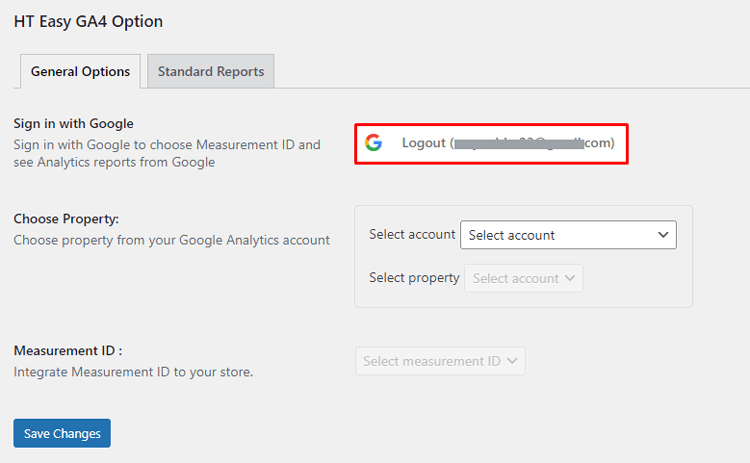
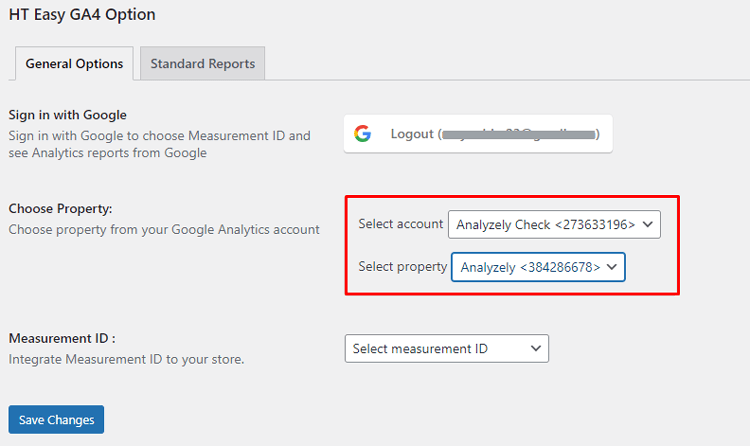
Select Account and Property:
Choose the Google Analytics account linked to your WordPress site from the dropdown list. After selecting the account, the plugin will show the properties connected to it.
Set up Data Stream:
Set up the data stream in Google Analytics by creating a web stream for your WordPress site. Input your site’s URL, create the stream, and obtain the Measurement ID.
Choose Measurement ID:
Choose a property from the dropdown list to view all the measurement IDs linked to that analytics property. Select the most suitable measurement ID for your website.
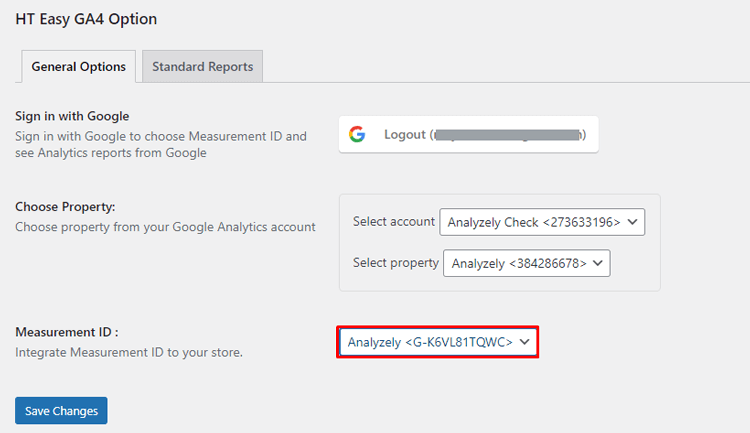
Save the Configuration:
After configuring your settings, save them. The plugin will insert the tracking script into your site’s header to monitor visitor data automatically.
No need for extra third-party plugins or custom code snippets for tracking. If you’ve added tracking code manually or used another plugin, feel free to remove them.
Activate E-Commerce Events (Pro):
With the Pro version of the “HT Easy GA4” and “WooCommerce” plugins activated, E-Commerce Events can be enabled. These events track user behavior on e-commerce sites, including checkout visits, product views, cart additions, and purchases.
Event Tracking:
The plugin offers a range of event tracking options including “View Product,” “View Category,” “Add to Cart,” “Initiate Checkout,” and “Purchase.”
These events facilitate monitoring user engagements with your products and website, empowering you to enhance your online store for improved conversions and revenue.
Directly Placing the Measurement ID in GA4 Plugin Settings:
We suggest signing in with Google and setting up the Measurement ID to unlock all plugin features. This grants easy access to your Analytics account’s Measurement IDs and essential Reports features without visiting the Google Analytics site.
HT Easy GA4
#1 📈 Google Analytics Plugin for WordPress
🚀 Supercharge your WordPress website with analytical insights. (Including WooCommerce Report)
Frequently Asked Questions
What is Google Analytics?
Google Analytics is a powerful web analytics tool offered by Google that tracks and reports website traffic, providing valuable insights into user behavior and interaction.
Why add Google Analytics to WordPress?
Integrating Google Analytics helps monitor website performance and user engagement, crucial for optimizing business strategies.
How to add Google Analytics to WordPress?
Easily add Google Analytics to WordPress with plugins like “HT Easy GA4” or by inserting the tracking code manually.
Can I track specific metrics with Google Analytics on WordPress?
Yes, Google Analytics allows tracking metrics like page views, conversions, and bounce rates, tailored to business goals.
Is Google Analytics free for WordPress sites?
Yes, Google Analytics offers a free version with robust features suitable for most website owners.
When does Google Analytics data appear?
Data appears in Google Analytics immediately after setup, with full visibility within 24 hours.
How to ensure accurate tracking with Google Analytics?
Conduct test visits and regular audits to verify accurate tracking and reporting on WordPress websites.
Watch the Video on How to Setup Google Analytics on WordPress Website using HT Easy GA4.
Conclusion
So, how to add Google Analytics to WordPress? We’ve covered all the steps throughout this article, from setting up your Google Analytics account to integrating it seamlessly with your WordPress site. However, if you encounter any issues during the setup process, refer to the steps above.
We hope this guide proves helpful in getting Google Analytics up and running on your website. For continued success, feel free to revisit this article whenever you need a quick reference.
Ready to take your website tracking to the next level? Start setting up Google Analytics today and unlock the full potential of your website’s performance!