The Extensions for CF7 plugin enhances Contact Form 7 (CF7) forms by adding various additional features, including the option to create multi-column layouts. This guide will walk you through adding a multi-column layout to your CF7 forms using the Extensions for CF7 plugin.
Steps to add Multi-Column Layouts #
To add the Multi-Column Layouts filed to CF7, make sure that both the Contact Form 7 and Extensions for CF7 plugins are activated on your website.

Step 1: Enable the Multi-Column Layouts Extension #
Go to WordPress Dashboard > HT Cf7 Extension > Extensions. From the list of extension, turn ON the Column Filed extension.
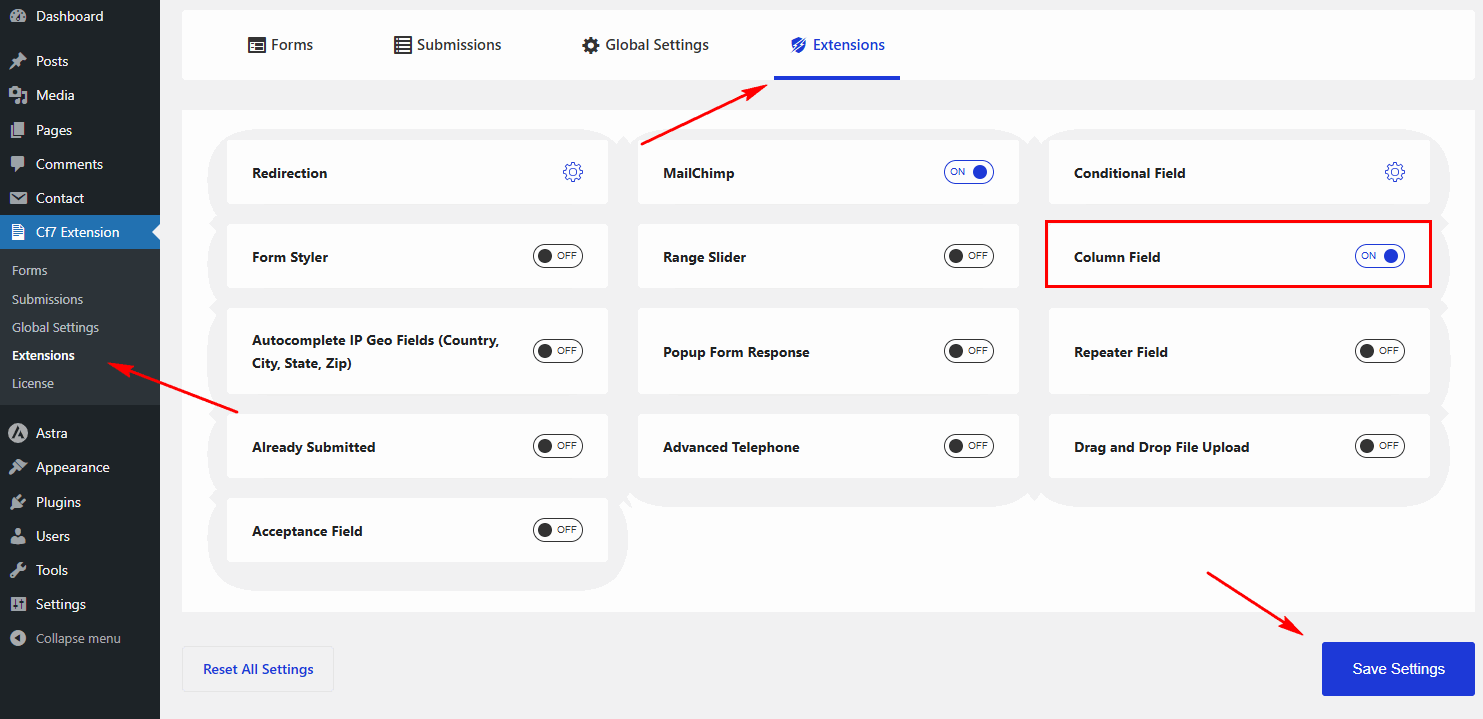
After turning on the Column Field Switcher, just click the Save Settings button to save this settings.
Step 2: Configure the Column field #
Once the Column Field extension is enabled, a new tag called HT Column will appear on the form edit screen. This tag becomes available whenever you edit an existing form or create a new one.

Clicking on the HT Column tag opens a popup where you can choose a column layout from the predefined options. After inserting the column tag, you can customize the columns according to your requirements.
After adding the column layout, insert the input fields within each column, then save the form.
Preview Example #
Once you've completed the setup, the preview will appear as shown below.

That’s it! Thank you for choosing Extensions for CF7 to enhance your user experience. If you need additional assistance, feel free to contact our support team. Our dedicated support team would be more than happy to assist you.


